How Can We Help?
Search for answers or browse our knowledge base.
Custom Tagging
Purpose
The system allows for creation of custom tags that can be used to mark files. This simplifies the process of locating the tagged files when searching and reporting. This feature can be used to assist with a variety of business processes such as, promoting collaboration towards ROT (Redundant /Obsolete/Trivial) remediation or compliance and legal file cleanup efforts.
Overview
- Creating & Deleting Custom Tags
- Tagging & Removing Tags From Files
- Searching & Reporting on Tags
Creating & Deleting Custom Tags
Only users with administrative privileges can create or delete tags. All others can use the tagging feature for tagging, searching, and reporting purposes.
Creating a Custom Tag
1. Click on the Administration Tab, located in the top navigation menu.
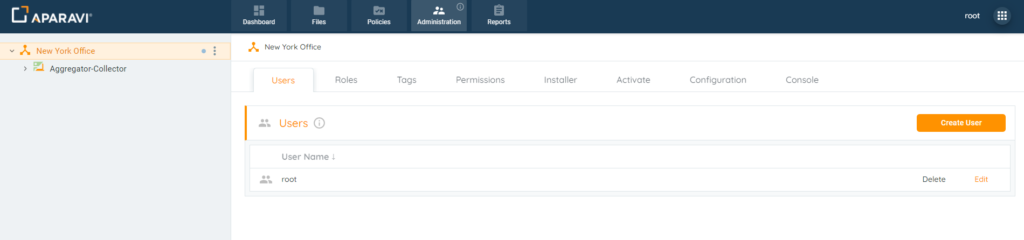
2. Click on the Tags subtab, located under the Administration Tab.
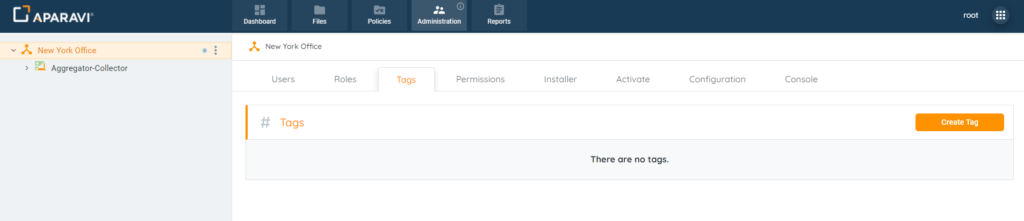
3. Click on the Create Tag button, located in the upper right-hand corner. Once clicked, the Create Tag pop-up box will appear.
4. Inside of the Create Tag pop-up box, enter the name of the custom tag into the Name field.

5. Click the Create button, located at the bottom right-hand side of the pop-up box to save the changes.

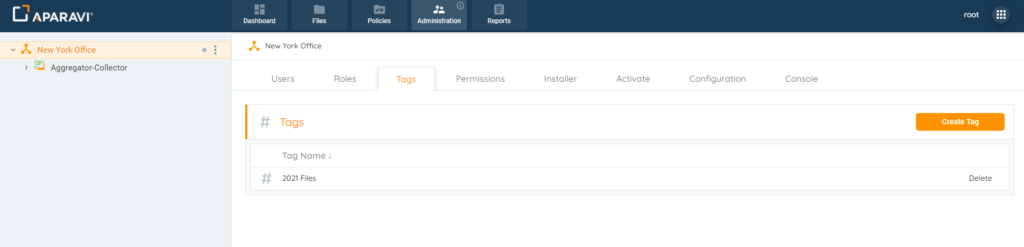
6. Once the tag has been successfully saved, it will appear under the Tags subtab, with the option to delete the newly created tag.
Deleting a Custom Tag
The system allows for custom tags to also be deleted. Once the tag is deleted, it will disappear and will no longer be available for tagging, reporting or searching for files by the tag’s name.
It’s important to note that the system will not retroactively review and delete tags from previously tagged files. If this is not completed before deleting the tag, the tagged files will no longer have the ability to be untagged without recreating the tag again. To remove a deleted tag from a file, recreate the same custom tag with an identical name. Once the tag has been restored, the system will allow for the untagging of files.
1. Click on the Administration Tab, located in the top navigation menu.
2. Click on the Tags subtab, located under the Administration Tab.
3. Click the Delete button, located to the right of the custom tag.
4. Click the Delete button to save the changes.
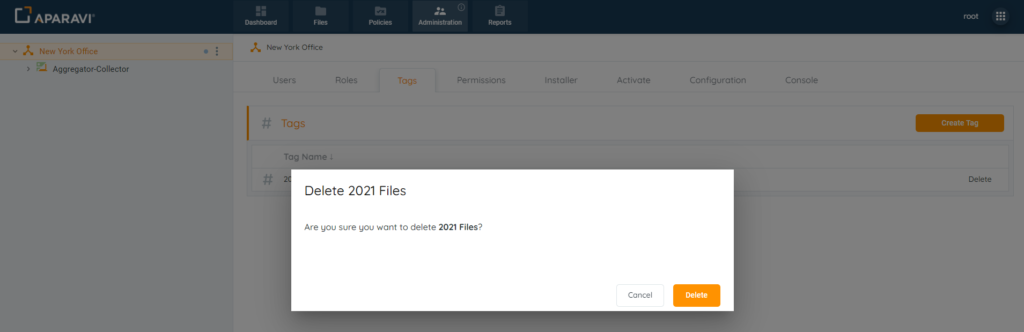
5. Once the Delete button has been clicked, the pop-up box will close, and the custom tag will no longer appear under the Tags subtab.
Tagging & Removing Tags From Files
After a tag has been created, tagging files can be performed while browsing in the system or after a search has been completed. This process simplifies locating specific files for organization, searching, and reporting capabilities.
Tagging Files
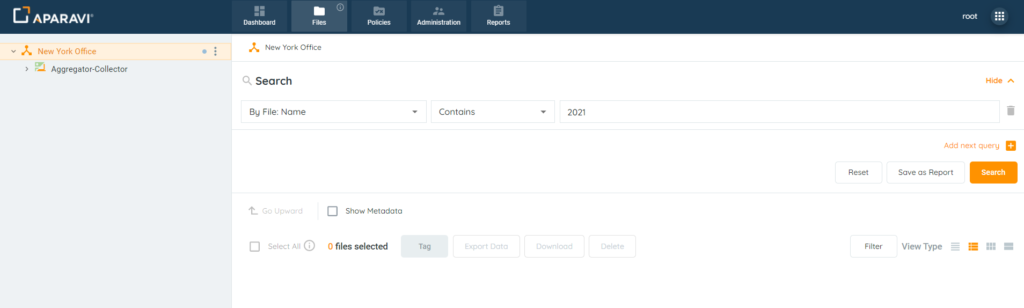
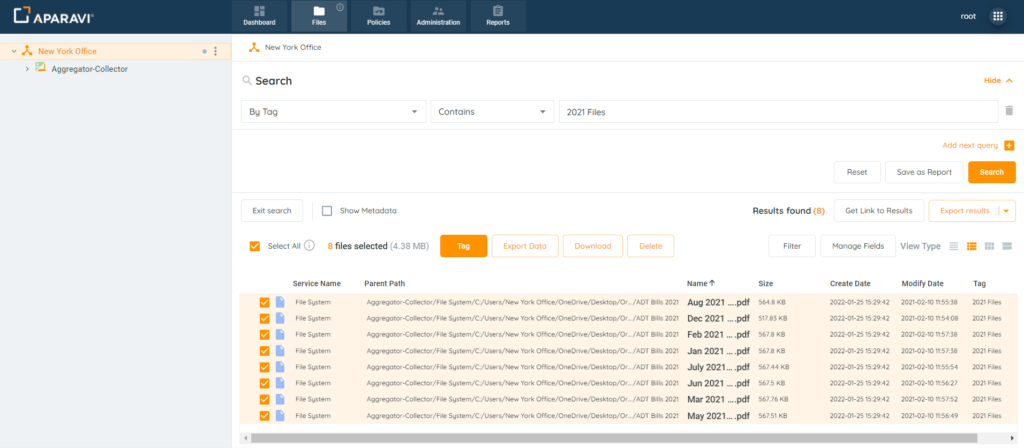
1. Click on the Files Tab, located in the top navigation menu.
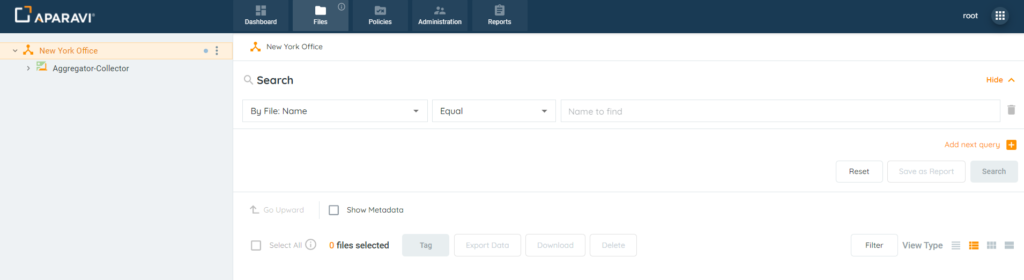
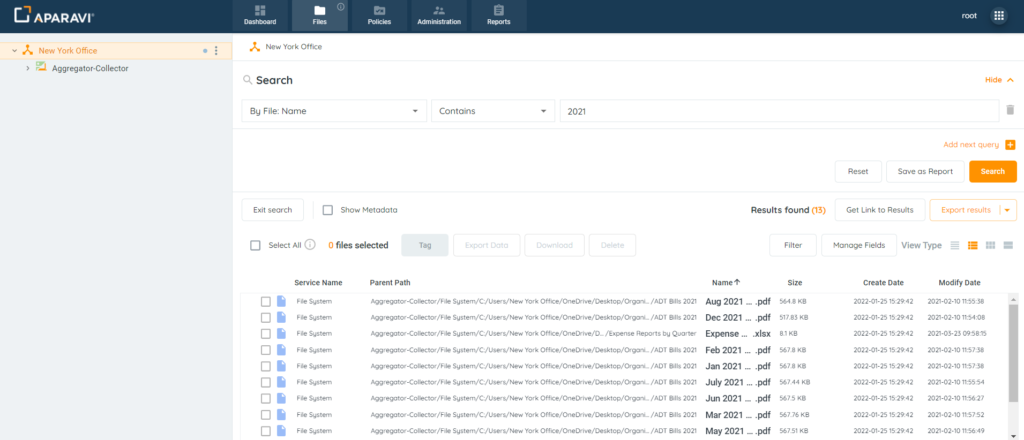
2. Perform any file search using the three query parameters and click the Search button.
3. Once the file results are displaying, ensure that the Details View option is selected as the View Type.
4. Select the checkboxes located to the left of the file’s name for tagging.
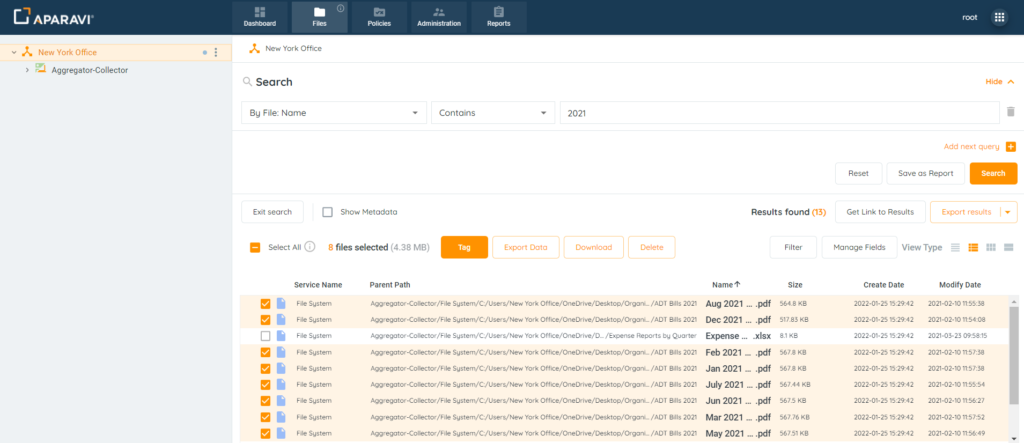
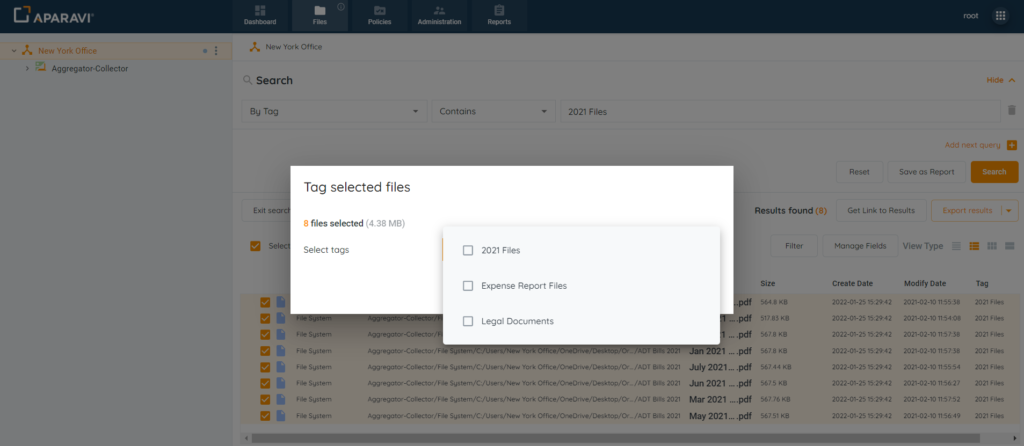
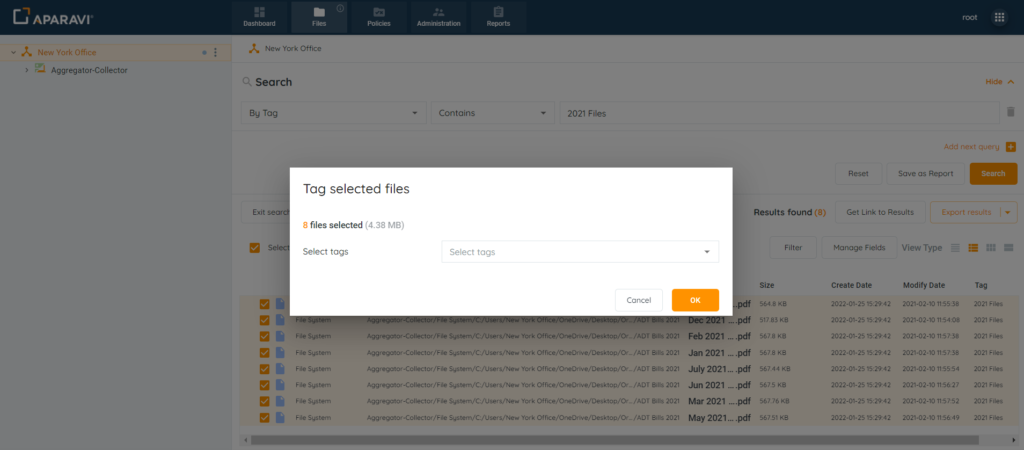
5. Click the Tag button, located in the toolbar above the file results.
6. Use the drop-down menu to view the list of available tags and click on the tag’s checkbox to select it.
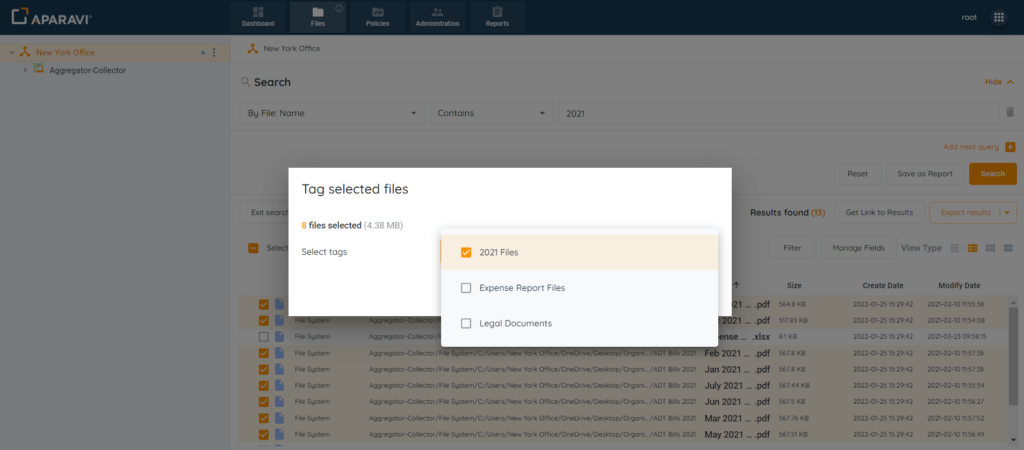
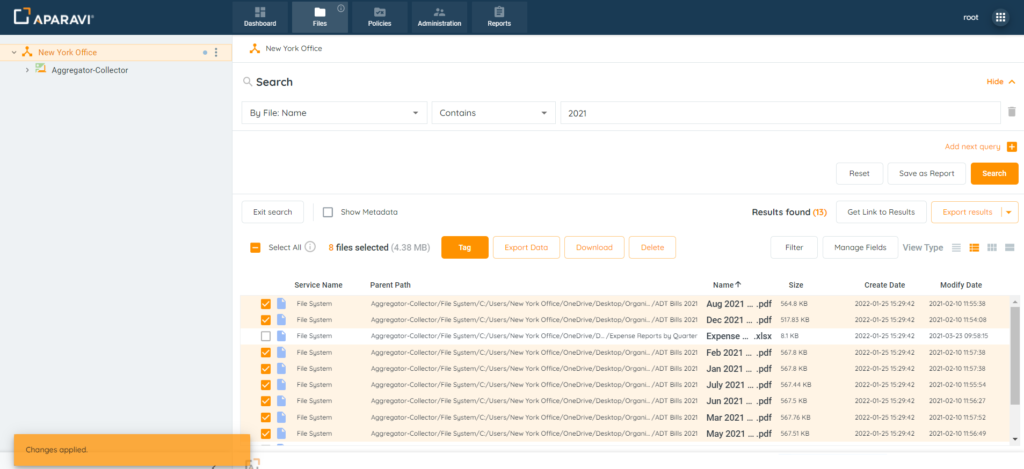
7. Once the tag is selected, click the OK button to save the changes.

Now that the files are tagged, this feature can be used to assist with collaboration towards ROT remediation or compliance efforts.
Removing Tags From Files
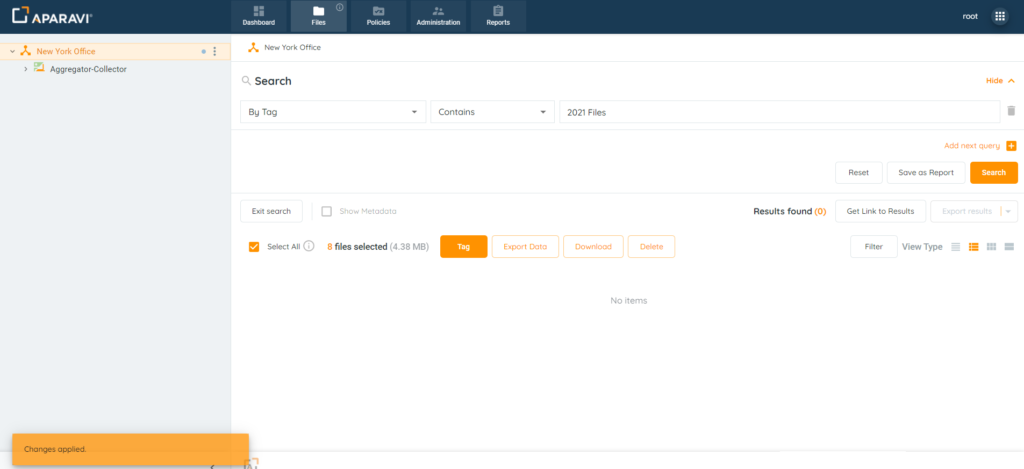
After files have been tagged, the tag can be removed. The simplest way to find the tagged files is to complete a files search using the tag’s name. It’s important to note that the system will not allow files to be untagged if the tag has been deleted. Once the tag has been deleted, the tagged files will no longer have the ability to be untagged without recreating the tag again. To remove a deleted tag from a file, recreate the same custom tag with an identical name. Once the tag has been restored, the system will allow for the untagging of files.
1. Click on the Files Tab, located in the top navigation menu.
2. Perform a file search using the tag’s name and click the search button when completed.
- First Filter: Select [By Tags]
- Second Filter: [Choose an operator]
- Third Filter: Select the [tag’s name]
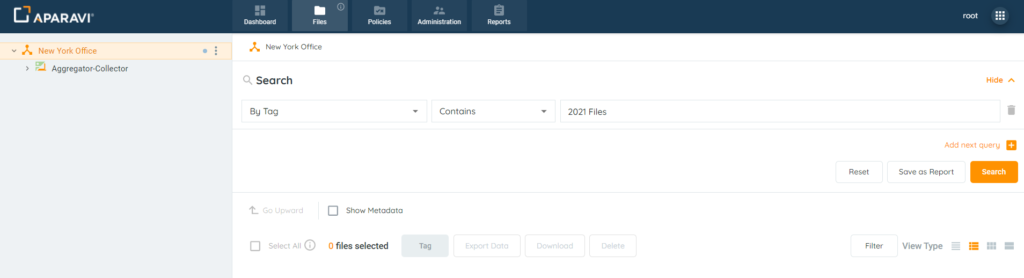
3. Once the file results are displaying, ensure that the Details View option is selected as the View Type.
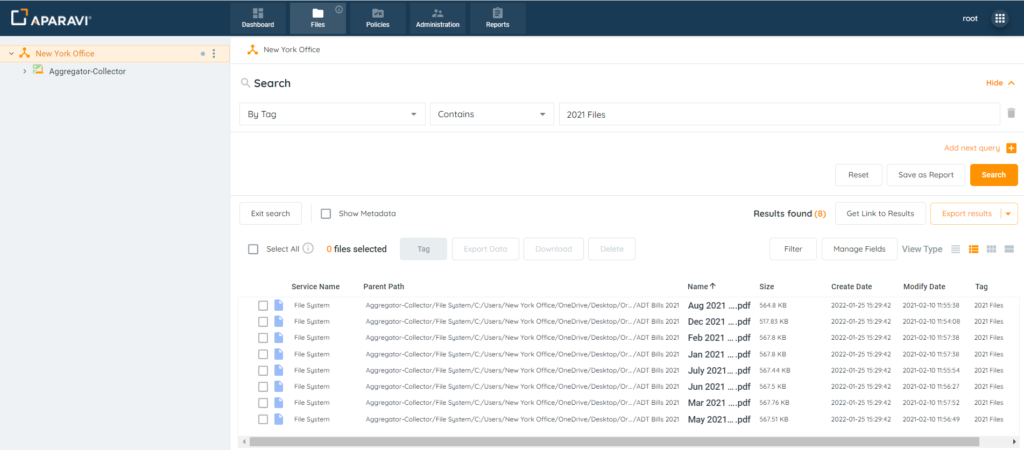
4. Select the checkboxes located to the left of the file’s name for untagging.
5. Click the Tag button, located in the toolbar above the file results.
6. Use the drop-down menu to view the list of available tags and click on a checkbox to deselect it.
7. Once the tag is no longer selected, click the OK button to save the changes.
At this point the files have been successfully untagged and will no longer appear in [By Tag] searches.
Searching & Reporting on Tags
After files have been tagged, file searches and reports can be generated to view only the selected files.
Searching For Tagged Files
1. Click on the Files Tab, located in the top navigation menu.
2. Perform a file search using the tag’s name and click the search button when completed.
- First Filter: Select [By Tags]
- Second Filter: [Choose an operator]
- Third Filter: Select the [tag’s name]
The system will display all the selected tag’s files. From this point, the search can be exported, printed, fields can be altered, and a report can be generated for future use.
Reporting on Tagged Files
1. Click on the Reports tab, located in the top navigation menu.
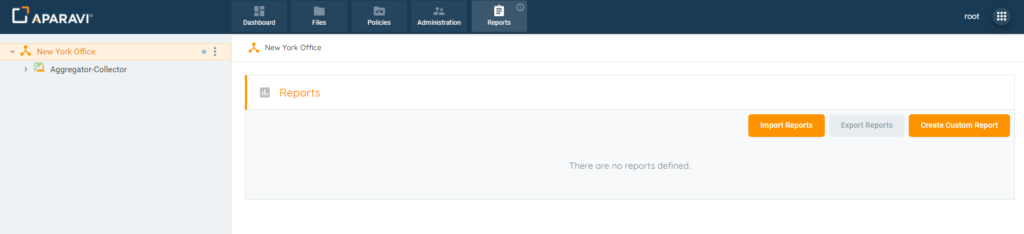
2. Click on the Create Custom Report button, located in the upper right-hand corner.

3. Create a query using the tag’s name and click the search button when completed.
- First Filter: Select [By Tags]
- Second Filter: [Choose an operator]
- Third Filter: Select the [tag’s name]
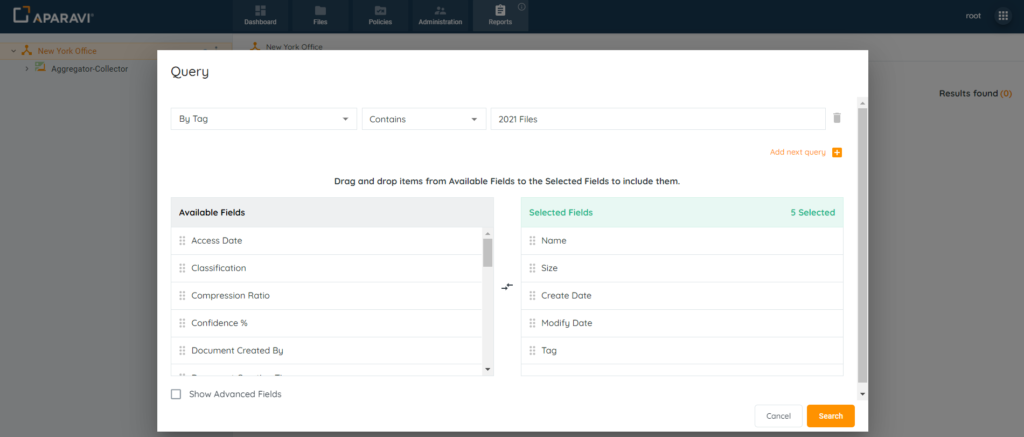
4. Next add and remove fields to the report using the Available and Selected field sections. Once completed, click on the Search button to generate the report.
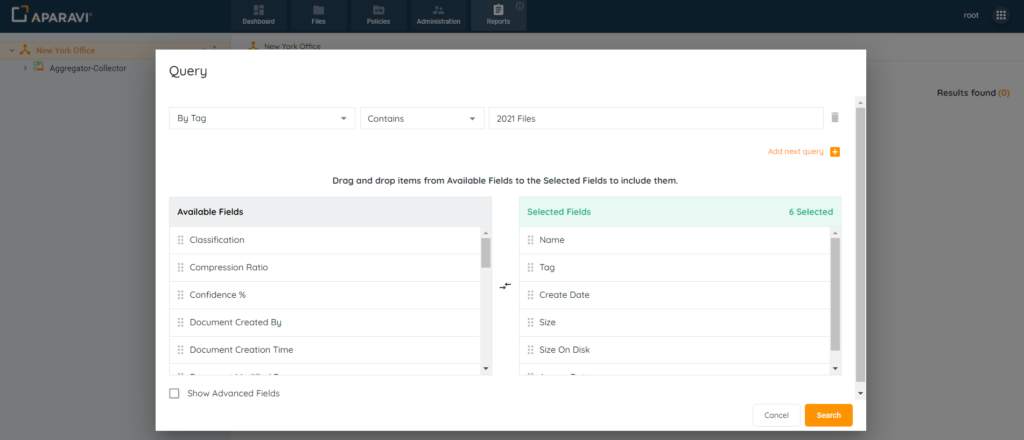
The query pop-up box will close, and the system will display all files that have been selected using the custom tag. From this point, the report can be exported, printed, fields can be altered, and the report can be saved for future use.
