How Can We Help?
Search for answers or browse our knowledge base.
Creating Custom Reports
Purpose
Creating custom reports allows users to query for all files that have been scanned by the system, offering a variety of search filter options to choose from. Each of these search filters provides many operators to narrow down the query criteria even further, allowing the system to locate specific files quickly and efficiently. This feature searches the entire system or a specific folder, depending on which node or folder is selected at the time the query is performed. After the query is created, saving the query in report form allows for quick reporting of all files that met the search criteria for future use without having to perform the steps each time of building the query. Once the report has been saved it can be ran to present real-time file results, be exported to a PDF or Microsoft Excel spreadsheet, or shared with other Aparavi users within the system.
Creating Custom Reports
- Choose which node/folder to perform the query on, by clicking on it in the navigation tree, located on the left-hand side. Once selected, it will appear with a yellowish background color to indicate that it is selected.

2. Click on the Reports tab in the top navigation menu. If not already located on this tab, the system will navigate to the Reports tab in the system.
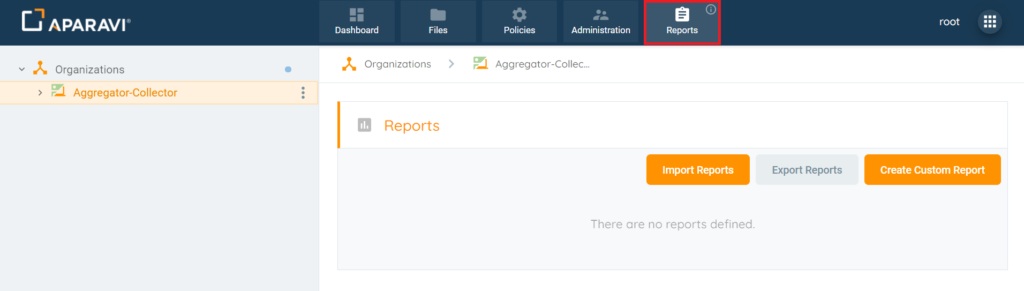
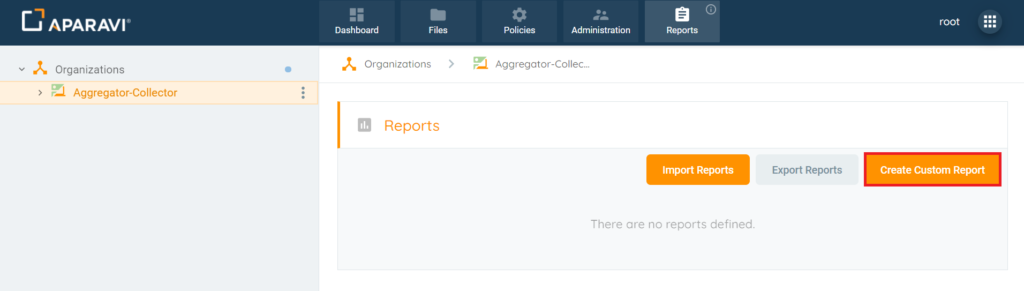
3. Click on the Create Custom Report Button, located in the upper right-hand side of the screen. Once clicked, the Query pop-up box will appear.
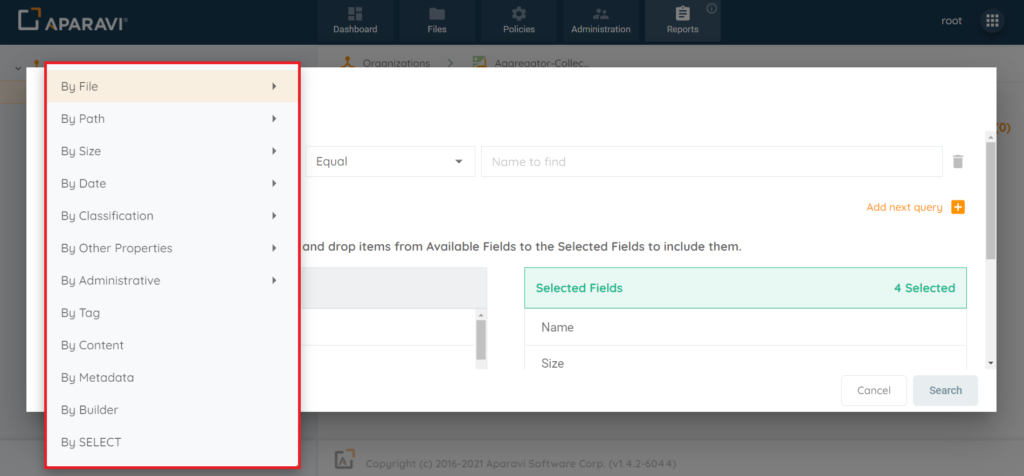
4. Once the Query pop-up box appears, click on the first search filter drop-down field and then click on one of the search options listed. Once the search filter is selected, the menu will disappear and the selection will appear inside the field.
*Please Note: All filters that contain a side arrow icon, directly to the right of the filter’s name, indicates there are more options to choose from within that filter subject.
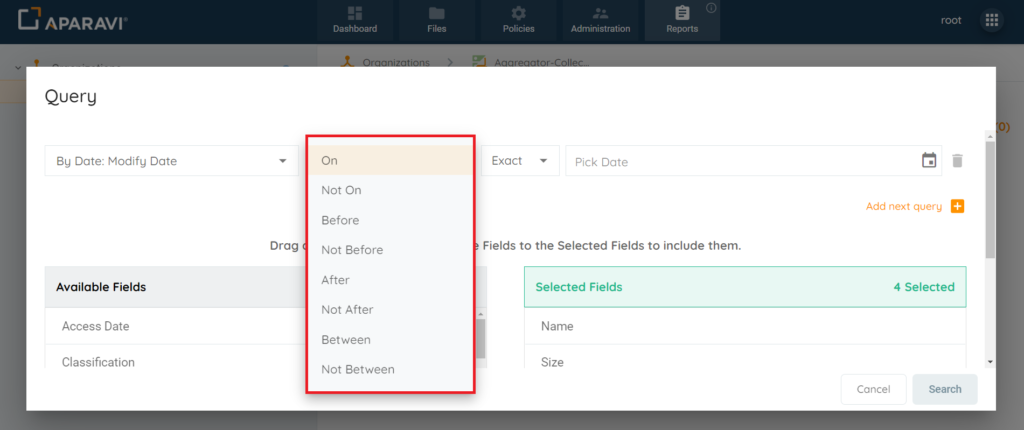
5. Click on the second search filter drop-down field and then click on one of the operators listed. Once the operator is selected, the menu will disappear and the selection will appear inside the field.
Please Note: This field is dynamic and offers different operators depending on the first search filter’s selection.
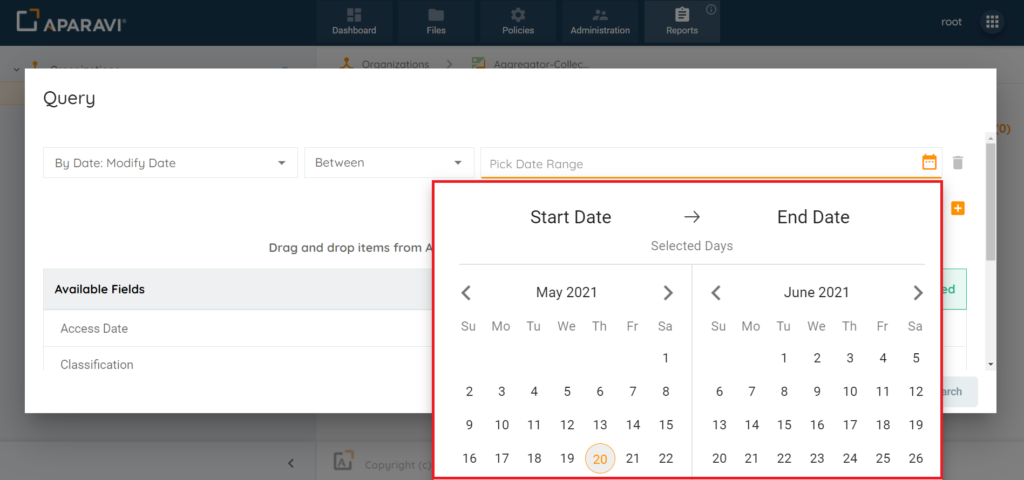
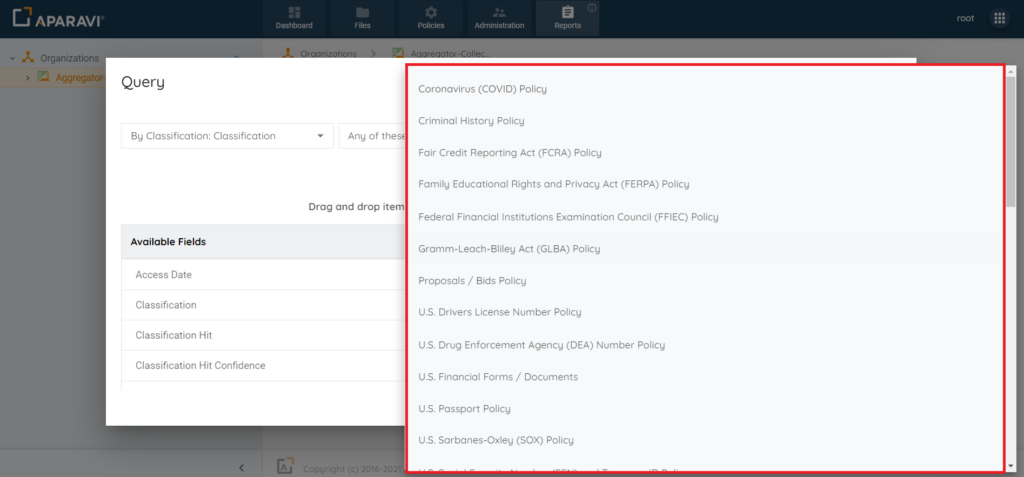
6. Click on the third field and enter the search criteria. This field will vary, depending on the selections of the first two drop-down fields. Once the information is entered or selected, it will appear inside of the field.
For Example: If querying for a File by Modification Date → Using the Between Operator → Field will become drop-down calendar to select a date range from.
For Example: If performing a query for a specific or multiple classifications → Field will become a drop-down list of all classifications saved to the system to choose from.
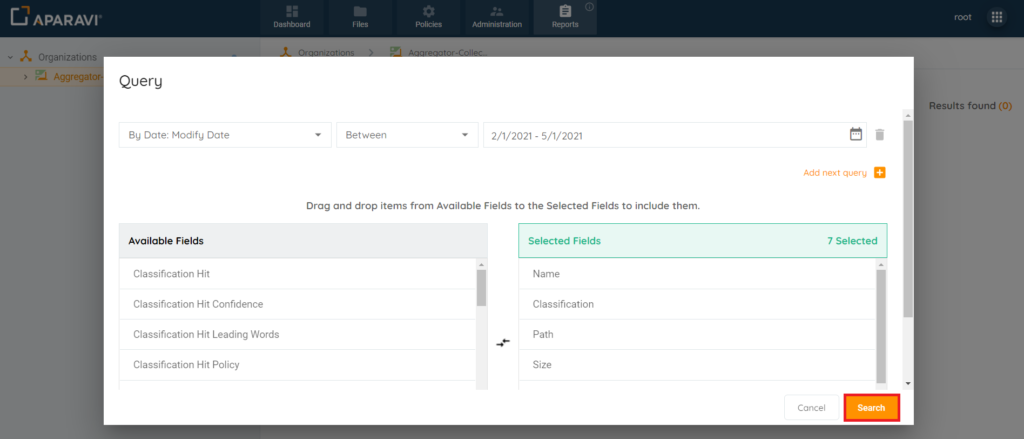
7. Once the query search criteria have been selected, begin adding or removing fields that should display along with the query results.
To add a field, click on the field name from the list of Available Fields section, located on the left-hand side. Once selected, hold down the button on the mouse and drag the selected field from the Available Fields section, into the Selected Fields section. Once the field has been added, it will no longer display under Available Fields section and now will display under the Selected Fields section only.
To remove a field, click on the field name from the list of Selected Fields section, located on the right-hand side. Once selected, hold down the button on the mouse and drag the selected field from the Selected Fields section, into the Available Fields section. Once the field has been removed, it will no longer display under Selected Fields section and now will display under the Available Fields section only.
Please Note: By Default, the system will select several fields which will appear under the Selected Fields section and another set of fields, under the Available Fields section. In addition to the fields that appear within those two sections, there is a checkbox located in the bottom left-hand side of the pop-up box, beside the label “Show Advanced Fields” that when clicked on, will offer many more field options to be added. To add or remove these fields, follow the same steps as above.
Once completed with selections, click on the Search button at the bottom right-hand side of the pop-up box to save changes.
8. Once the Search Button is clicked, the Query pop-up box will disappear and the Query file results will appear.

Report Query Feature Links
- Report Query Toolbar Options
- Add & Remove columns that appear on the report
- Customize columns on the report for more meaningful results
- Save the report for future viewing
- Printing a report
- Export report results to PDF or Microsoft Excel files
- Export saved reports to importable JSON files
- Import previously configured custom reports
- Create a local live Excel spreadsheet using the Get Link to Results feature