How Can We Help?
Search for answers or browse our knowledge base.
Report on Duplicate Files
Purpose
Searching for duplicate files allows for organizations to view the redundant data that is being stored within the system. Managing redundant data is a requirement in managing ROT (Redundant/Obsolete/Trivial) and offers many benefits such as consolidating storage, reducing risk, and imposing defensible disposition of data. Saving these duplicate file queries in report form allows for quick reporting of all duplicate files that have been scanned by the system.
Creating Duplicate Files Reports
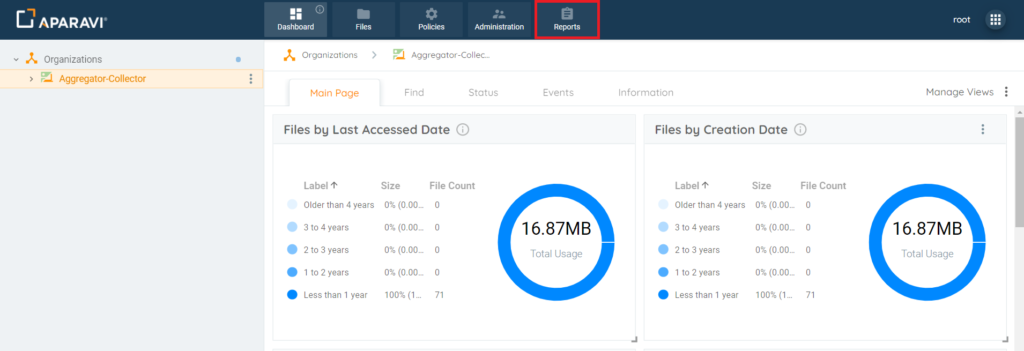
1. Click on the Reports tab, in the top navigation menu.
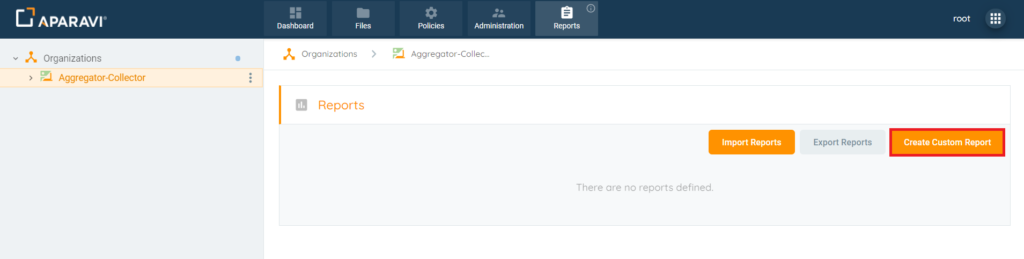
2. Click on the Create Custom Report button, located in the upper right-hand side of the screen. Once clicked, a Query pop-up box will display.
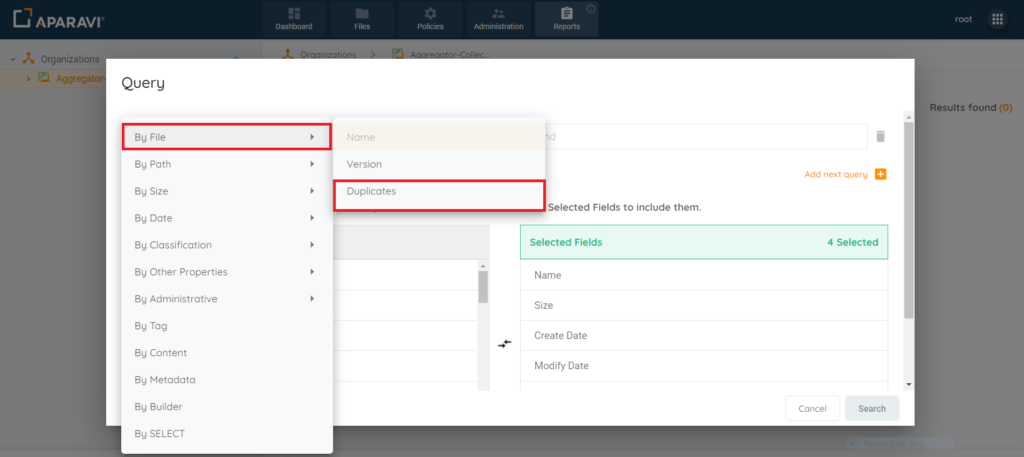
3. Inside the Query pop-up box, click on the first drop-down field and click on the first option listed, [By File]. A sub-menu will display, click on the Duplicates option. Once selected, the drop-down menus will close and [By File: Duplicates] will appear inside of the first drop-down field.
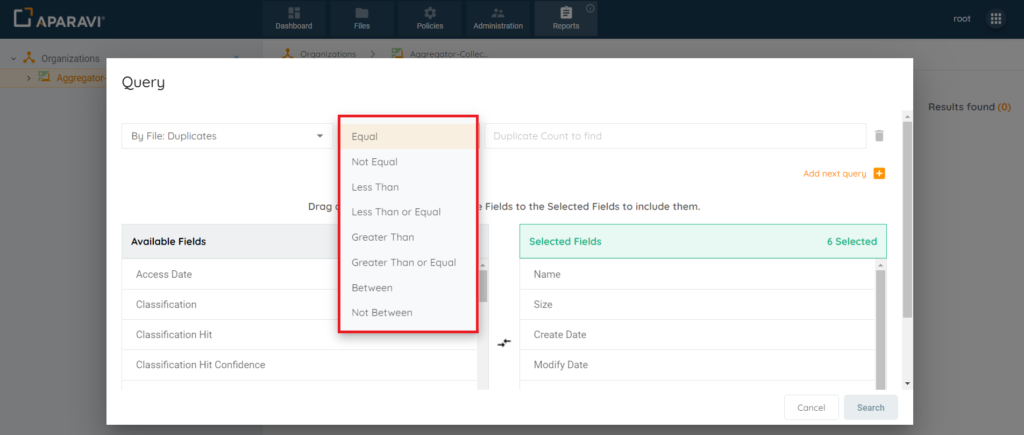
4. Inside the Query pop-up box, click on the second drop-down field and choose one of the operators listed. Once selected, the drop-down menu will close and the selected operator will appear inside of the second drop-down field.
5. Inside the Query pop-up box, click on the third field and enter the search criteria. This field will vary, depending on the selection of the second drop-down menu (list of operators). Once the information is entered or selected, it will appear inside of the field.
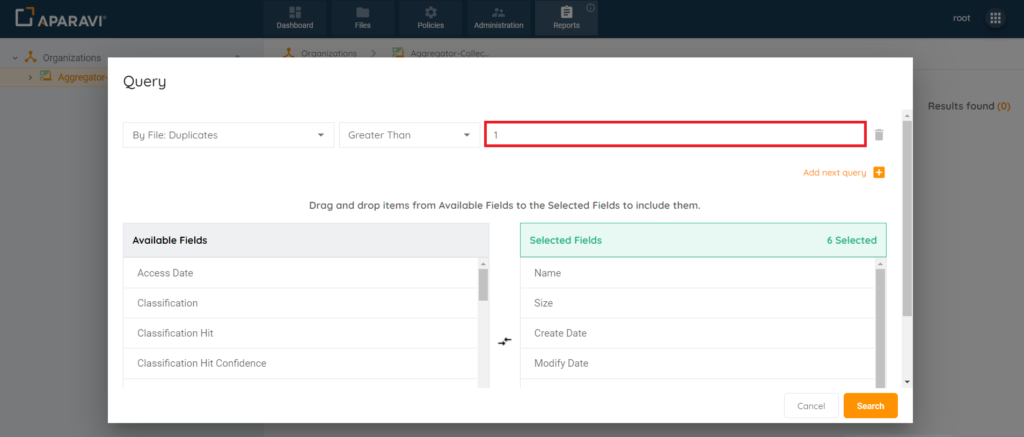
- Example 1: If searching for any duplicates files in the system, this can be performed by selecting [Greater Than] in the second drop-down menu. If this operator is selected, the third field becomes a textbox that a numerical value can be entered. For this type of query, “1” would be entered into the third field.
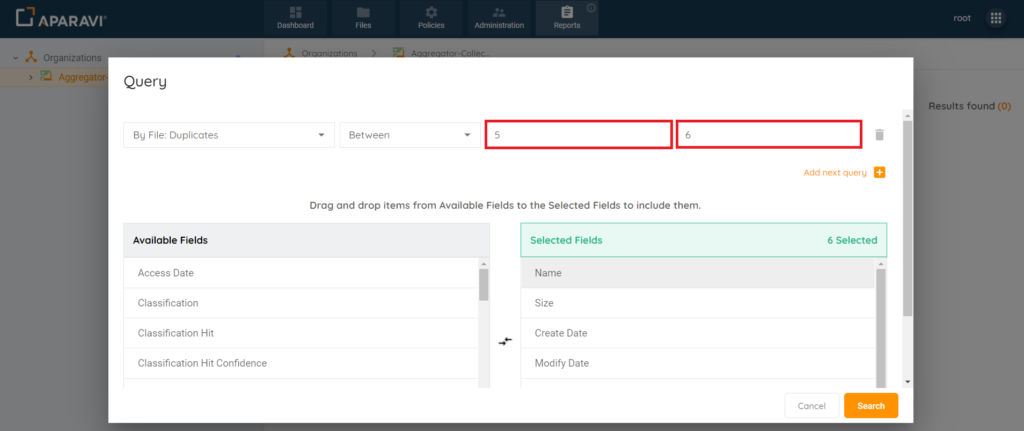
- Example 2: If searching for duplicate files between the range of 5 – 6 duplicates each, this can be performed by selecting [Between] in the second drop-down menu. If this operator is selected, an additional fourth field displays. The third and fourth fields will then accept numerical values that can be entered into each field. For this type of query, “5” would be entered into the third field and “6” would be entered into the fourth field.
6. From this view, fields can be added or removed, to ensure the report only displays desired fields on the Duplicate Files report.
To add a field, click on the field name from the list of Available Fields section, located on the left-hand side. Once selected, hold down the button on the mouse and drag the selected field from the Available Fields section, into the Selected Fields section. Once the field has been added, it will no longer display under Available Fields section and now will display under the Selected Fields section only.
To remove a field, click on the field name from the list of Selected Fields section, located on the right-hand side. Once selected, hold down the button on the mouse and drag the selected field from the Selected Fields section, into the Available Fields section. Once the field has been removed, it will no longer display under Selected Fields section and now will display under the Available Fields section only.
Please Note: By Default, the system will select several fields which will appear under the Selected Fields section and another set of fields, under the Available Fields section. In addition to the fields that appear within those two sections, there is a checkbox located in the bottom left-hand side of the pop-up box, beside the label “Show Advanced Fields” that when clicked on, will offer many more field options to be added. To add or remove these fields, follow the same steps as above.
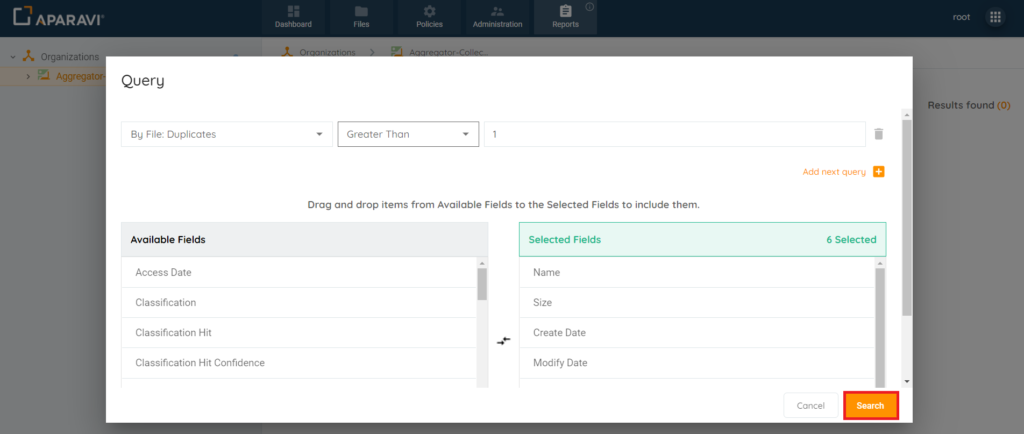
Once completed with selections, click on the Search button at the bottom right-hand side of the pop-up box to save changes.
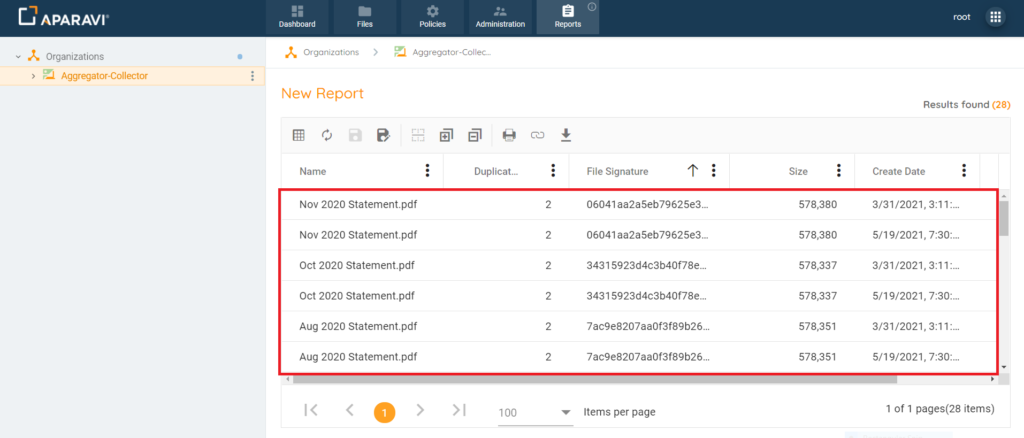
7. Once the Search button is clicked, the Query pop-up box will close, and the system will display all duplicate files that have been scanned by the system.
*Please Note: By default, when using the [By File Duplicates] filter, the system will display the two columns “Duplicate Count” & “File Signature.”
Duplicate Count Field: The values located in this field represents that specific duplicated file’s count. For Example: Duplicate Count = 3 – Then this file is the third duplicate of the original file scanned.
File Signature Field: This field contains data used to identify, or verify, the contents of the duplicated file and will display that specific duplicated file’s file signature.
Report Query Feature Links
- Report Query Toolbar Options
- Add & Remove columns that appear on the report
- Customize columns on the report for more meaningful results
- Save the report for future viewing
- Printing a report
- Export report results to PDF or Microsoft Excel files
- Export saved reports to importable JSON files
- Import previously configured custom reports
- Create a local live Excel spreadsheet using the Get Link to Results feature