How Can We Help?
Search for answers or browse our knowledge base.
Creating Reports by Service
Purpose
From the 2.0 release it is now possible to create custom reports that can be configured to report on data on a per-service or per-service type basis. This can be used to report on what files/data are stored on a particular service or service type, which can then be used for budgeting and cost optimization analysis, or identification of ROT data.
Searching for files by various configured services is easy using the Reports Query feature. This enables the narrowing down of file results to only display the folders and files that exist on the specified service. The reports created can also be altered using filters, adding fields and saved for future use.
Creating a Custom Service Report
1. Click on the Reports tab, in the top navigation menu.
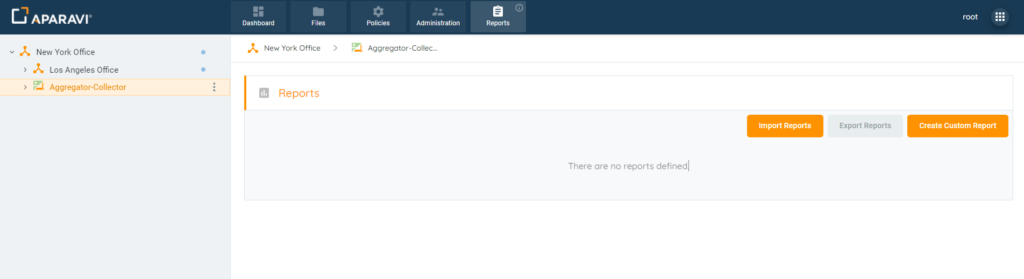
2. Click on the Create Custom Report button, located in the upper right-hand side of the screen. Once clicked, a Query pop-up box will display.
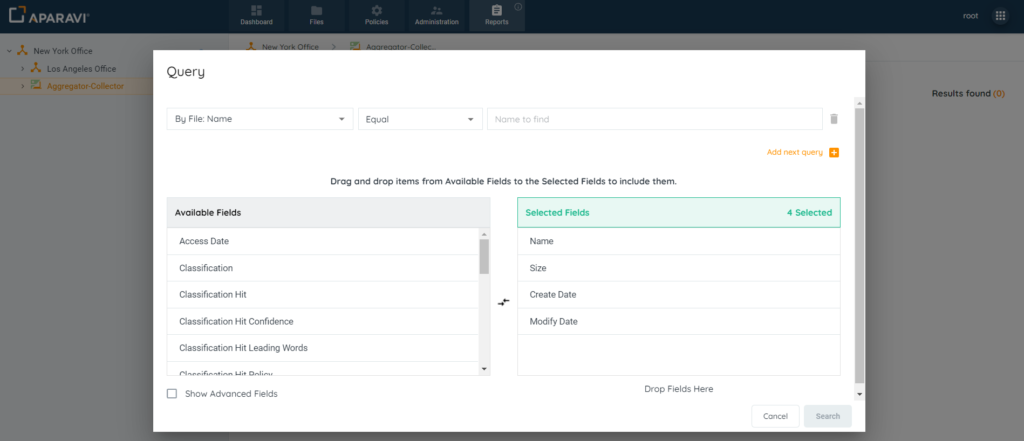
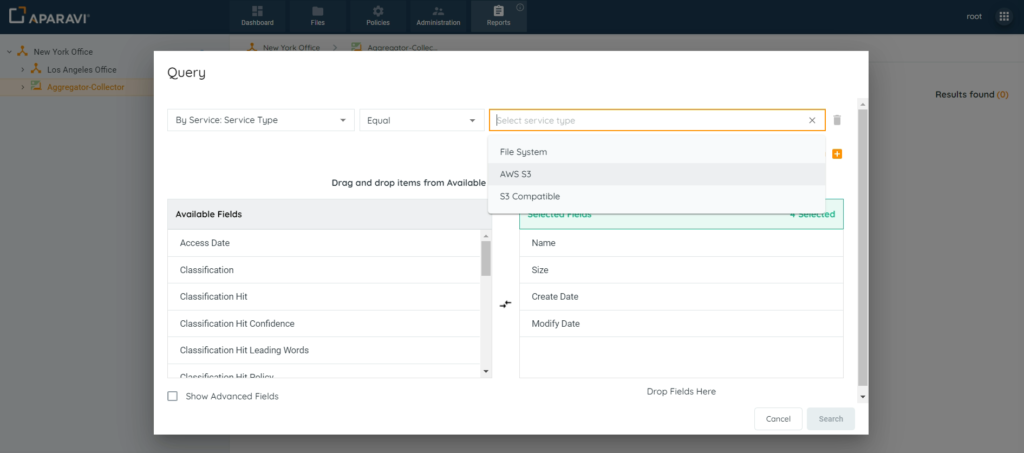
3. Inside the Query pop-up box, click on the first drop-down field and click [By Service]. Once the sub-menu displays, click on the [Service Name] or [Service Type] filter, depending on the type of search to be performed. Once selected, the drop-down menu will close and [By Service: Service Name] or [By Service: Service Type] will appear inside of the first drop-down field.
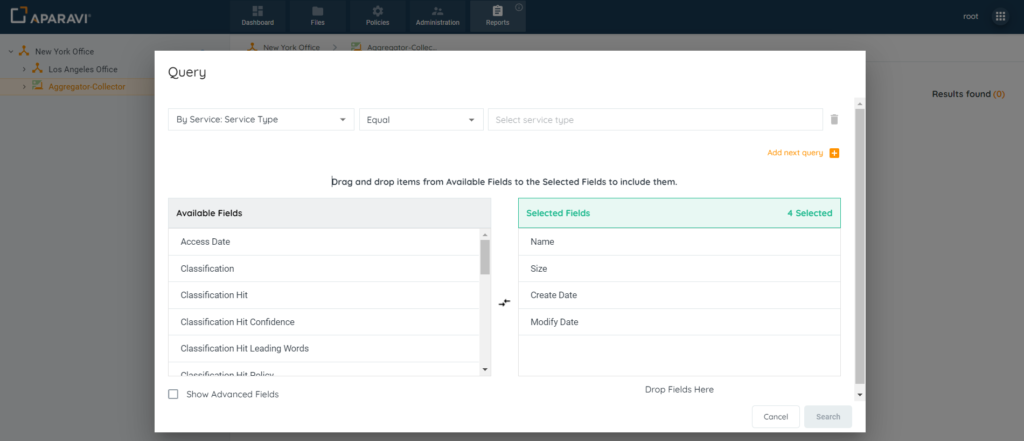
4. Click on the second search filter drop-down field and choose one of the operators listed. Once selected, the chosen operator will appear inside the field and the drop-down menu will close.
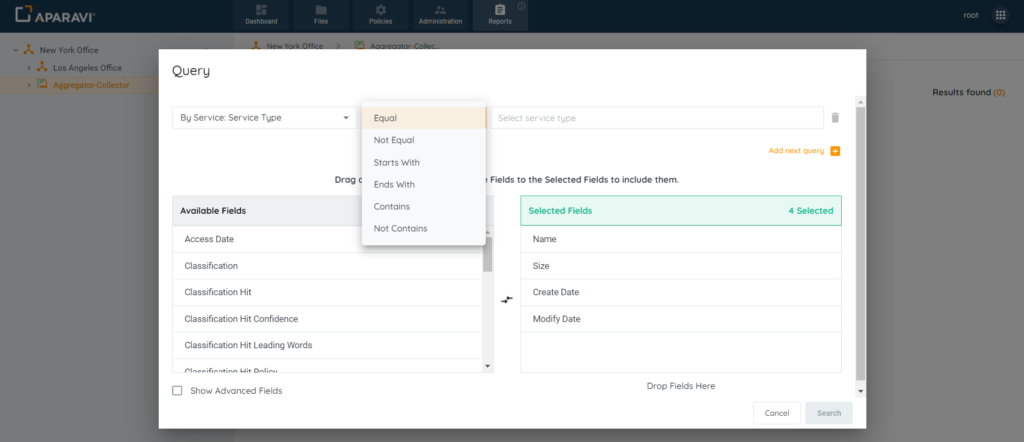
5. In the third search filter drop-down field, choose from the services listed. Once selected, the name of the service will appear inside the field.
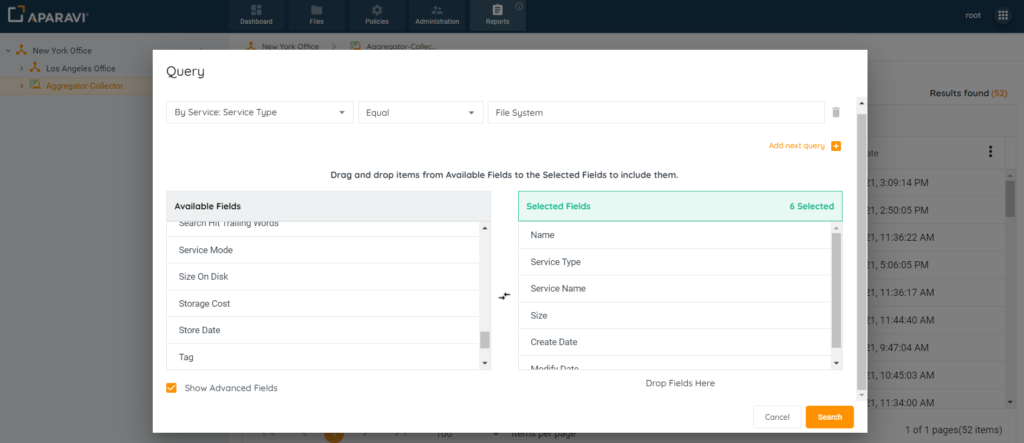
7. From this point, fields can be added or removed to display the report in a meaningful way. Once completed with selections, click on the Search button in the bottom right-hand side of the pop-up box.
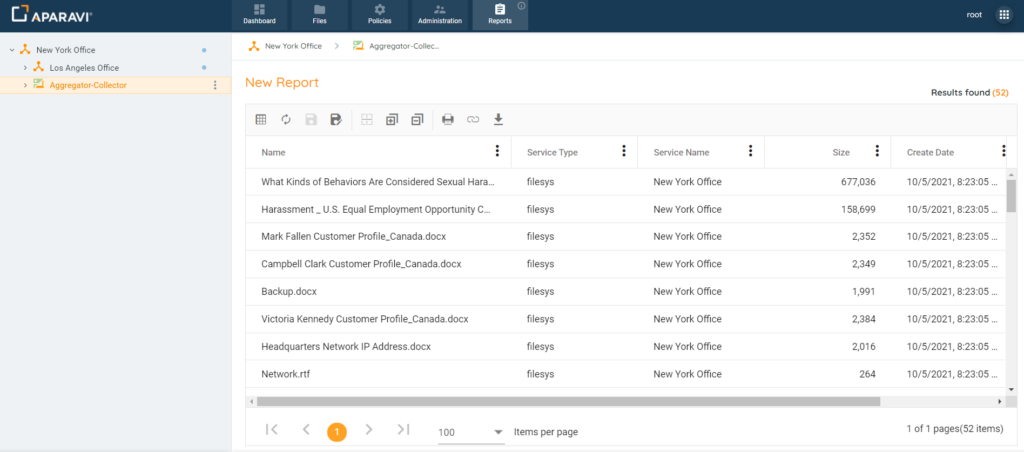
8. Once the Search button is clicked, the Query pop-up box will close, and the system will display all files scanned by the specified Service.
From this point, the report can be exported, printed, columns can be altered, and the report can be saved for future use.
Report Query Feature Links
- Report Query Toolbar Options
- Add & Remove columns that appear on the report
- Customize columns on the report for more meaningful results
- Save the report for future viewing
- Printing a report
- Export report results to PDF or Microsoft Excel files
- Export saved reports to importable JSON files
- Import previously configured custom reports
- Create a local live Excel spreadsheet using the Get Link to Results feature