How Can We Help?
Search for answers or browse our knowledge base.
Reporting on Classification Hits
Purpose
Once files are classified using the classification policies saved in the system, the classified files are searchable by their classifications on the Files tab and Reports tab. When searching for files, several fields can be added to display not only the name of the classification triggered by a file, but also details regarding the content within the file that triggered the classification policy to begin with. Once the search or query is performed, the details for the classification file contents display directly on the screen showing data such as, the content that triggered the classification policy and even the rule within that classification policy that was triggered by that content.
The 6 Classification Hit Fields
There a 6 classification hit fields that can be added to any files search or reports query:
- Classification Hit – File content that triggered the classification policy
- Classification Hit Confidence – Confidence level of file content that triggered the classification policy
- Classification Hit Policy – The name of the classification policy that the file content triggered
- Classification Hit Rule – The name of the rule that was triggered by the file content of the classification policy
- Classification Hit Leading Words – File content that appears just before the content that triggered the classification policy
- Classification Hit Trailing Words – File content that appears just after the content that triggered the classification policy

Reporting on Classification Hits
While the query is being performed, the classification hit fields can be added to the search criteria before searching. It is important to note, that if a file is classified with multiple classification policies, the file will appear in the results duplicated for as many classifications as the file has tagged. For example, if the same 1 file has 3 classification policies, this file will appear 3 times in the file results but contain different data within the classification hit fields added.
1. Click the Reports Tab, located in the top navigation menu.

2. Click on the Create Custom Report button, located in the upper right-hand corner.

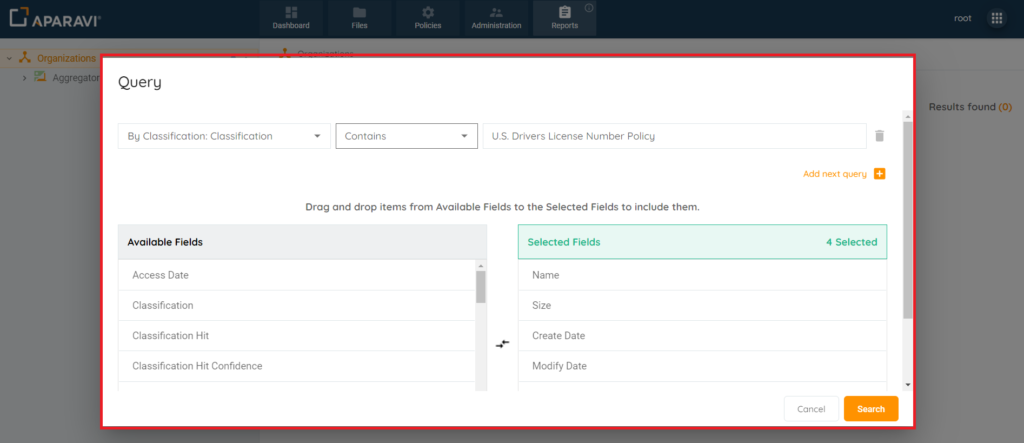
3. Once the Query pop-up box appears, select the search criteria by altering the search fields, located above the list of Available and Selected Fields.

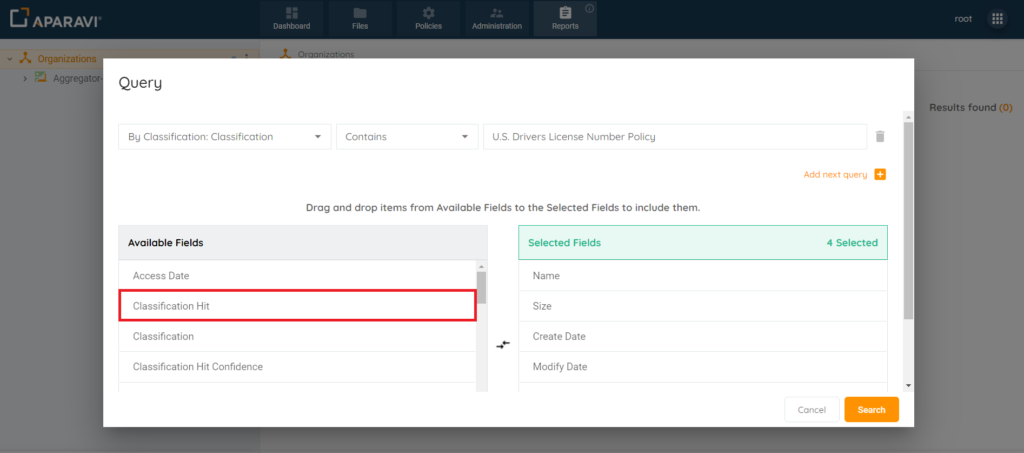
4. Once the search criteria have been selected, click on the Classification hit field, located under the Available Fields column, and while holding down the mouse, drag it over into the Selected Fields column and release the mouse. Once the Classification Hits field has been successfully added, it will appear under the Selected Fields column and no longer display under the Available Fields column.

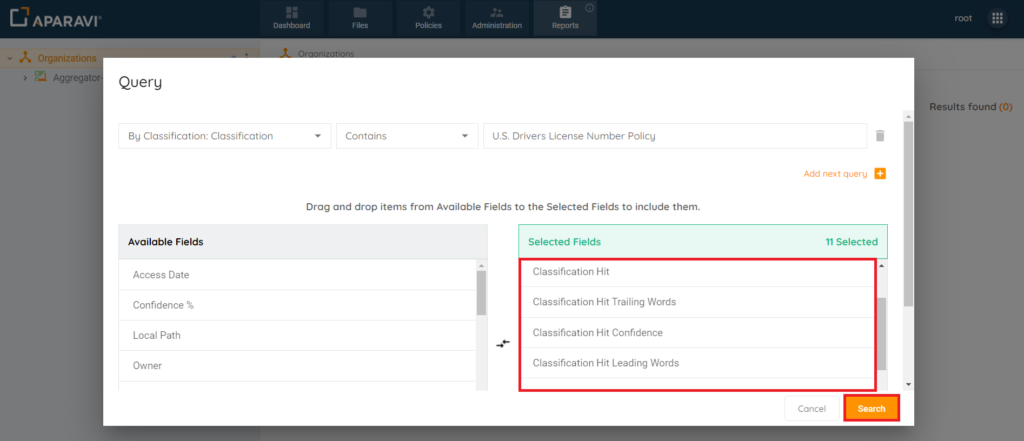
5. Repeat this process for the following fields:
- Classification Hit Rule Field
- Classification Hit Trailing Words Field
- Classification Hit Policy Field
- Classification Hit Leading Words Field
- Classification Hit Confidence Field
6. Once all fields have been added and appear under the Selected Fields column, click the Search button, located in the bottom right-hand side of the Query pop-up box.

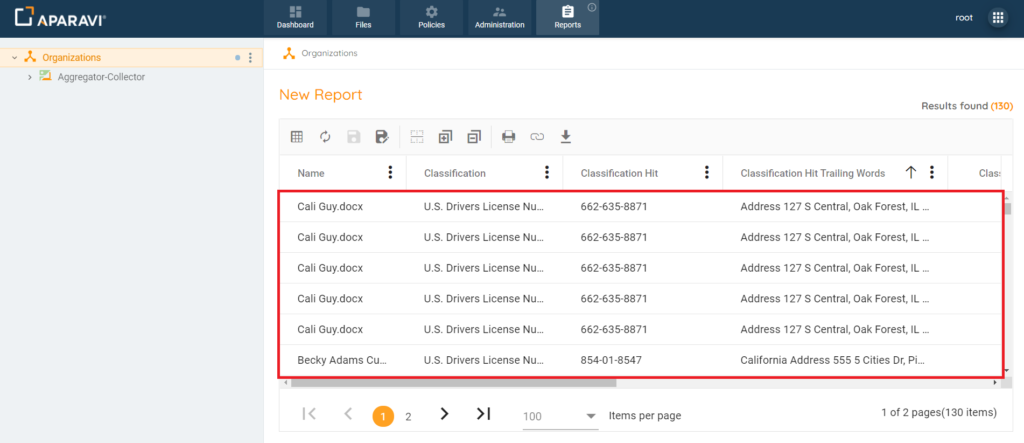
7. Once the Query pop-up box disappears, the file results matching the search criteria entered will appear, along with all Classification Hit fields added.

Report Query Feature Links
- Report Query Toolbar Options
- Add & Remove columns that appear on the report
- Customize columns on the report for more meaningful results
- Save the report for future viewing
- Printing a report
- Export report results to PDF or Microsoft Excel files
- Export saved reports to importable JSON files
- Import previously configured custom reports
- Create a local live Excel spreadsheet using the Get Link to Results feature