How Can We Help?
Search for answers or browse our knowledge base.
Custom Classifications
Purpose
The classification feature allows for efficient tracking of important and sensitive data, providing organizations with quick insight as to what data is stored by the configured sources. Aparavi offers a vast list of global predefined classification policies, or custom classifications can be created to meet the needs of any organization. This feature empowers firms to classify not only their current unstructured data, but also all future files as they are scanned into the system. Files can also be tagged with multiple classifications if it meets the criteria of more than one built. This allows for versatile searching and policy setting capabilities.
Inheriting Classifications
When generating new custom classifications, it’s important to notice which node is selected on the navigation tree. The system allows the ability to configure uniform classifications for all nodes under the account, or specific classifications for each. By default, the inheritance policy is applied, and must be disabled to create it’s own custom classifications.
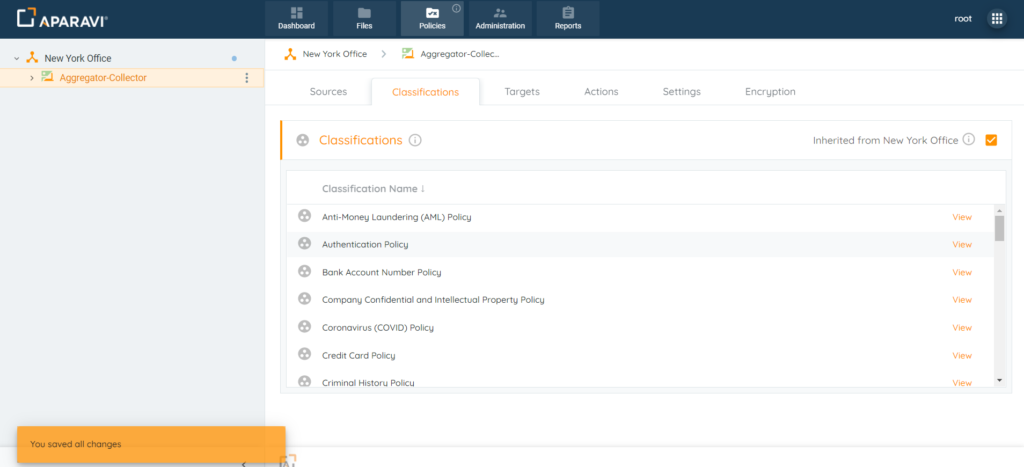
Inheritance Enablement
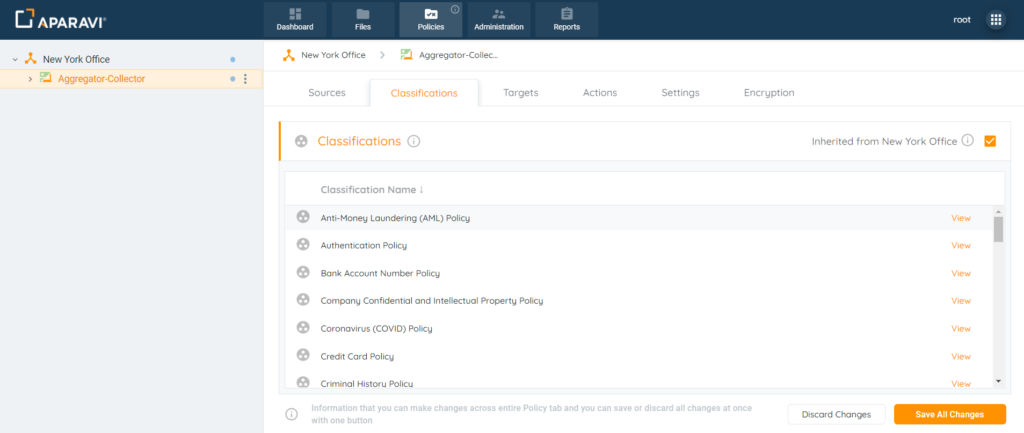
When selected, this node will inherit all classifications that were configured for the organization above.
1. Select the node in the navigation tree to apply the configured classifications.
2. Click the Policies tab and then click on the Classifications subtab that appears.

3. Configure the node’s inheritance policy by selecting the checkbox next to the label “Inherit from [Organization].”
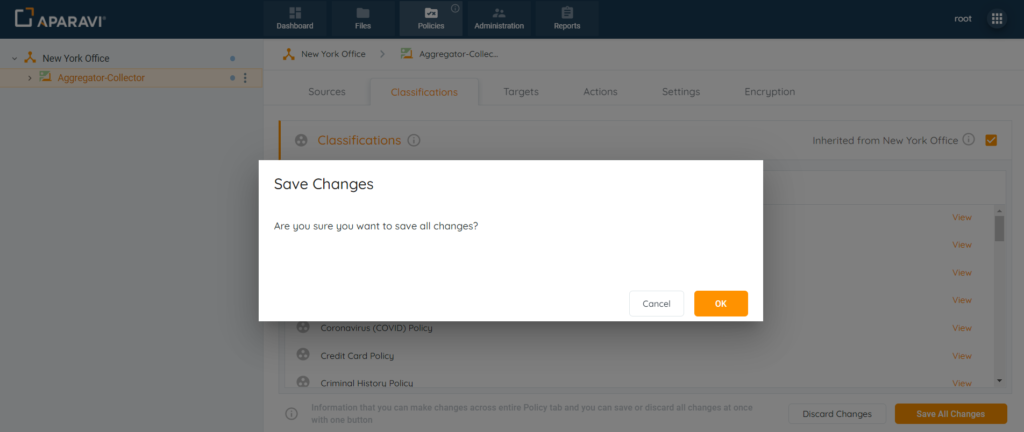
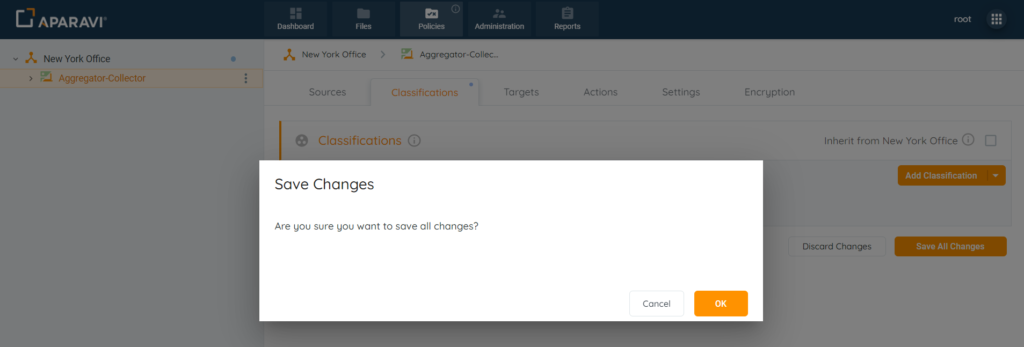
4. Once the Save All Changes button has been selected, a pop-up box will appear asking to confirm all new classification policies.
5. Click the Ok button to apply the classification inheritance policies.
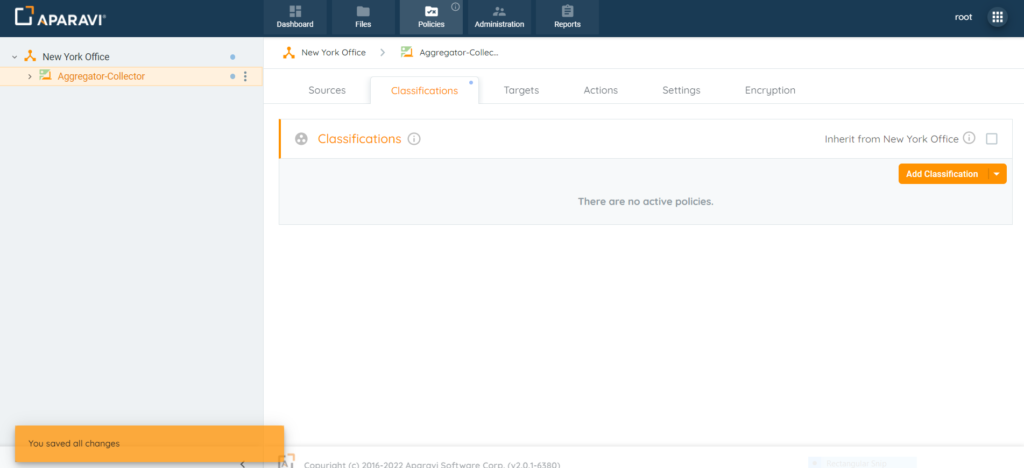
Once the classifications have been applied, all inherited classification policies for the node above will automatically be activated for the node below.
Inheritance Disablement
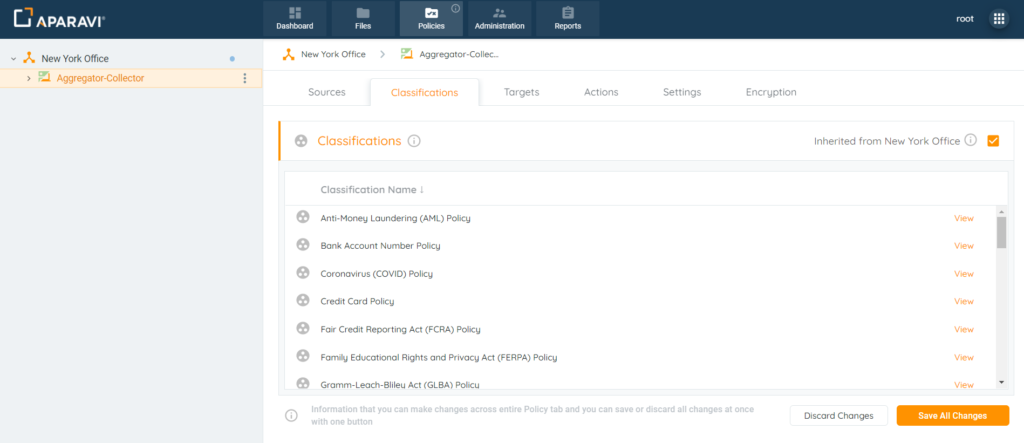
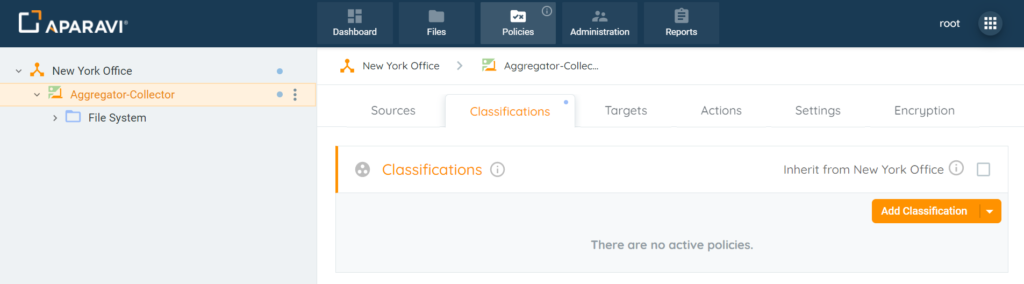
When deselected, this node will require it’s own set of classification policies to be configured.
1. Select the node in the navigation tree to disable the configured classifications.
2. Click the Policies tab and then click on the Classifications subtab that appears.
3. Click on the checkbox next to the label “Inherit from [Organization]” to deselect it.
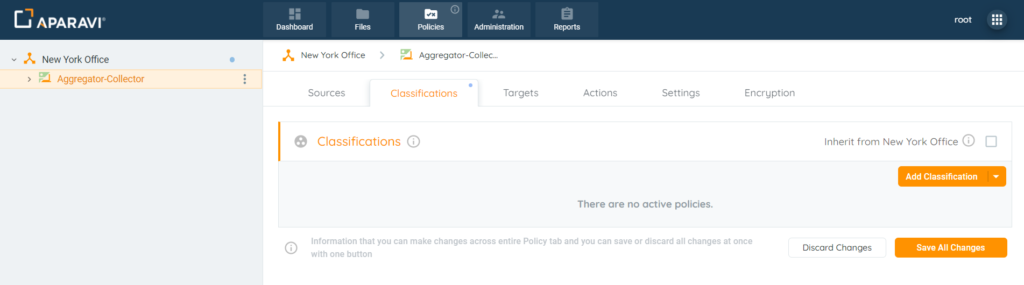
4. Once the Save All Changes button has been selected, a pop-up box will appear asking to confirm all new classification policies.
5. Click the Ok button to complete the classification disablement process.
Once deselected, the node will no longer inherit the classification policies configured for the node above. Custom classifications for this node can now be constructed and applied upon the next scan.
Creating Custom Classifications
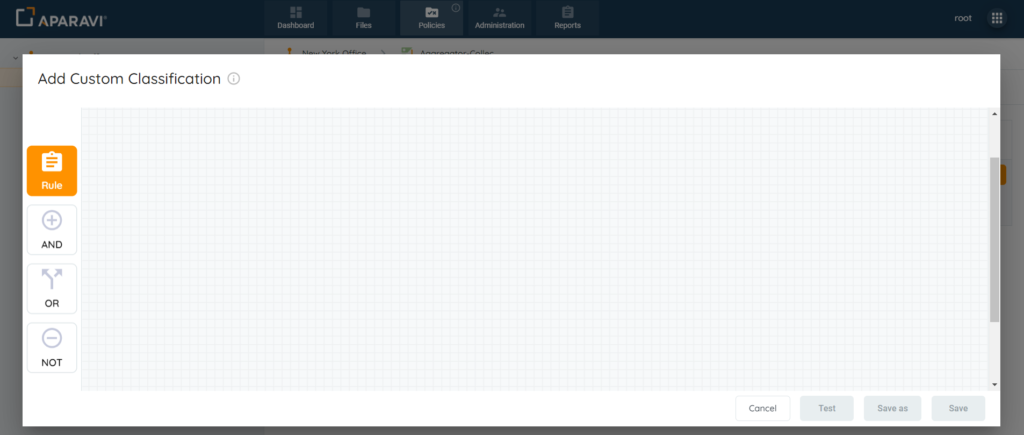
Customizing classifications allows for precise targeting of files that can be tailor-made to fit any organization’s needs. The classifications are built using [AND], [OR] & [NOT] operators, which provides endless options to classify all file types scanned by the system.
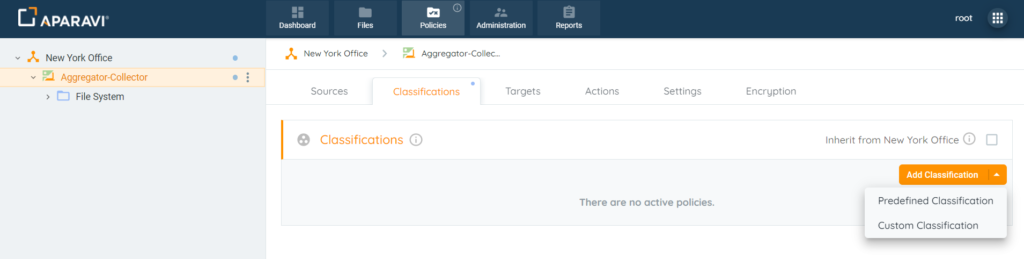
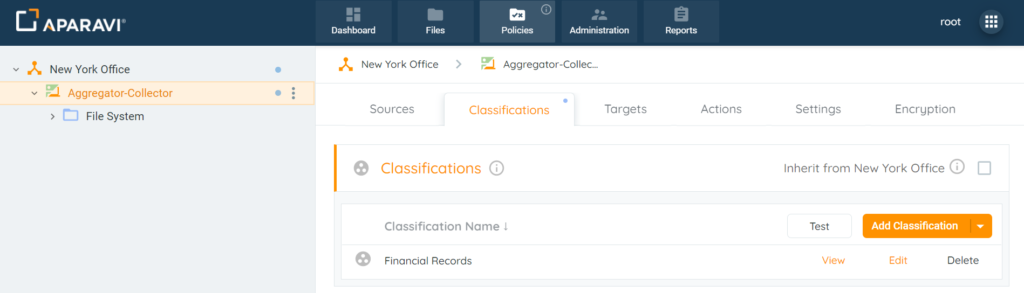
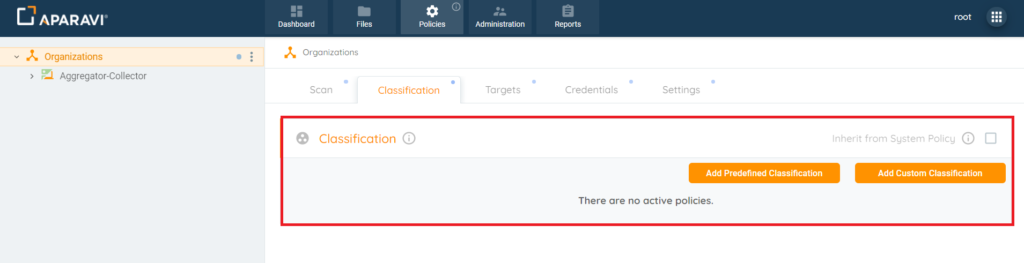
1. Click the Policies tab and then click on the Classifications subtab that appears.
2. Click on the Add Classification button and select Custom Classification from the menu that appears.

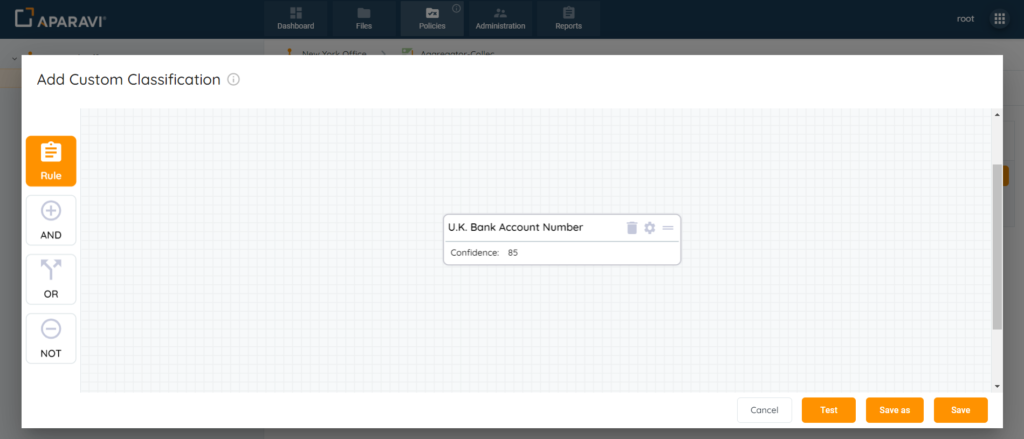
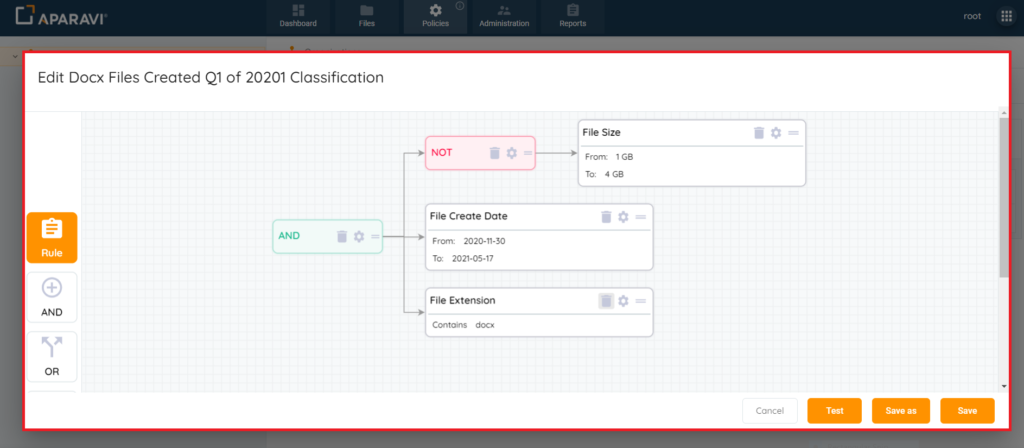
3. Once the Add Custom Classification grid displays, click on the [Rule] option. Drag & drop the Rule option inside the editor until it appears inside the custom builder.
4. Inside of the Rule pop-up box, select a field option from the drop-down menu.
Please Note: This rule will drive the classification policy.

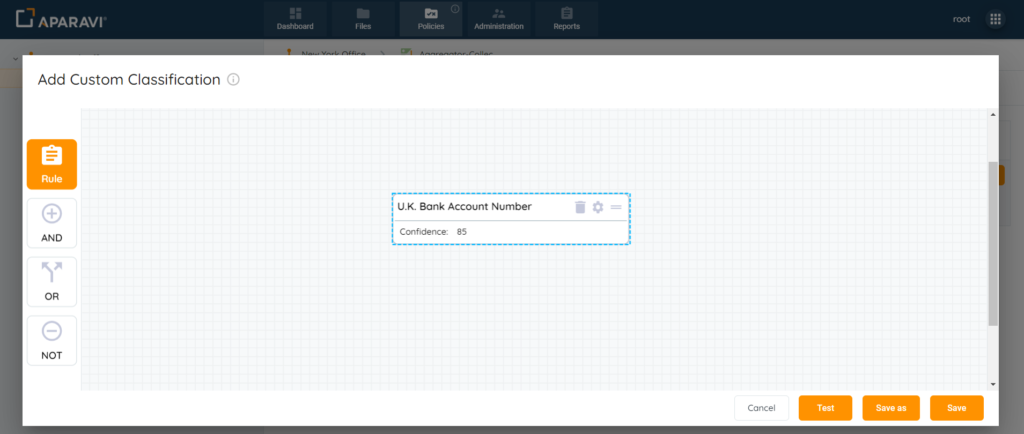
5. Once the rule is selected, the name will appear inside of the field. From this view, the rule’s confidence level can also be adjusted, in order to make the files more or less sensitive to being classified.
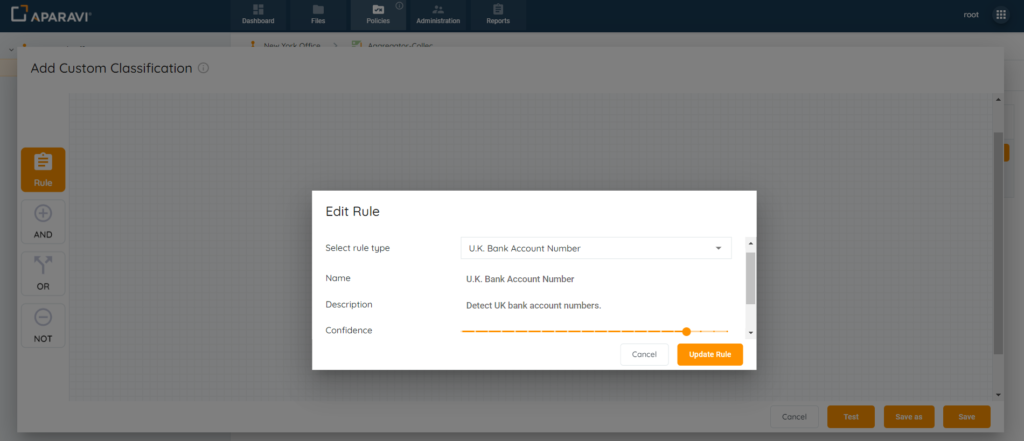
6. After the desired parameters have been determined, click the Update Rule button to save the selections.
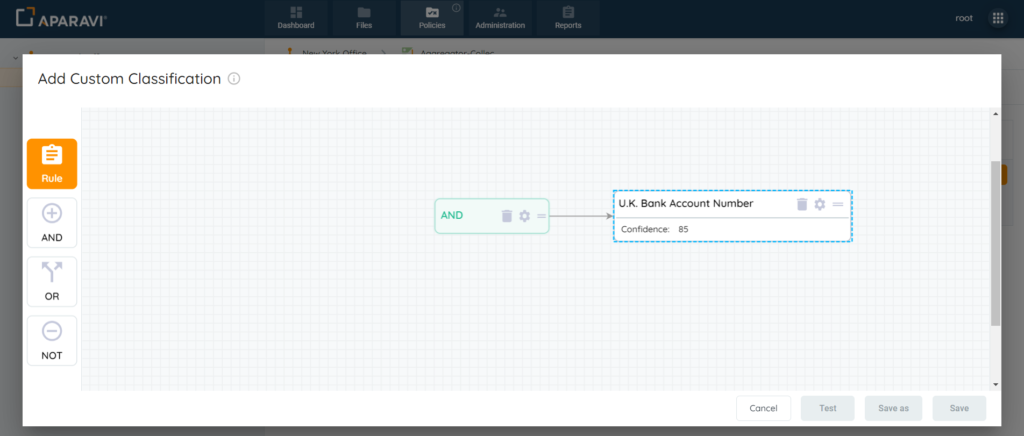
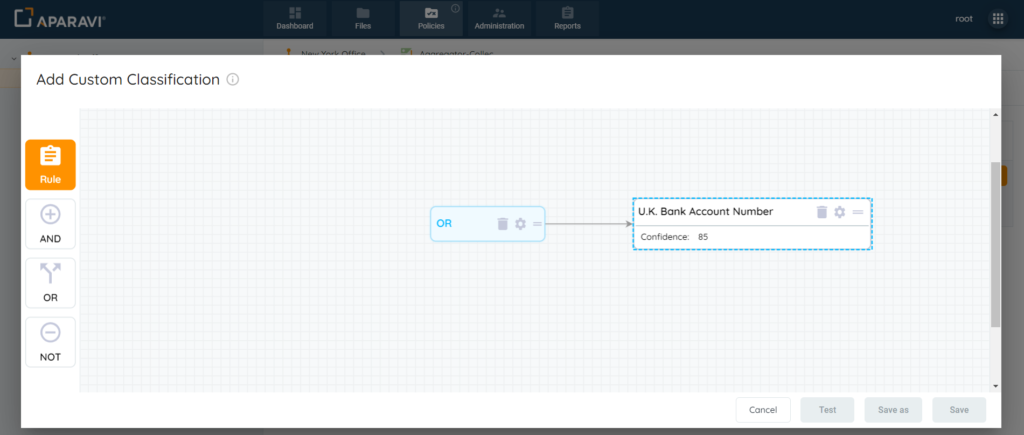
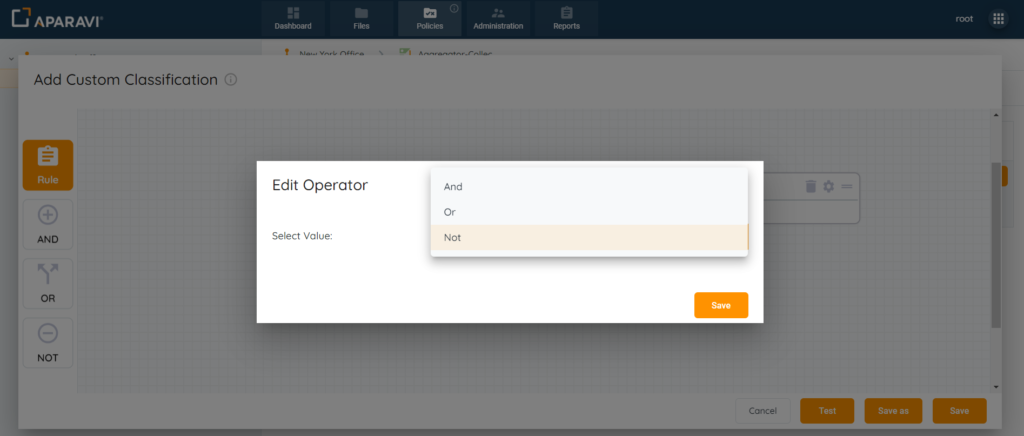
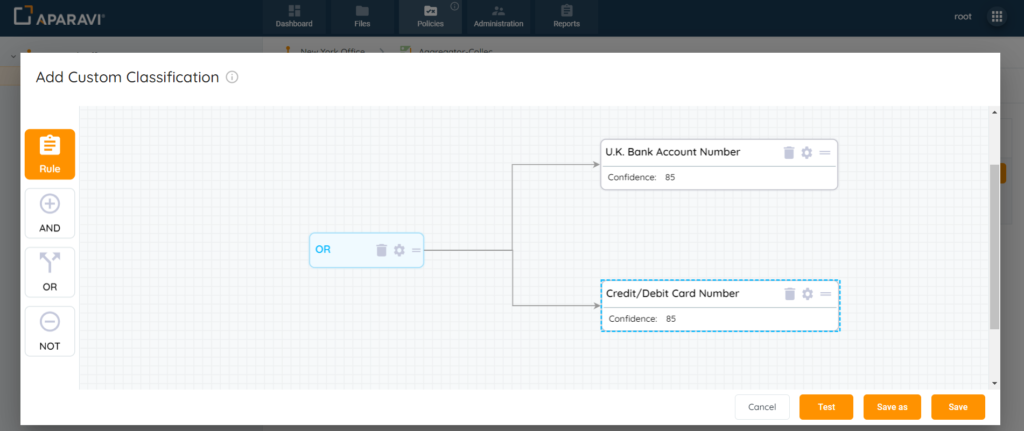
7. To select an operator, drag & drop it on top of the rule inside the editor. Once added, the operator will appear connected to the Rule.
(1) AND – using this operator requires that files must meet both criteria in order to classify.
(2) OR – using this operator requires that files must meet either or both criteria in order to classify.
(3) NOT – using this operator requires that files must contain the criteria specified in order to be excluded from the classification.
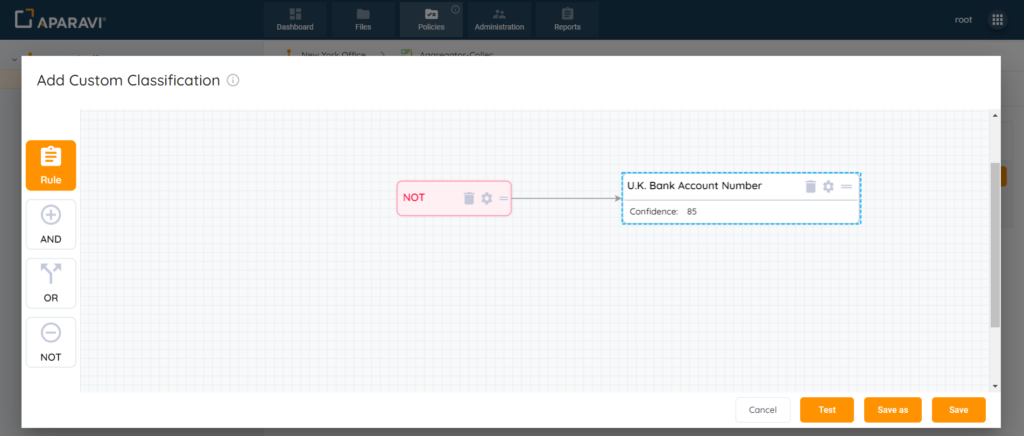
8. While customizing the classification, the rules and operators can be edited or deleted, by clicking on the gear or trashcan icons.

If Delete (trashcan icon) is selected, the rule or operator will disappear from the custom classification editor.
If the rule or operator should be edited before saving, select the gear icon. Once selected, the drop-down menu will display in order to update the selections.
9. Additional rules and operators can also be added to the custom classification editor. This allows for versatile policy setting capabilities. Simply drag and drop the new addition on top of the existing rules or operators.
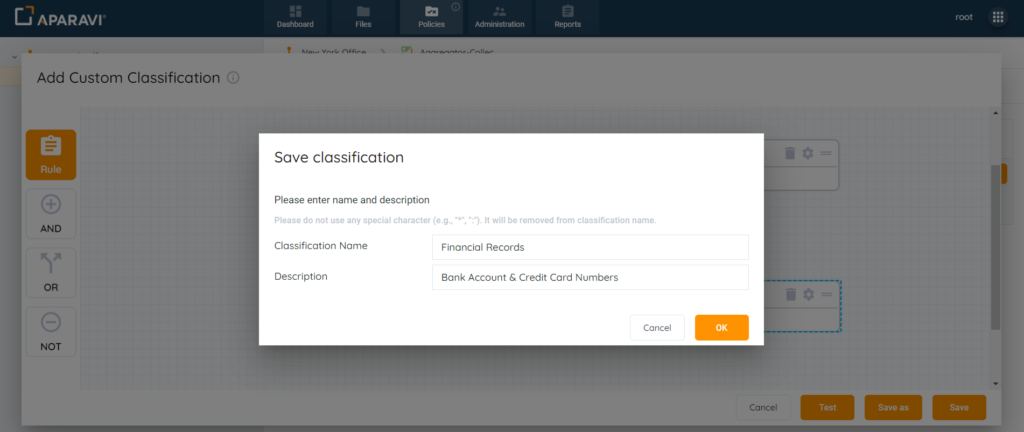
10. When all selections have been made, the classification criteria will display inside the editor. Once completed, click on the Save button in order to save the custom classification.
11. Enter the name and description of the custom classification. Once completed, click the OK button to finalize the classification.
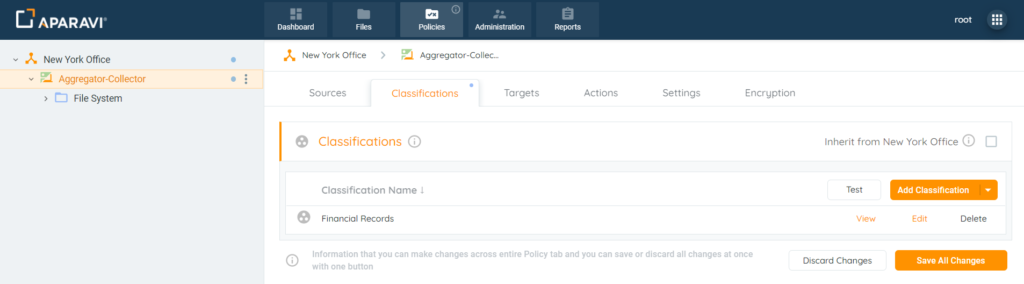
12. Once the custom classification has been created, it will appear on the Classifications subtab. Click the Save All Changes button to apply the classification to all previous and future file scans.
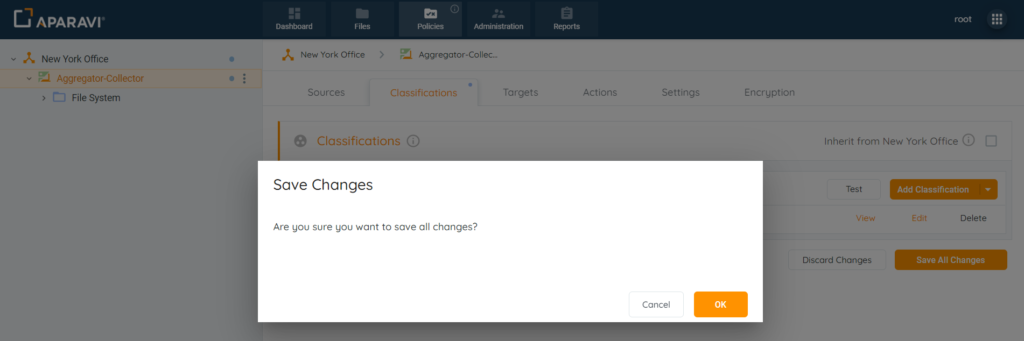
13. The Save Changes pop-up box will appear to confirm all changes. Click on the OK button to complete the process.
Once the custom classification has been saved, it will appear under the classifications subtab. During the next file scan, the system will review all previously scanned files, as well as any new files, and run them against the new classification.
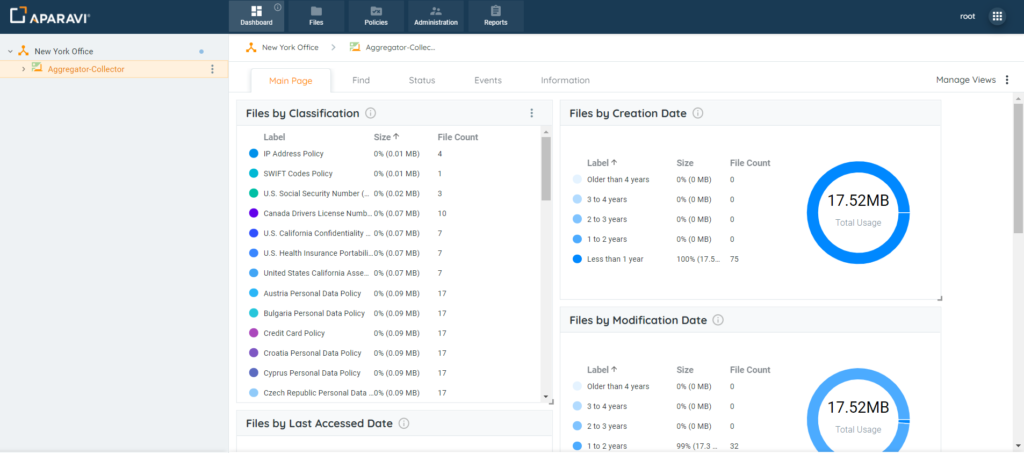
- Now that the custom classification has been saved, the system offers several tools for viewing and reporting:
- File searches can be performed to locate the classified files.
- Report queries can be created to filter files by one or multiple classifications.
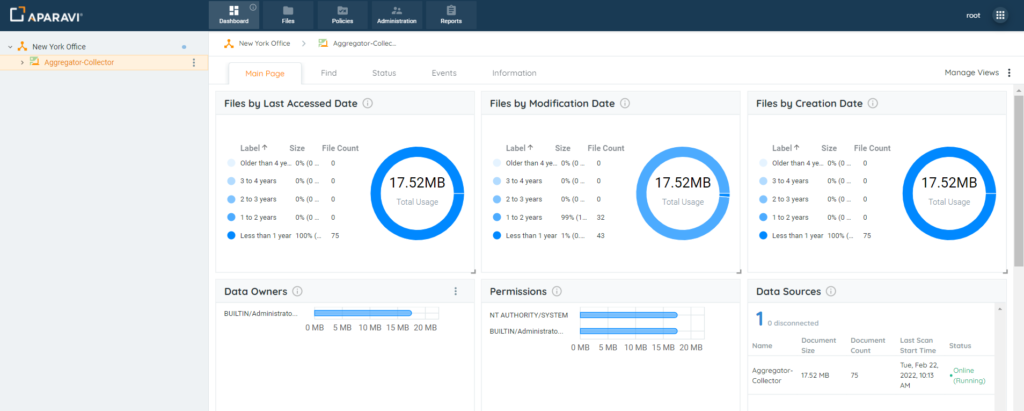
- The classification Dashboard widget will display the statistics about the classified files.
Classification Test Feature
The system allows for files to be tested using the custom classifications before being applied. This provides insight into if the classification rules will satisfy the criteria to tag the scanned files. If the test feature successfully classifies the files, all others meeting the same criteria, will also be filtered. If the system does not classify the files, the option to edit the classification rule’s confidence level can be altered, or a predefined classification can be selected instead.
Please Note: Files can be tested regardless if they have been scanned by the system. They can also be tested before, or prior to the classification rules being saved.
1. Click the Policies tab and then click on the Classifications subtab that appears.
2. Click on the Add Classification button and select Custom Classification from the menu that appears.
3. Create and save the custom classification. Once completed it will appear under the Classifications subtab.
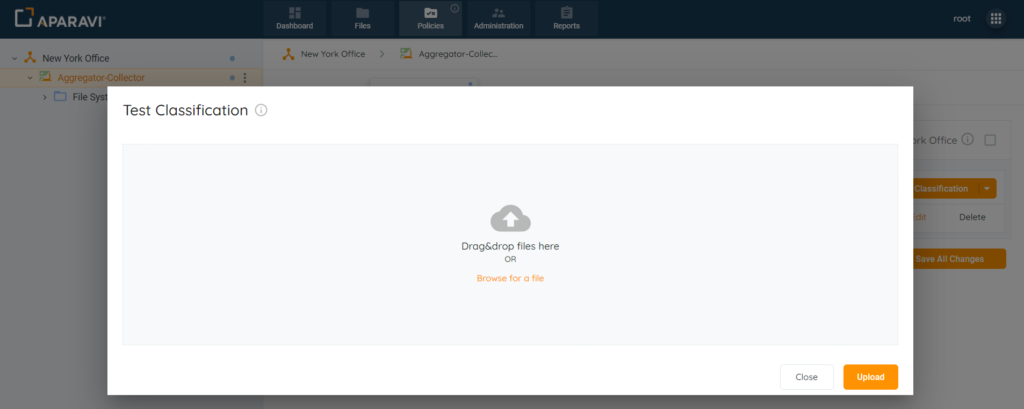
4. Once the selections have been made, the classification will have the option to be tested or saved. Click the Test button, located above the classification policies.
5. The system allows testing the custom classifications using up to 5 files at once. Simply Drag & Drop the files into the Test Classification pop-up box or click on the Browse for a file button, and select files from the local directory. Once completed, click on the Upload button to begin the process.
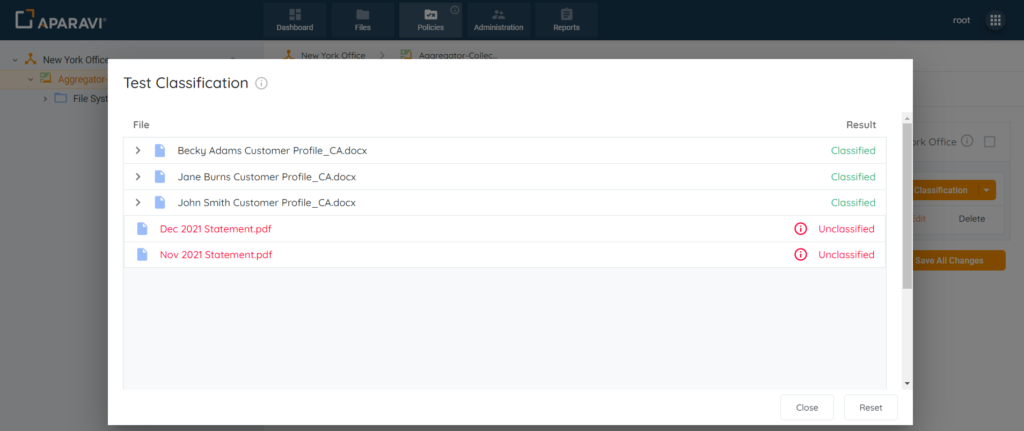
6. The selected files will now be ran against the custom classification rules.
- Successful Classification: Displays “Classified” in green text to the right of each file uploaded.
- Unsuccessful Classification: Displays “Unclassified” in red text to the right of each file uploaded.
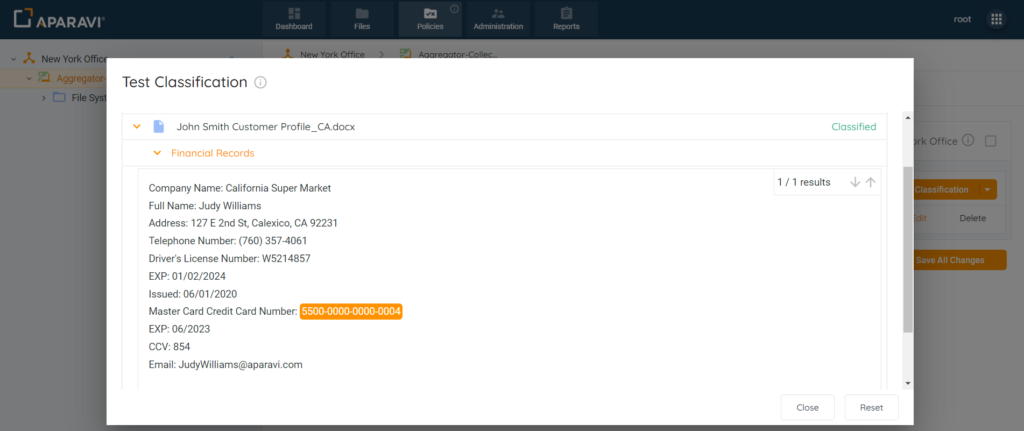
7. If the file was successfully classified, the system will display the content that met the criteria for the classification in orange. Simply click on the arrow to the left of the classification to view the classification hits.
View, Edit & Delete Custom Classifications
Once the custom classification has been saved, it can be viewed, edited or deleted by clicking on the respective buttons.
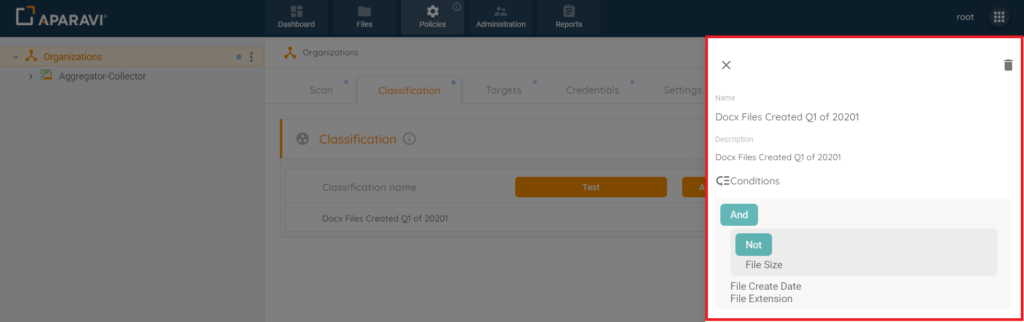
View – rules and operators appear in a side window to display the criteria of the classification.
Edit – rules and operators can be edited, added or removed to alter the classification criteria.
Delete – classification policy will be deleted and new files will not be ran against it. The system will also remove the deleted classification from all previously classified files.
Feature Links
- The classification Dashboard widget will display the statistics about the classified files.
- Complete a custom classification file search
- Configure and save a query report on specific or multiple classifications
- Search for files by their classification hits
- Query results for classification hits
- Selecting Predefined Classifications