How Can We Help?
Search for answers or browse our knowledge base.
Microsoft SSO Login
Purpose
Signing into the platform can be achieved in several ways. The system offers a Microsoft single sign-on option, that when configured will allow for signing in without having to input the credentials each time.
Please Note: To configure this option, a user with administrative permissions must create the new account using the matching Microsoft account that will be set up by the user to authenticate successfully.
Administrative Microsoft SSO Set Up For New User
1. Click on the Administration tab, located in the top navigation menu.
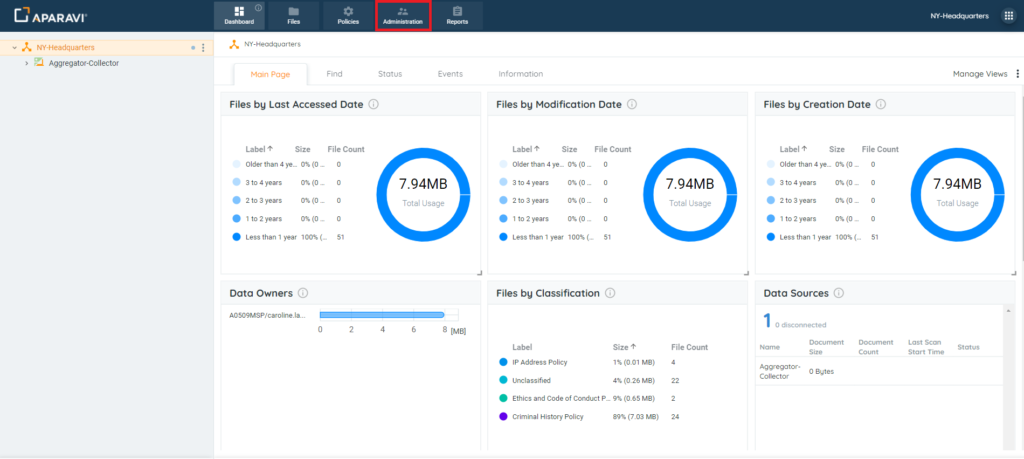
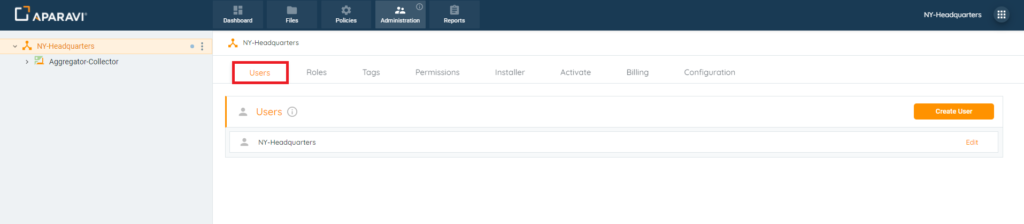
2. The system should automatically display the Users sub-tab by default. If it doesn’t, click on it.
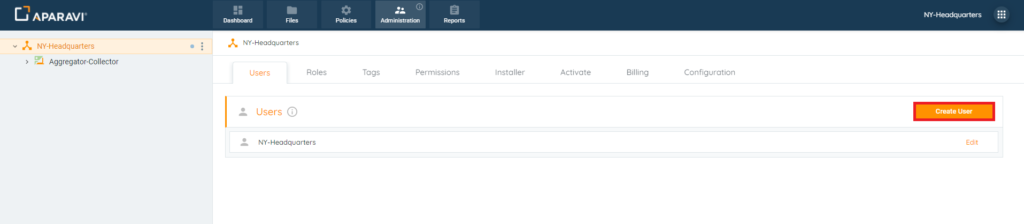
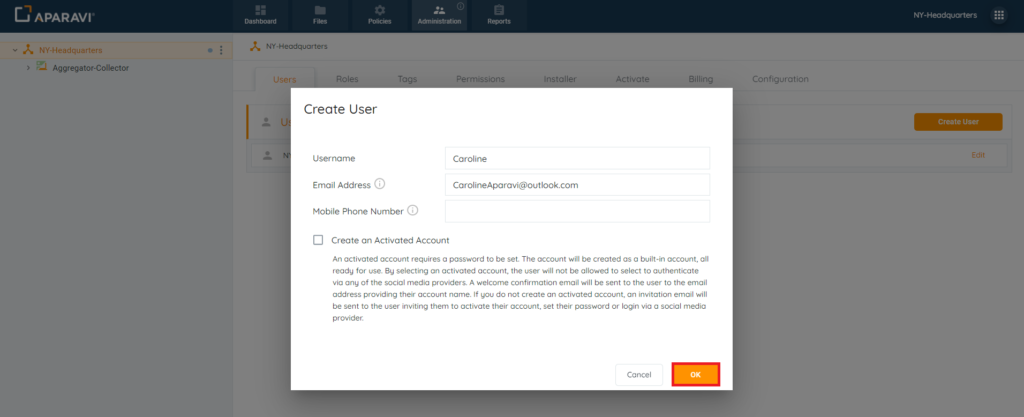
3. Click on the Create User button, located in the upper right-hand side of the screen.
4. Once clicked, the Create User pop-up box will appear. Enter the following information into the fields below:
- Username: Type in any username for the new user account
- Email Address: Use the official Microsoft email address for the new user
- Mobile Phone Number: [Leave This Field Empty]
- Create an Activated Account: By default the system will have the checkbox unchecked. Leave this checkbox as is.
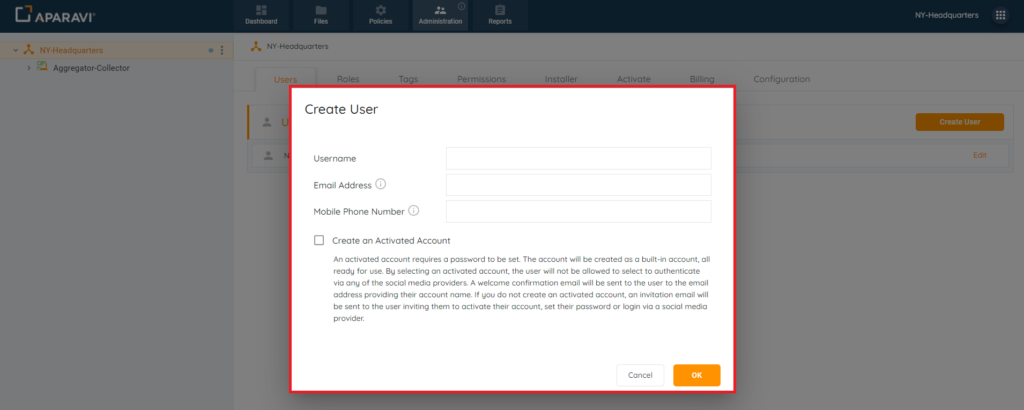
5. When completed, click on the Ok button, located in the bottom right-hand corner of the Create User pop-up box to save the changes.
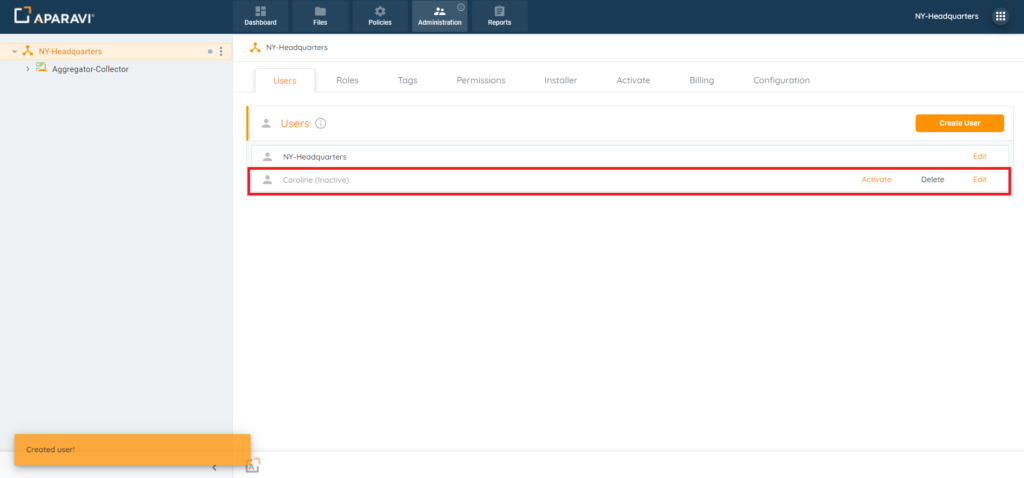
Once the new user has been added, the user will appear under the Users sub-tab in the platform. At this point, the Microsoft user will receive an email to configure their account. Once the new user has activated the account, the word (Inactive) will disappear from the entry.
Administrative Microsoft SSO Set Up For New Client
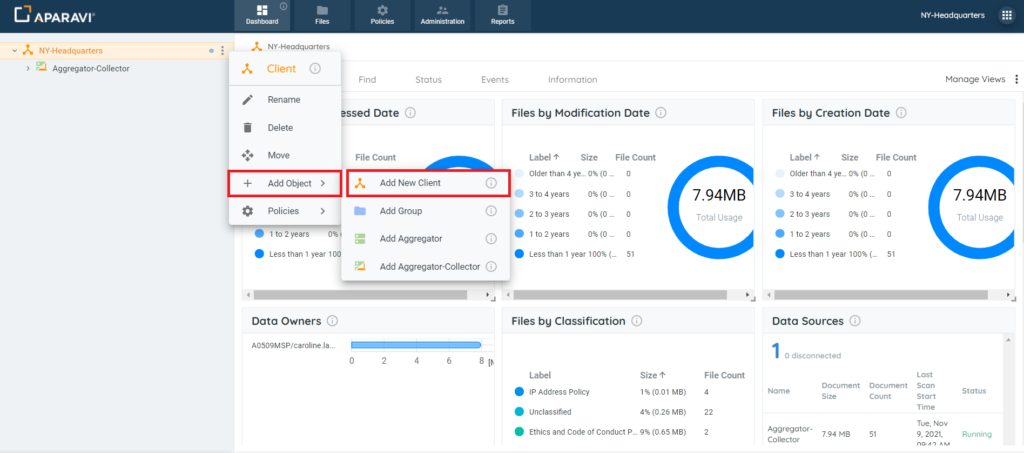
1. Click on the 3 vertical dots next to the Organization/Client this new client should be nested under in the navigation tree. Once clicked, a menu will appear.
2. In the menu, click on the [Add Object] option and a sub-menu will display. Once displaying, choose the [Add New Client] option that appears in the sub-menu.
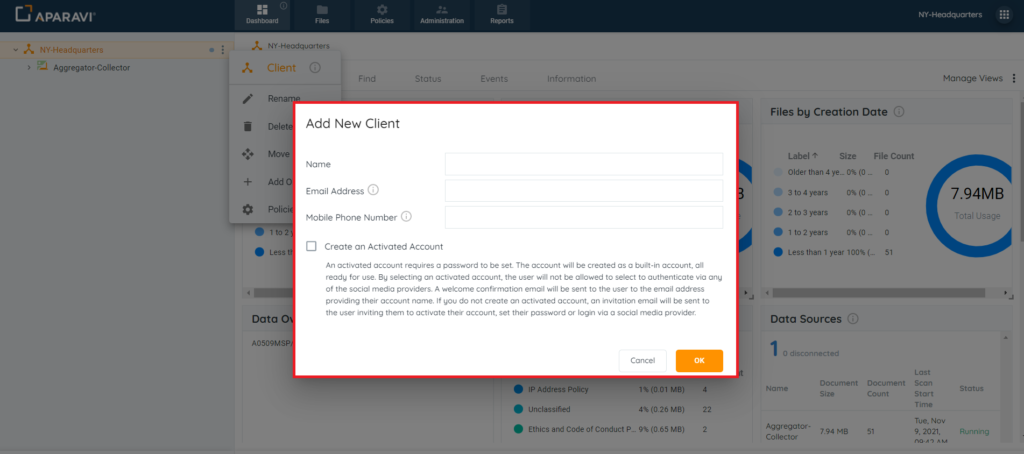
3. Once clicked, the Add New Client pop-up box will appear with options to input:
- Name: Enter the name of the new client
- Email Address: Use the official Microsoft email address for the new user
- Mobile Phone Number: [Leave This Field Empty]
- Create an Activated Account: By default the system will have the checkbox unchecked. Leave this checkbox as is.
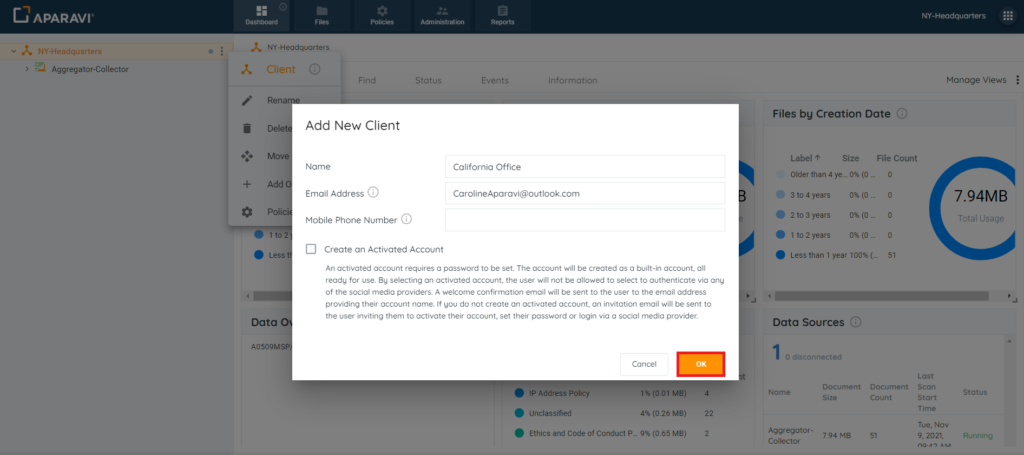
4. When completed, click on the Ok button, located in the bottom right-hand corner of the Create User pop-up box to save the changes.
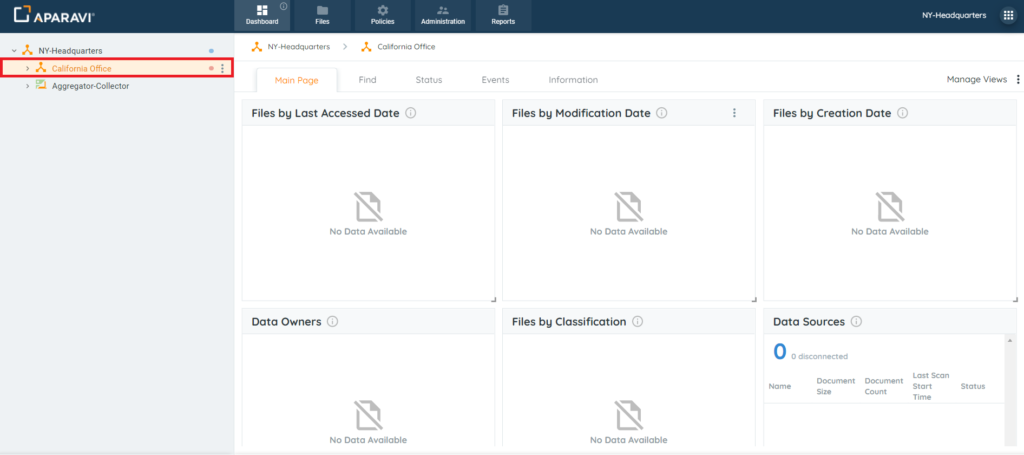
Once the new client has been added, the client will appear in the navigation tree under the Organization/Client that was chosen when the new client was created. At this point, the Microsoft user will receive an email to configure their account. Once the account has been activated the red dot that appears to the right of the client’s name will become a blue color instead.
Initial Configuration – Microsoft SSO for New Clients & New Users
Although the steps of setting up a new client vs a new user are different, the Microsoft account SSO login process is identical regardless of the set up procedure.
1. If not already logged into the Microsoft account added, do so now.
Please Note: This Microsoft account must be the email used during the new account/user creation to authenticate successfully.
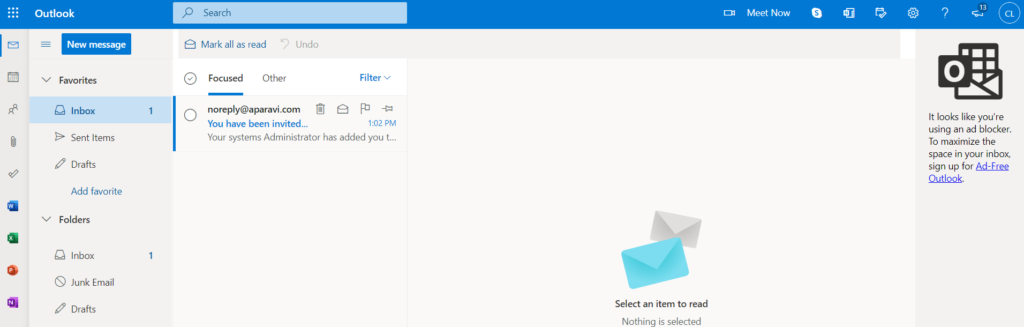
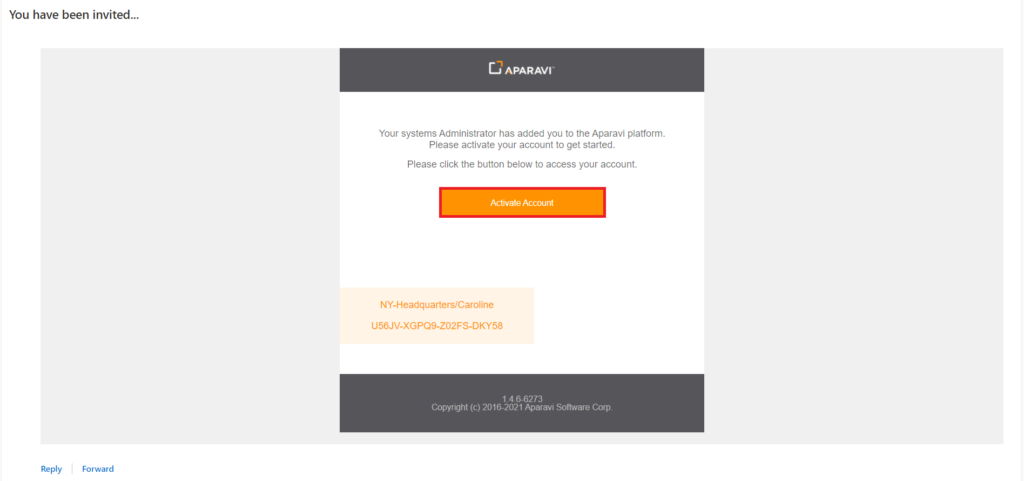
2. Once the administrative user has configured the new user/client, the Microsoft user will receive an activation email from the Aparavi platform.
3. Click on the Activate Account button, located in the middle of the email that was received by the Microsoft account.
4. Once clicked, a new browser window will open, displaying the Aparavi login webpage.

5. Without changing any of the other fields on the webpage, click on the [Sign in with Microsoft] button.

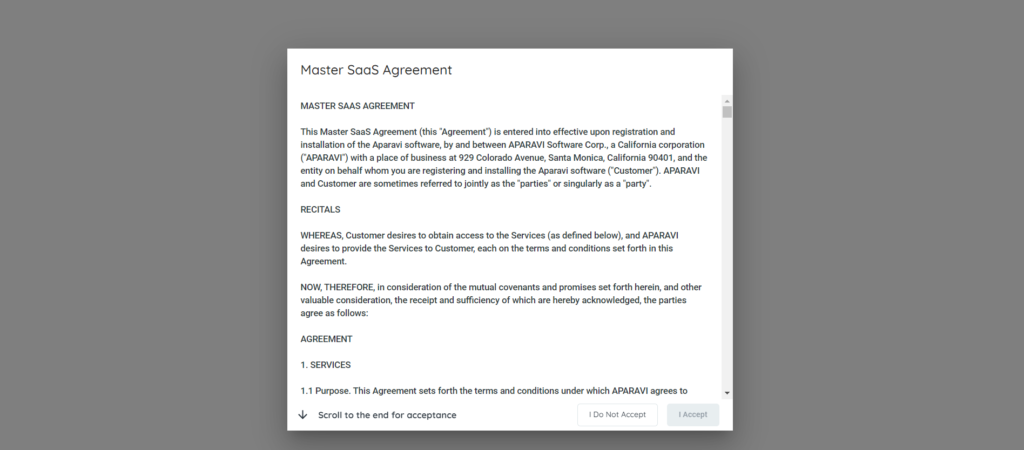
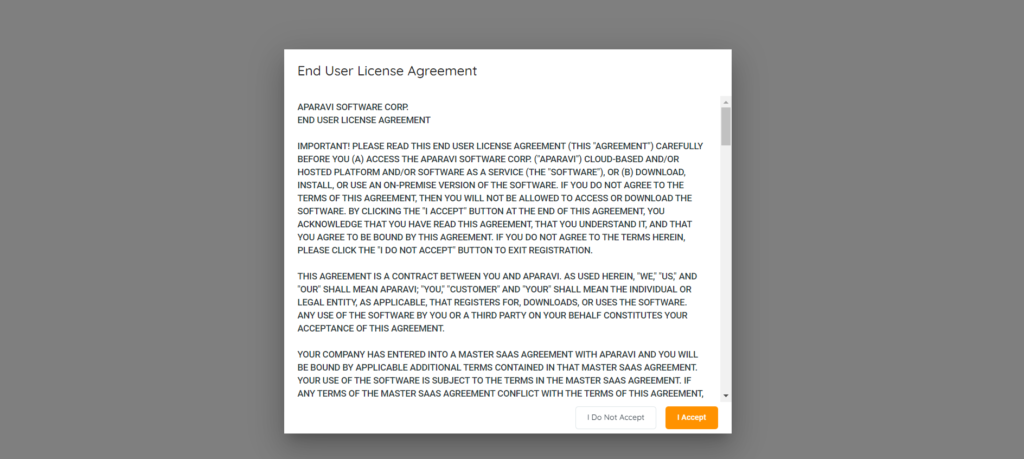
At this point the Master SaaS Agreement and the End User License Agreement will need to be accepted. Once they both are, the user will be logged into their account.
Subsequent Microsoft SSO Logins
1. If not already logged into the Microsoft account added, do so now.
Please Note: This Microsoft account must be the same email used during the new account/user creation to authenticate successfully.
2. Visit the Aparavi Website login webpage.

3. Without changing any of the other fields on the webpage, click on the [Sign in with Microsoft] button.

After the button is clicked, the system should automatically sign the user into the account.