How Can We Help?
Search for answers or browse our knowledge base.
Manually Exporting Files by Select
Purpose
The system allows exporting 25,000 files from the platform to the local host machine. Manual data exports can be used to migrate files between storage systems or to extract data and review the files when they are stored in the Aparavi data format.

Overview
- Exporting Files After File Search
- Exporting Files from Navigation Tree
Exporting Files After File Search
1. Click on the Files Tab, located in the top navigation menu.
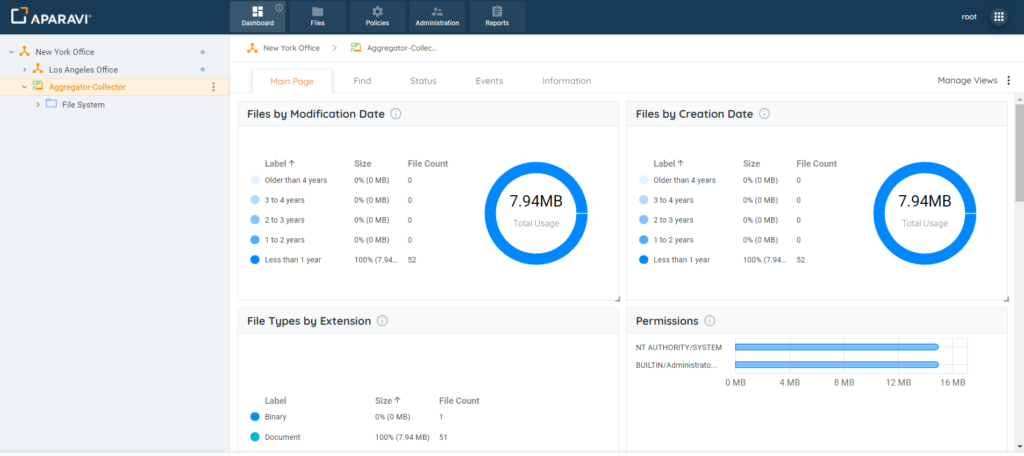
2. Perform any file search using the three query parameters and click the Search button.
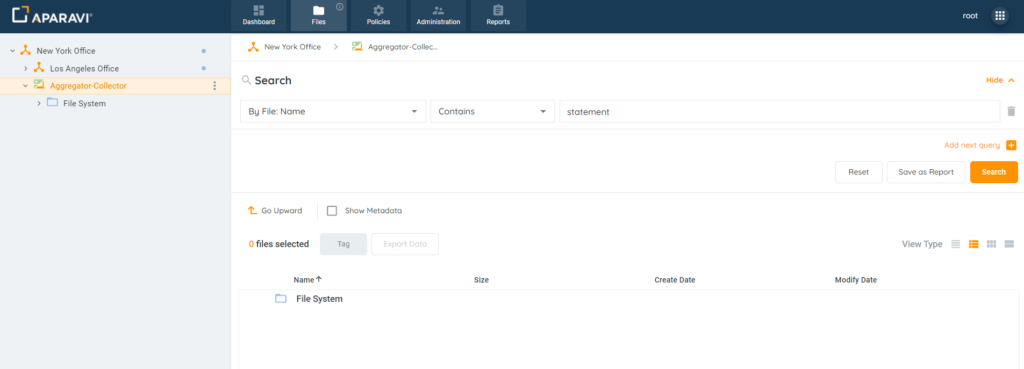
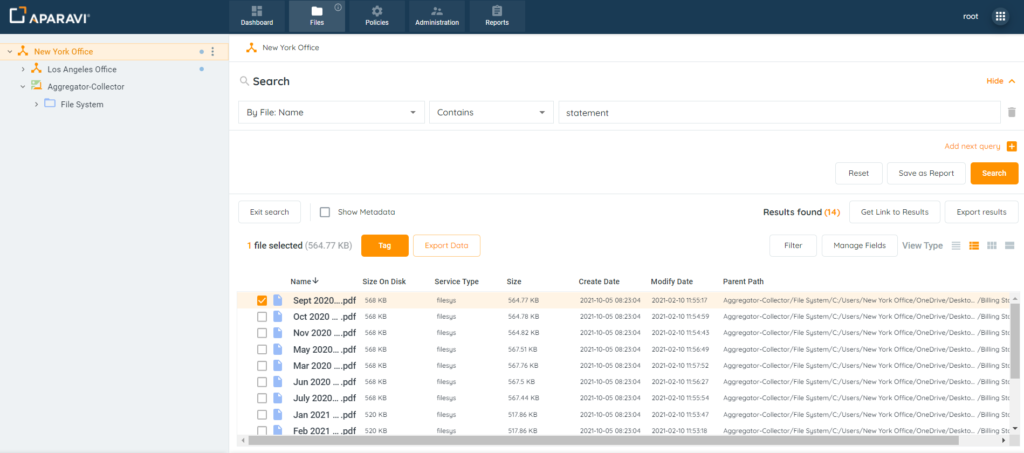
3. Select the checkbox located to the left of the file’s name. This will select the file for export.
4. Repeat this process until all files are selected for export. If all files should be selected, a Select All checkbox appears above the files checkboxes.
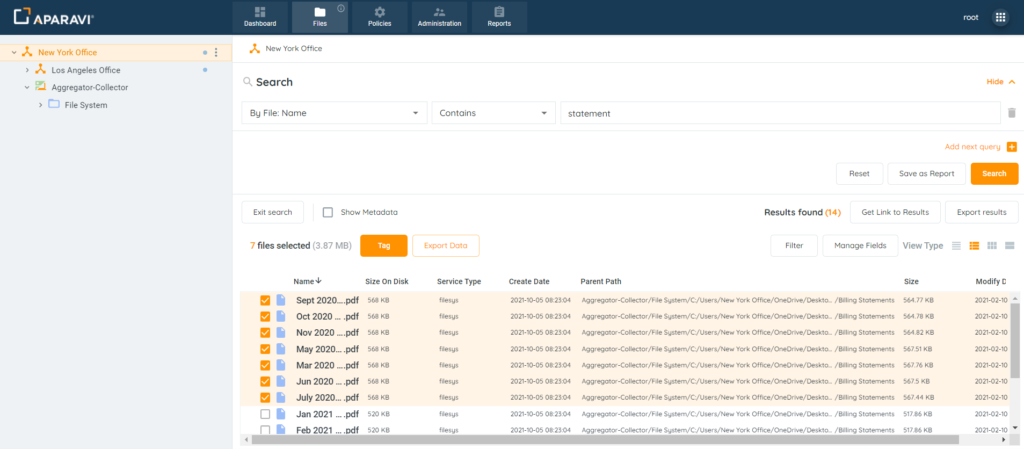
5. To begin the export process, click on the highlighted Export Data button, located above the file results.

6. Once clicked, the Export to Location pop-up box will display and offer the Export Location drop-down menu.
If an export location has been previously configured, the location will appear in the drop-down menu for selection. To create a new export location, click on the Create New option.
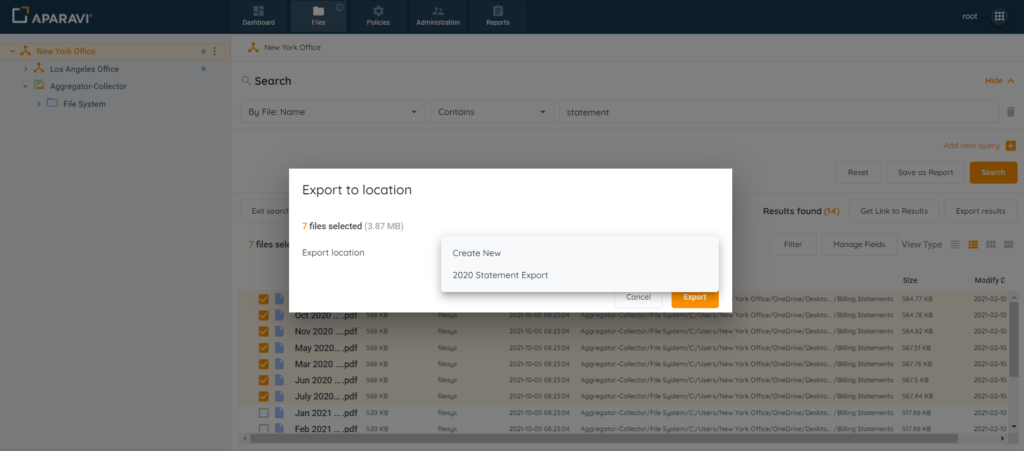
If Configuring a New Location:
- Choose [Create New] from the drop-down menu.
- Once all information has been entered into the Export to Location pop-up box, click on the Validate button.
- Click on the Save button, located at the bottom right-hand side of the pop-up box.
- All information will be saved and the Export button will become active.
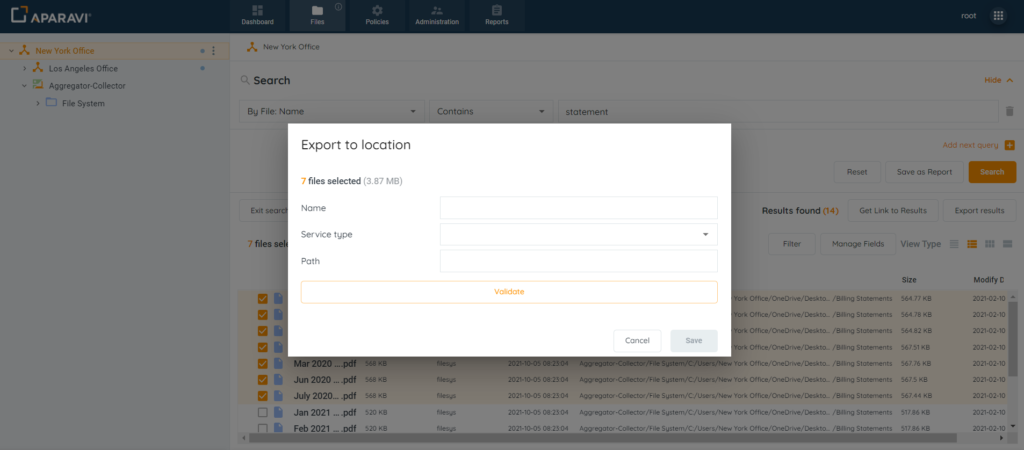
Once completed, the files will begin to export to the new location.
If Selecting a Previously Configured Location:
- Click on the already configured location from the drop-down menu.
- Click on the Export button, located at the bottom right-hand side of the pop-up box.


Once completed, the files will begin to export to the selected location.
7. To view the exported files, check the location specified during the export process. The folder will display all selected files in their native format.

Exporting Files from Navigation Tree
1. Located on the left-hand side of the screen, expand the folders in the navigation tree. Once the folder is visible, click on it to view the files.
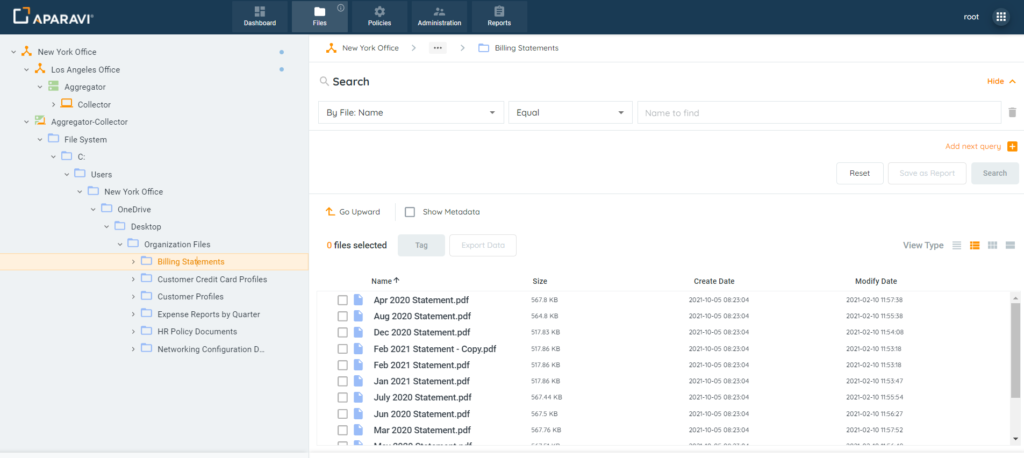
2. Select the checkbox located to the left of the file’s name. This will select the file for export.
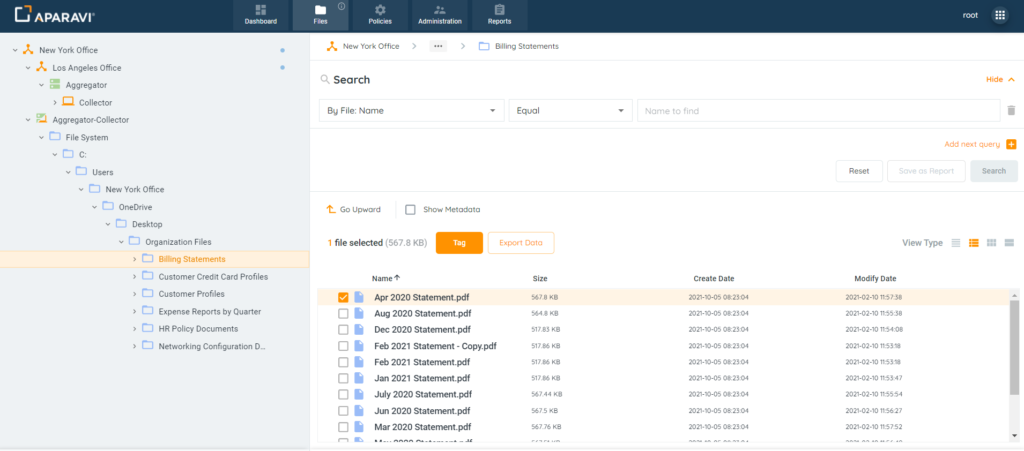
3. Repeat this process until all files are selected for export. If all files should be selected, a Select All checkbox appears above the files checkboxes.
Please Note: The export by query option is not available when exporting via the navigation tree, only after a file search has been performed.
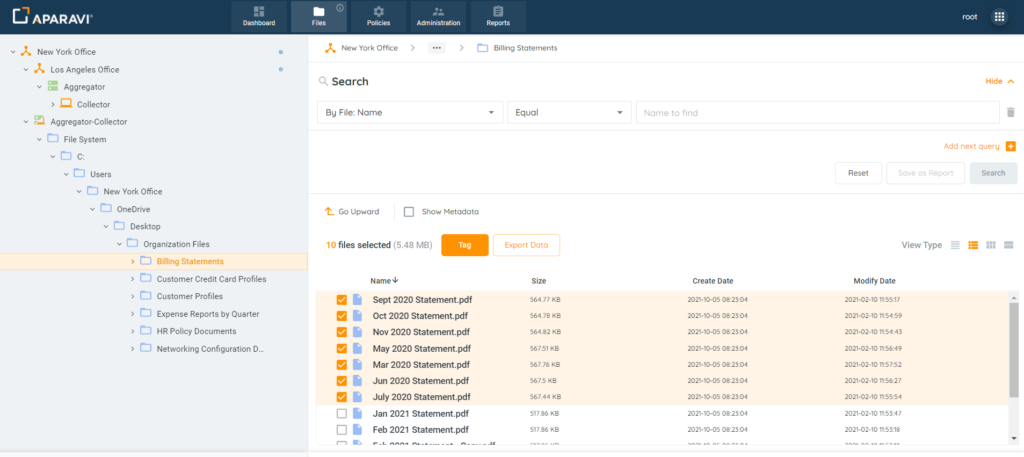
4. To begin the export process, click on the highlighted Export Data button, located above the file results.

5. Once clicked, the Export to Location pop-up box will display and offer an Export Location drop-down menu.

6. Select where the files should be exported to by creating a new location or selecting a previously configured location.
If Configuring a New Location:
- Choose [Create New] from the drop-down menu.
- Once all information has been entered into the Export to Location pop-up box, click on the Validate button.
- Click on the Save button, located at the bottom right-hand side of the pop-up box.
- All information will be saved and the Export button will become active.

Once completed, the files will begin to export to the new location.
Selecting a Previously Configured Location:
- Click on the configured location from the drop-down menu.
- Click on the Export button, located at the bottom right-hand side of the pop-up box.


Once completed, the files will begin to export to the selected location.
7. To view the exported files, check the location specified during the export process. The folder will display all selected files in their native format.
