How Can We Help?
Search for answers or browse our knowledge base.
Generic Installer
Purpose
The generic installer allows Aparavi administrators to create and download a single installer package that can then be distributed internally. The generic installer is available for all installation types.
Usage
Create Installer
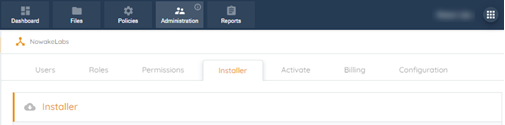
- From the top ribbon menu, select Administration. Under Administration select the Installer tab to get started.
- The Installer tab will have several fields to fill out and the fields will change depending on the Device Type selected initially. Let us begin by covering the Collector device type.
Collector Installer

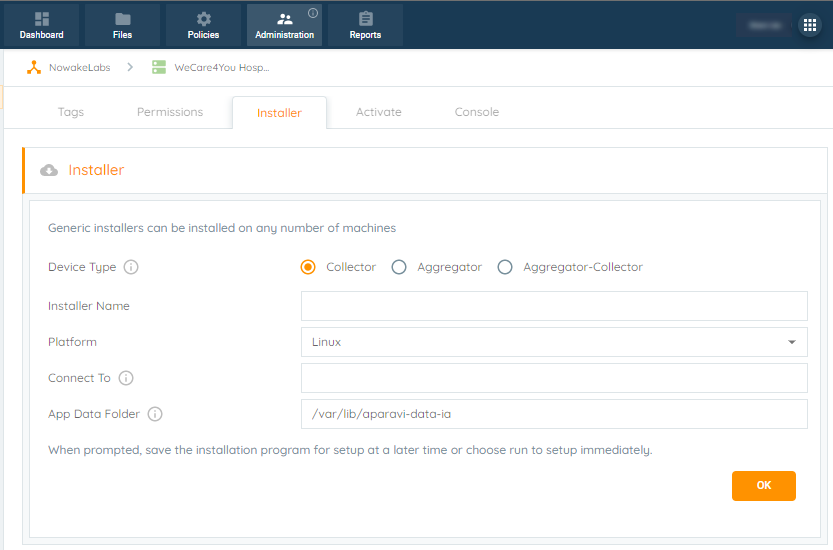
- Select Collector from Device Type. The Collector device type selection will require the following information:
- Installer Name – a descriptive name to be included in the downloaded installer filename
- Platform – Windows or Linux
- Connect To – IP or DNS name of the Aggregator for this Collector
- App Program Folder – location for the install (Windows only)
- App Data Folder – location for user data
- Click OK when finished and the installer will download locally. You will then need to copy the installer to the server(s) you wish to utilize as a Collector.
Let us cover the next device type, the Aggregator.
Aggregator Installer
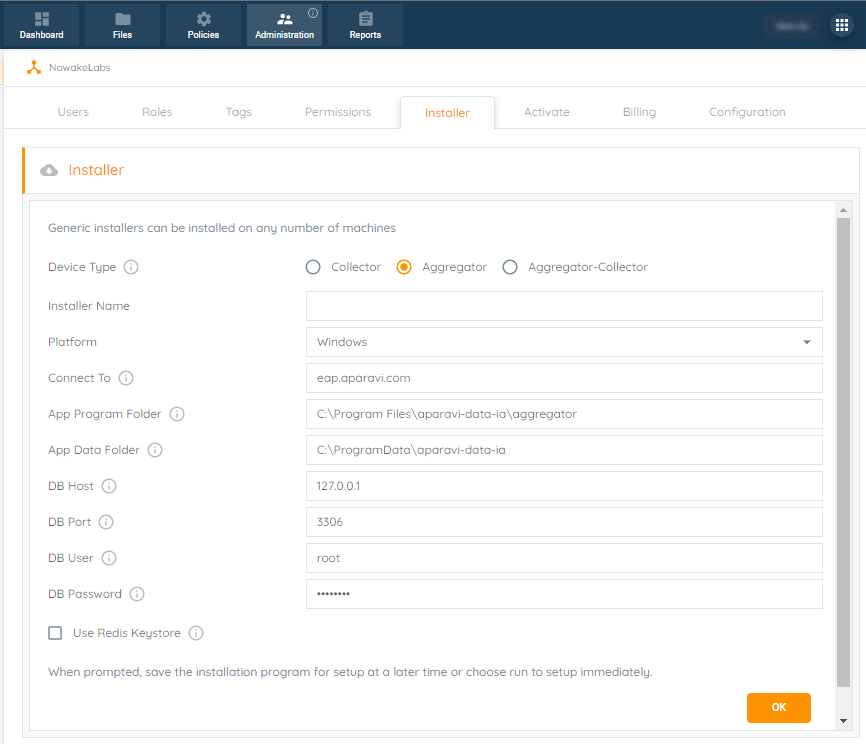
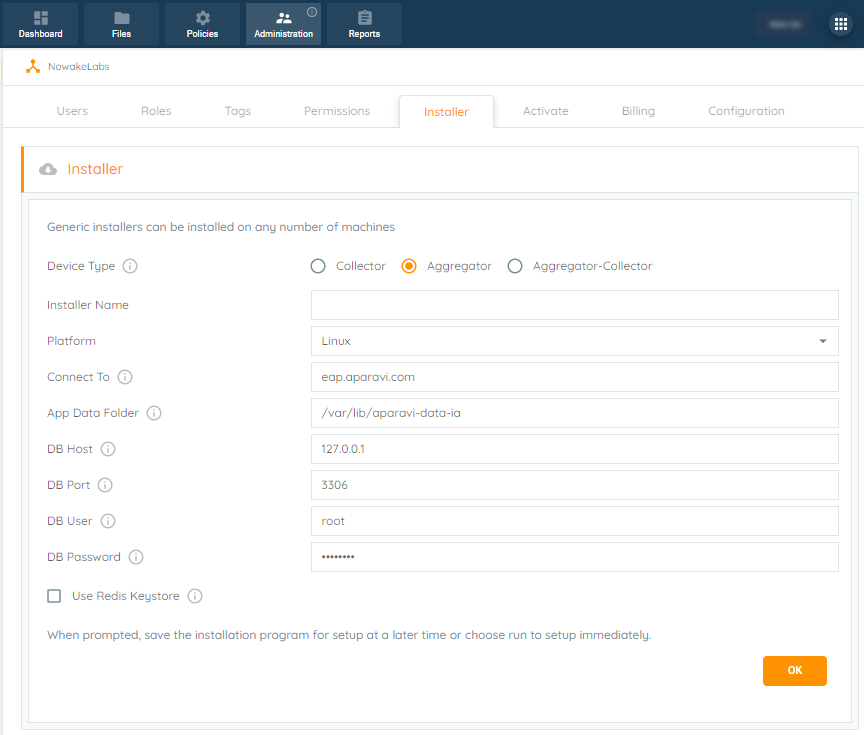
- Select Aggregator from Device Type. The Aggregator device type selection will require the following information:
- Installer Name – a descriptive name to be included in the downloaded installer filename
- Platform – Windows or Linux
- Connect To – auto populated with Aparavi portal URL
- App Program Folder – location for the install (Windows only)
- App Data Folder – location for user data
- DB Host – MySQL host IP, local by default
- DB Port – 3306 default
- DB User – root or other designated user for MySQL DB
- DB Password – password for user entered above
- Use Redis Keystore – leave unchecked to use the built-in keystore, or check to use the Redis keystore if that is installed and preferred
- Click OK when finished and the installer will download locally. You will then need to copy the installer to the server(s) you wish to utilize as an Aggregator. Note: Aggregator installs require a MySQL server to be present prior to executing the install.
Next let’s cover the next device type, the Aggregator-Collector.
Aggregator-Collector Installer
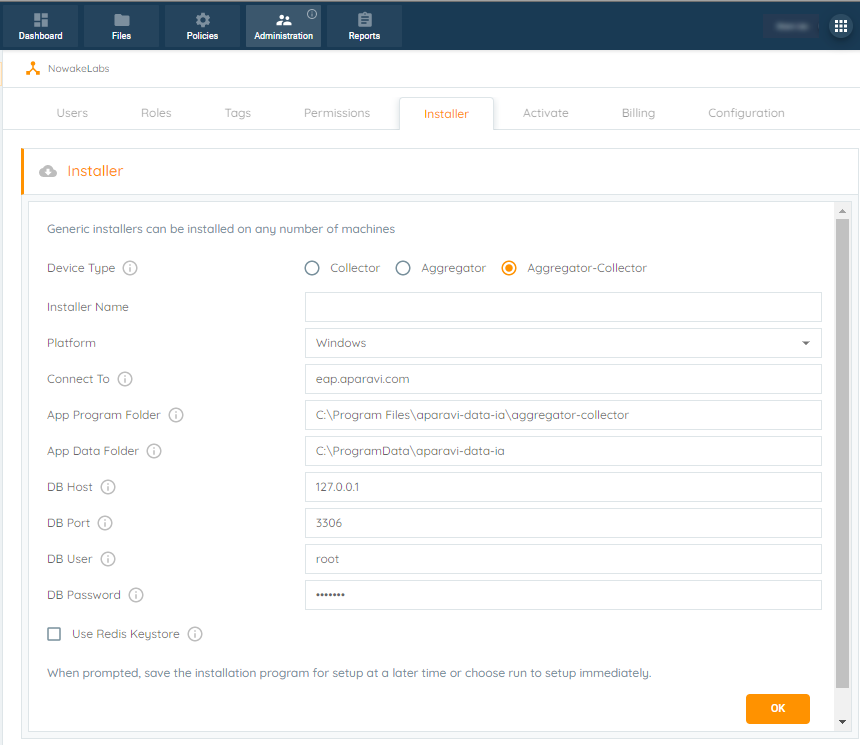
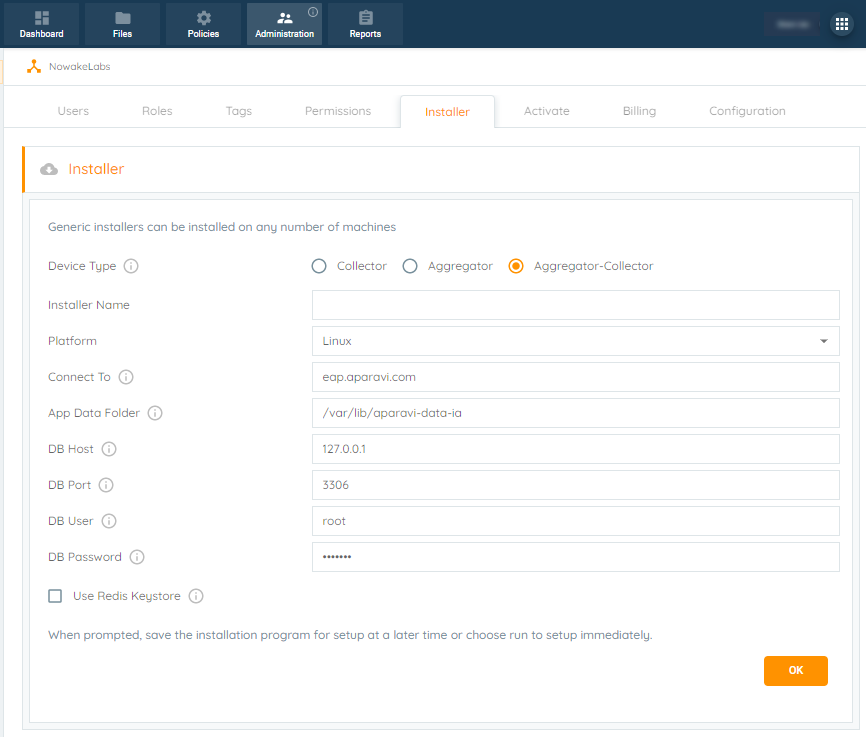
- Select Aggregator-Collector from Device Type. The Aggregator-Collector device type selection will require the following information:
- Installer Name – a descriptive name to be included in the downloaded installer filename
- Platform – Windows or Linux
- Connect To – auto populated with Aparavi portal URL
- App Program Folder – location for the install (Windows only)
- App Data Folder – location for the user data
- DB Host – MySQL host IP, local by default
- DB Port – 3306 default
- DB User – root or other designated user for MySQL DB
- DB Password – password for user entered above
- Use Redis Keystore – leave unchecked to use the built-in keystore, or check to use the Redis keystore if that is installed and preferred
- Click OK when finished and the installer will download locally. You will then need to copy the installer to the server(s) you wish to utilize as an Aggregator-Collector. Note: Aggregator-Collector installs require a MySQL server to be present prior to executing the install.
Activate Installer
We will now cover the activation process for the following device types:
- Collector
- Aggregator
- Aggregator-Collector
Let us start with the Collector device type installer.
Collector Installer
- Copy the installer file to the designated server. Once the installer has been copied over, execute the installer. The installer will automatically install all necessary files and start the Aparavi Data IA Collector service when done.
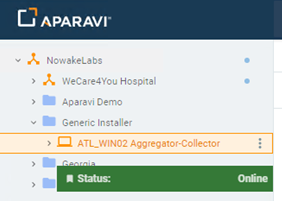
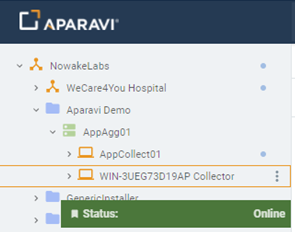
- Once the installation is complete, the Collector will automatically connect to the designated Aggregator set within the installer file. Since the entire process is automated, once the Collector comes online this completes the activation process.
Next, we’ll cover the Aggregator device type installer.
Aggregator Installer
- Copy the installer file to the designated server.
- Ensure that the MySQL database is accessible; for instructions on MySQL installation refer here.
- If MySQL server is accessible, execute the installer. The installer will automatically install all files and start the Aparavi Data IA Aggregator service when done.
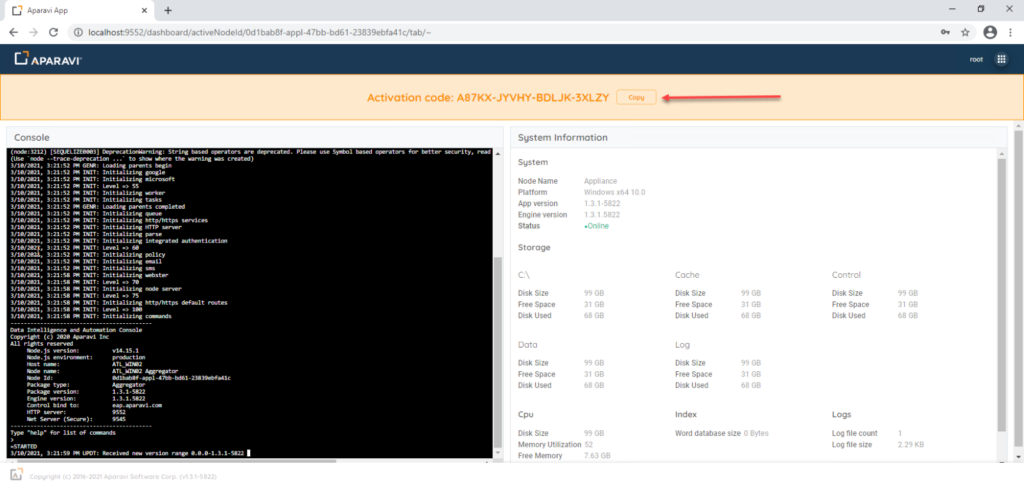
- Once the installation is complete, we will need to locate the activation code. To do so, open a web browser (Chrome, MS Edge, Firefox or Safari) and navigate to the page localhost:9552. This will bring you to a local portal login screen, enter Account Name – root and Password – root.

- Once logged in, click I Accept for the Master SaaS agreement and the End user license agreement.
- Once accepted, you will see the portal along with the activation code, Console and System Information. Click Copy next to the activation code.
- Now that we have the activation code, log into the actual Aparavi portal. We will need to activate the Aggregator under the desired tree level (client, group).
- Click on the level object and select Administration from the top ribbon menu.
- Click on the Activate tab.
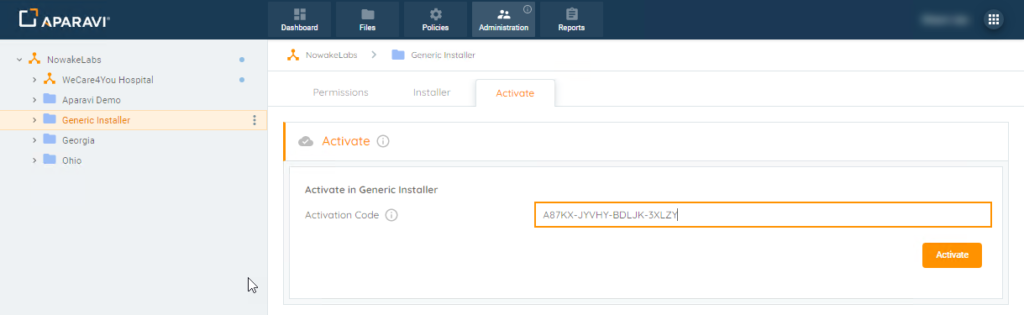
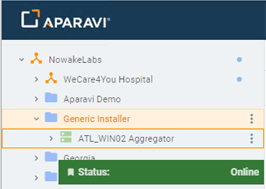
- Copy the activation code over to the Aparavi portal page and click Activate to complete the process. The Aggregator will come online under the client or group selected.
Last, we will cover the Aggregator-Collector device type installer.
Aggregator-Collector Installer
- Copy the installer file to the designated server.
- Ensure that the MySQL database is accessible; for instructions on MySQL installation refer here.
- If MySQL server is accessible, execute the installer. The installer will automatically install all files and start the Aparavi Data IA Aggregator-Collector service when done.
- Once the installation is complete, we will need to locate the activation code. To do so, open a web browser (Chrome, MS Edge, Firefox or Safari) and navigate to the page localhost:9752. This will bring you to a local portal login screen, enter Account Name – root and Password – root.

- Once logged in, click I Accept for the Master SaaS agreement and the End user license agreement.
- Once accepted, you will see the portal along with the activation code, Console and System Information. Click Copy next to the activation code.

- Now that we have the activation code, we will need to activate the Aggregator-Collector under the desired tree level (client, group).
- Click on the level object and select Administration from the top ribbon menu.
- Click on the Activate tab.
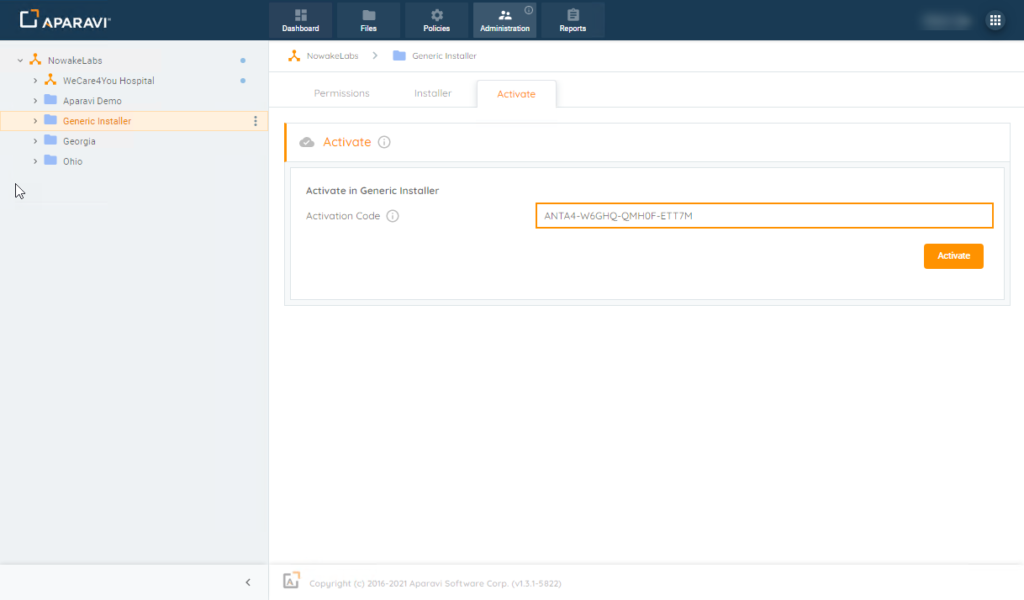
- Copy the activation code over to the Aparavi portal page and click Activate to complete the process. The Aggregator-Collector will come online under the client or group selected.