How Can We Help?
Search for answers or browse our knowledge base.
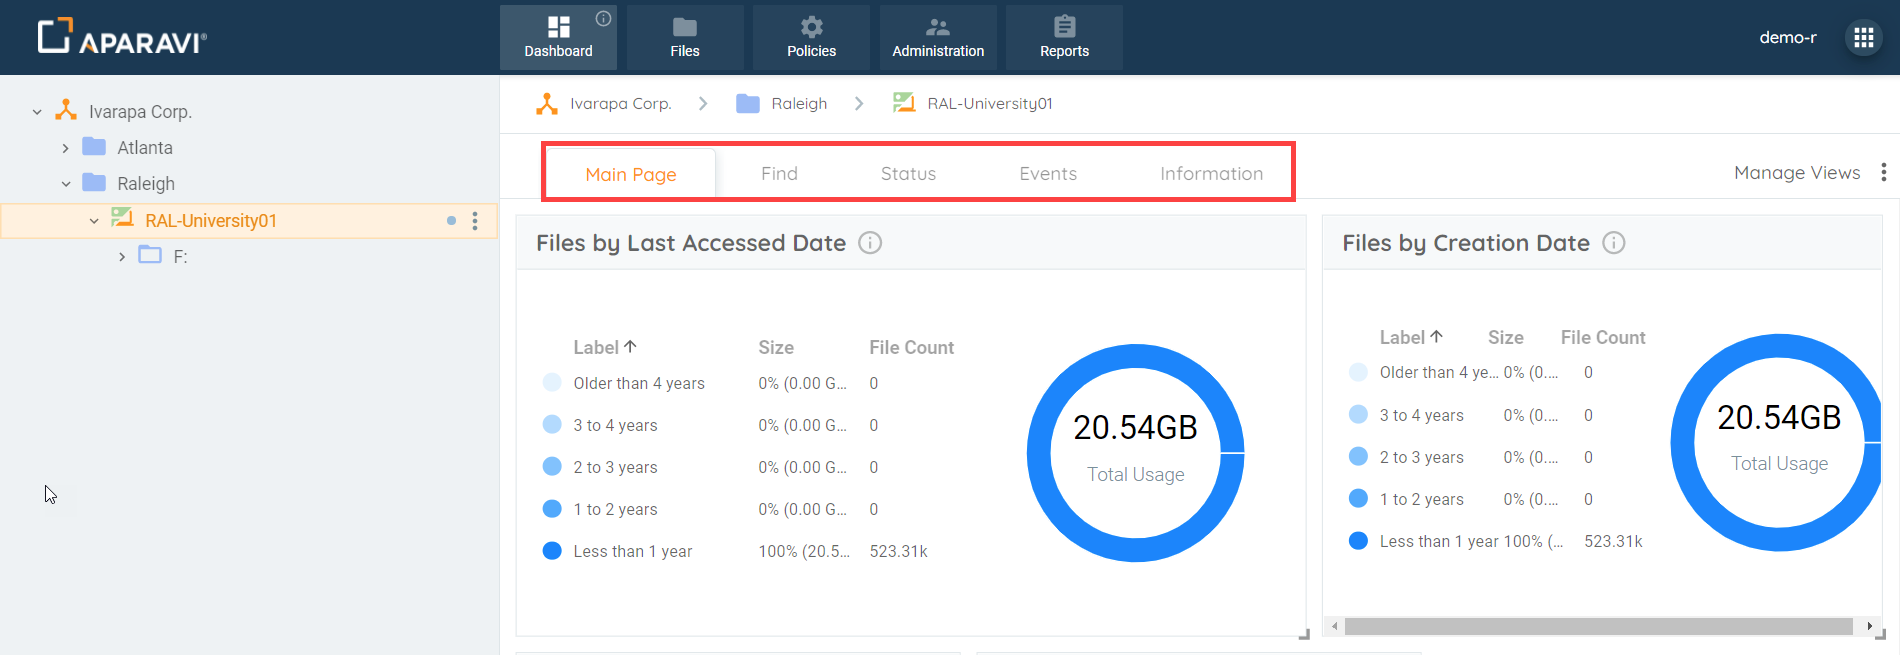
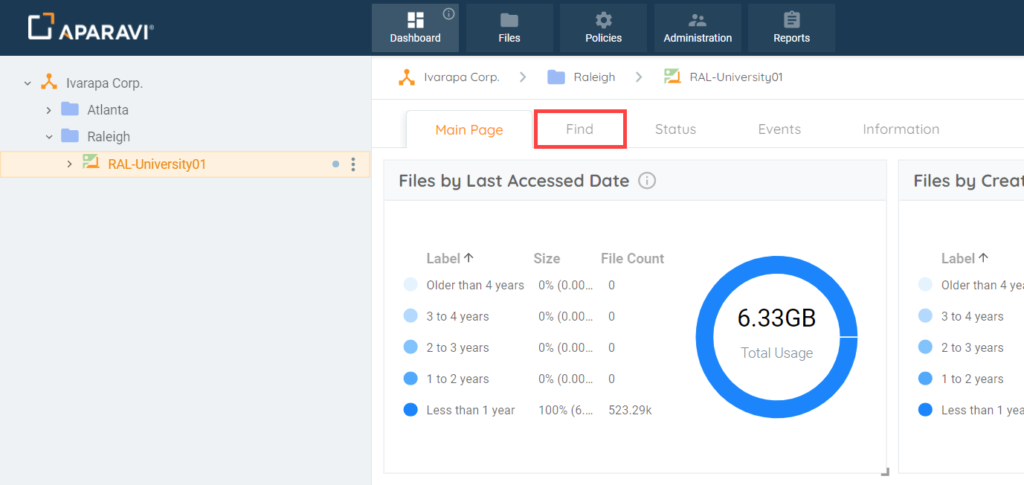
Dashboard Find Subtab
Purpose
Located on the second subtab under the Dashboard, the find subtab will allow for searching of files using search filters and operators for the node selected.
*Please note: Ensure that the proper node is selected since different nodes may have different dashboards entirely.
Overview
- Find Widget on Find Subtab
- Nested Find Widget File Search
- Add, Edit & Delete Widgets to Find subtab
- Resizing & Relocating Find Widget on Find Subtab
- Edit Find Widget Name
- Delete the Find Widget from the Find subtab
- Rename Find Subtab
- Remove Find Subtab
- Restore Default Dashboard
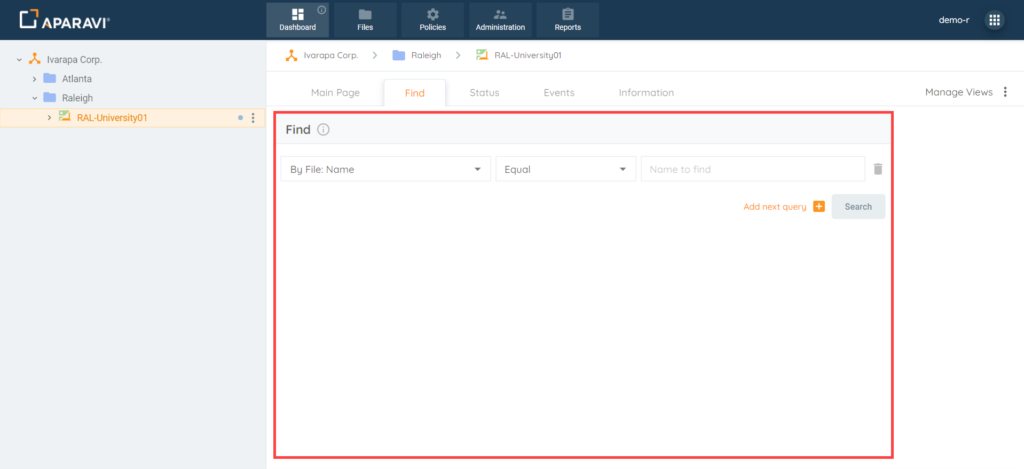
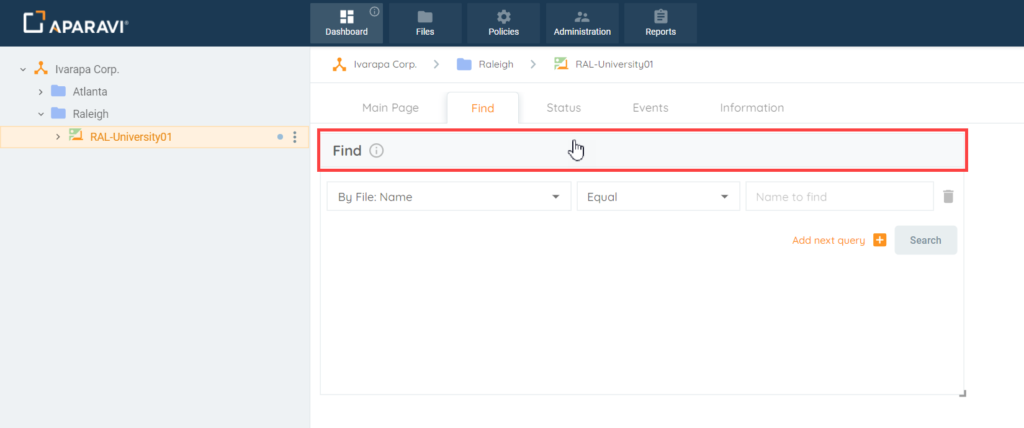
Find Widget on Find Subtab
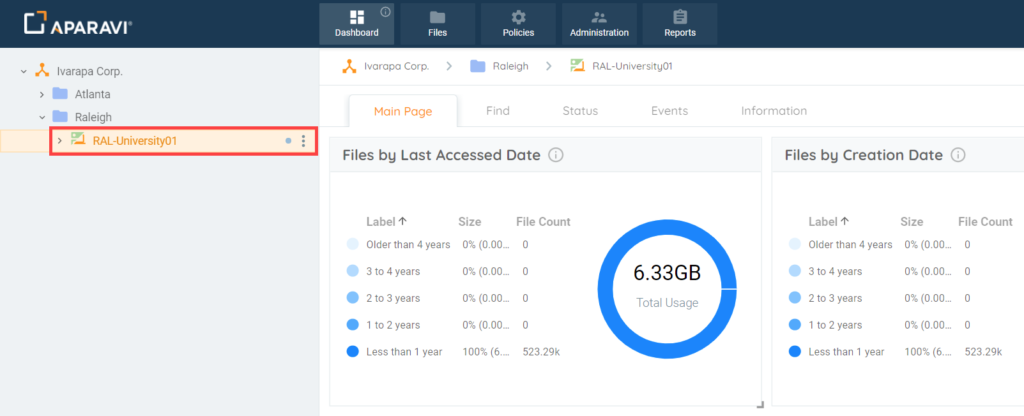
1. Choose which node/folder to perform the search on, by clicking on it in the navigation tree, located on the left-hand side. Once selected, it will appear with a yellowish background color to indicate that it is selected.
Please Note: It is important to select the correct node/folder. The system will only search for files contained within that specific node/folder selected.
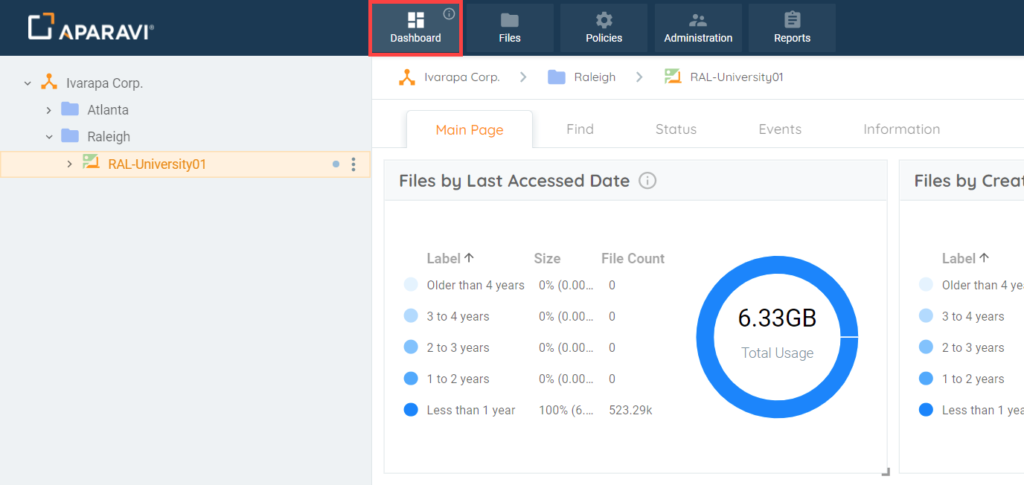
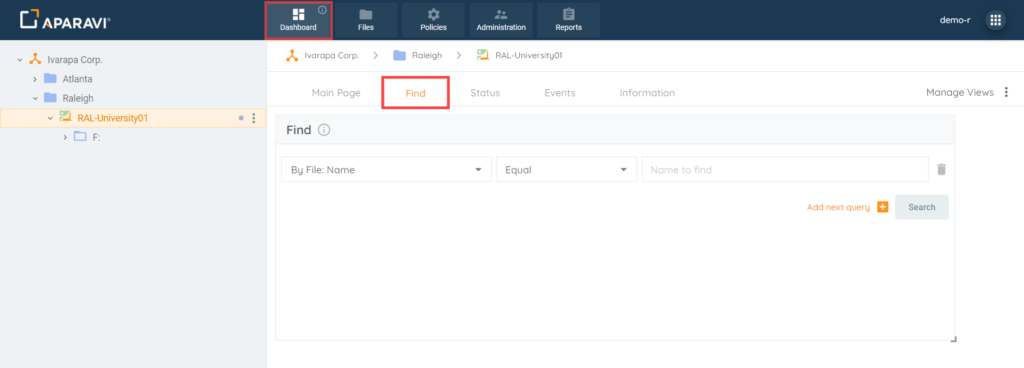
2. Click on the Dashboard tab in the top navigation menu. If not already located on this tab, the system will navigate to the Dashboard tab in the system.
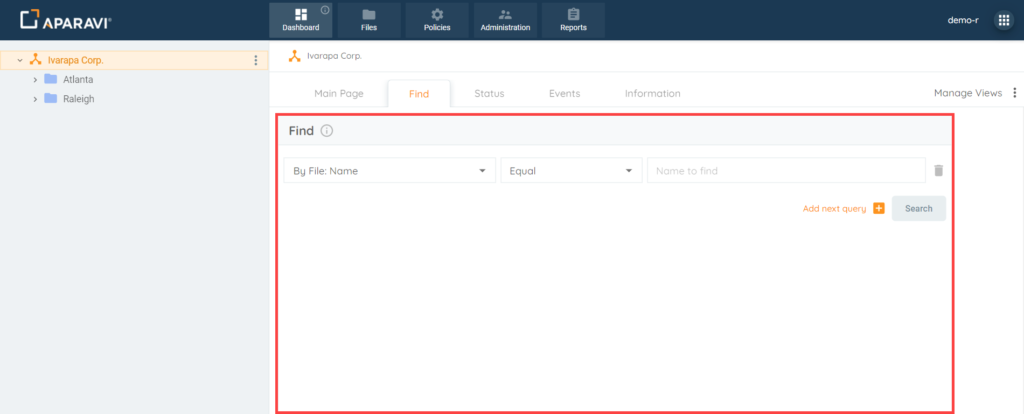
3. Click on the Find subtab, located under the Dashboard tab. Unless the Dashboard tab has already been altered, it is typically the second subtab.
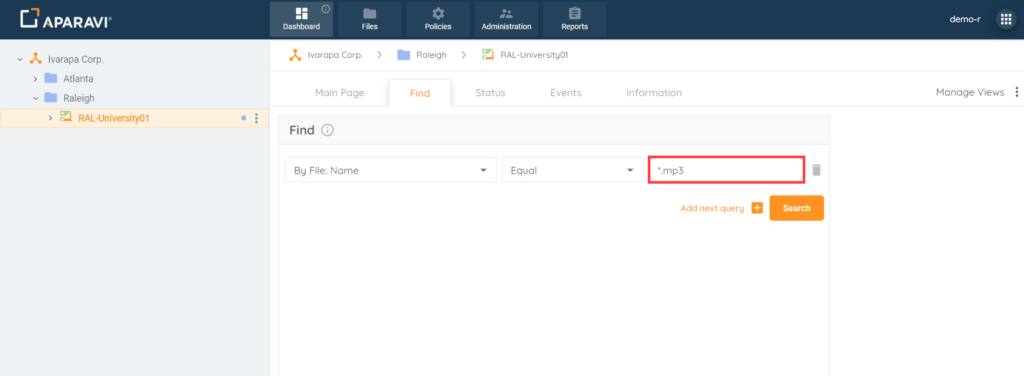
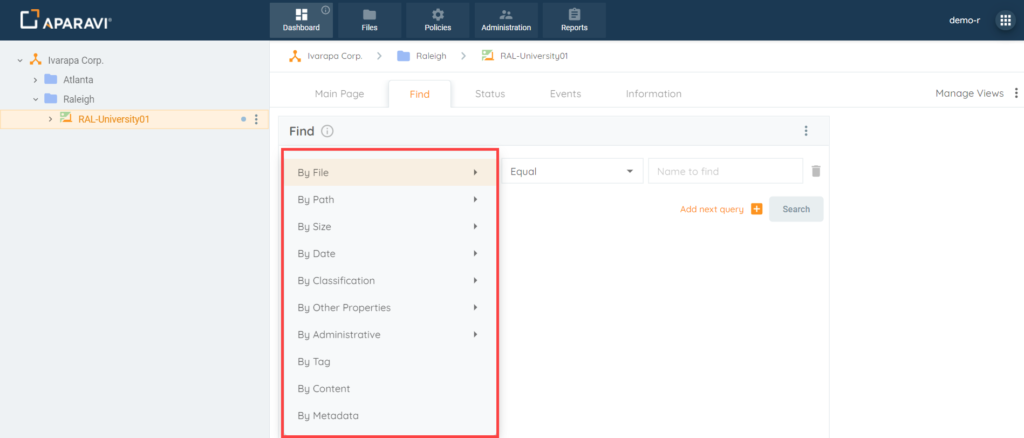
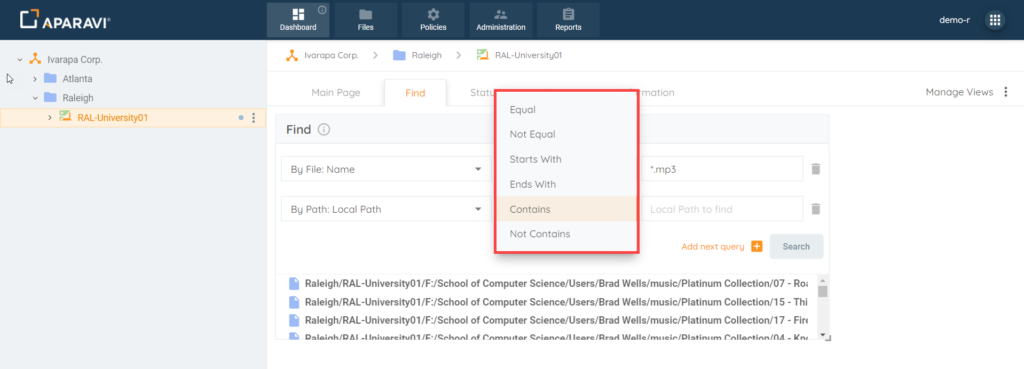
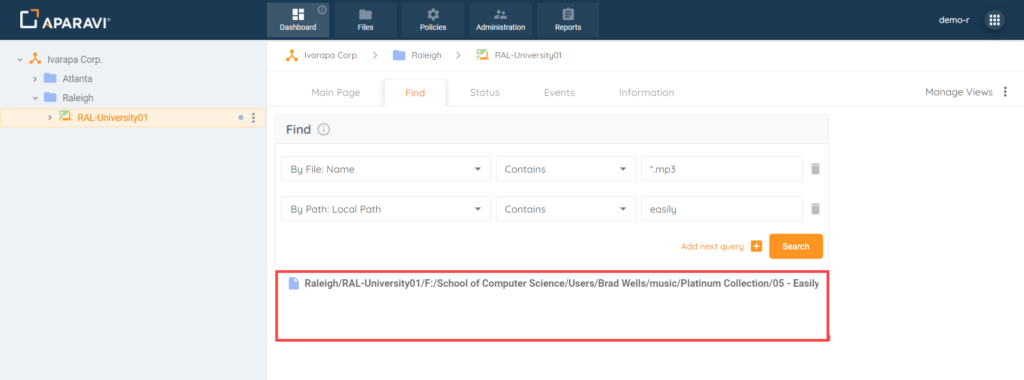
4. Click on the first search filter drop-down field and then click on one of the search options listed. Once the search filter is selected, the menu will disappear and the selection will appear inside the field.
Please Note: All filters that contain a side arrow icon, directly to the right of the filter’s name, indicates there are more options to choose from within that filter subject.

5. Click on the second search filter drop-down field and then click on one of the operators listed. Once the operator is selected, the menu will disappear and the selection will appear inside the field.
Please Note: This field is dynamic and offers different operators depending on the first search filter’s selection.

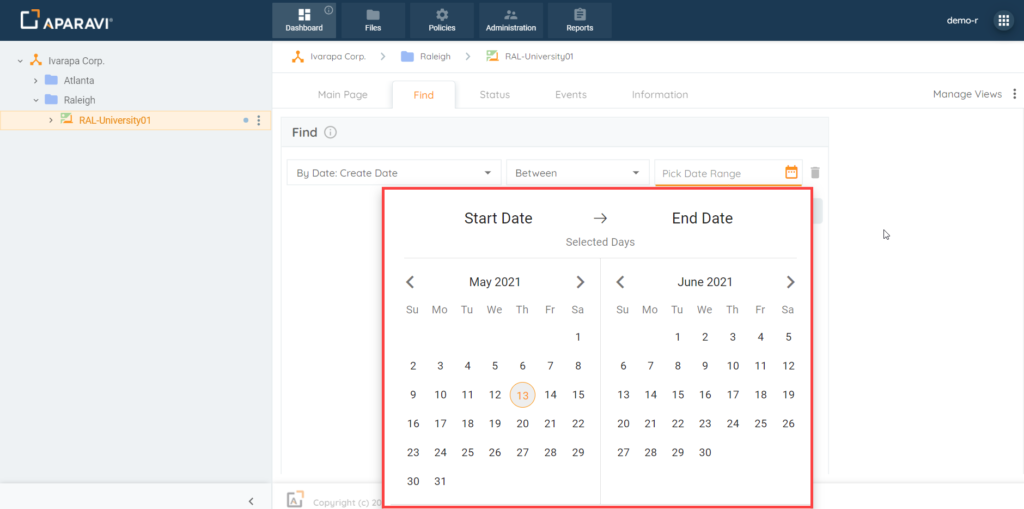
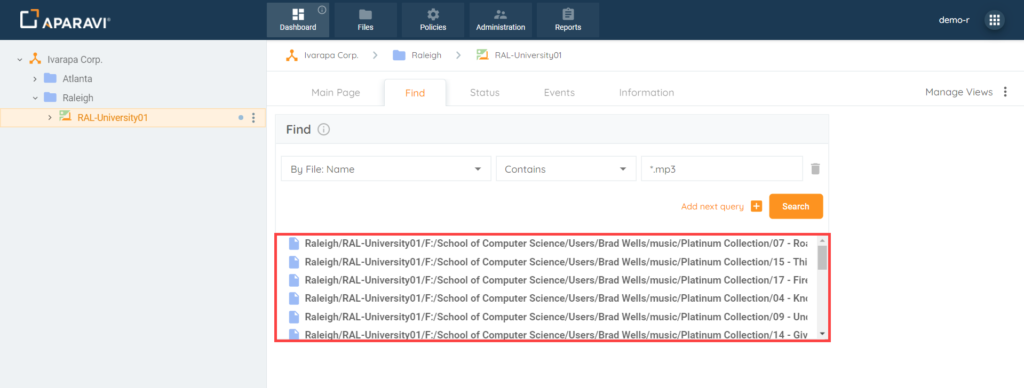
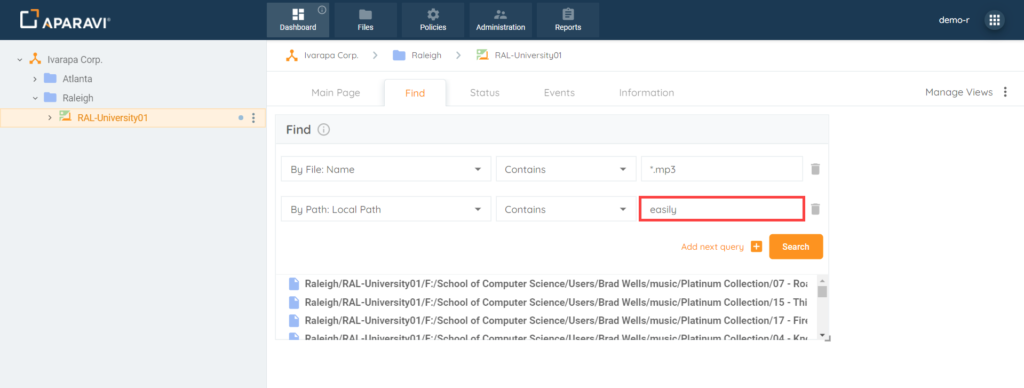
6. Click on the third field and enter the search criteria. This field will vary, depending on the selections of the first two drop-down fields. Once the information is entered or selected, it will appear inside of the field.
For Example: If searching for a File Name → Enter the keyword contained in file name.
For Example: If searching for a File by date → Field will become drop-down calendar to select a date range from.
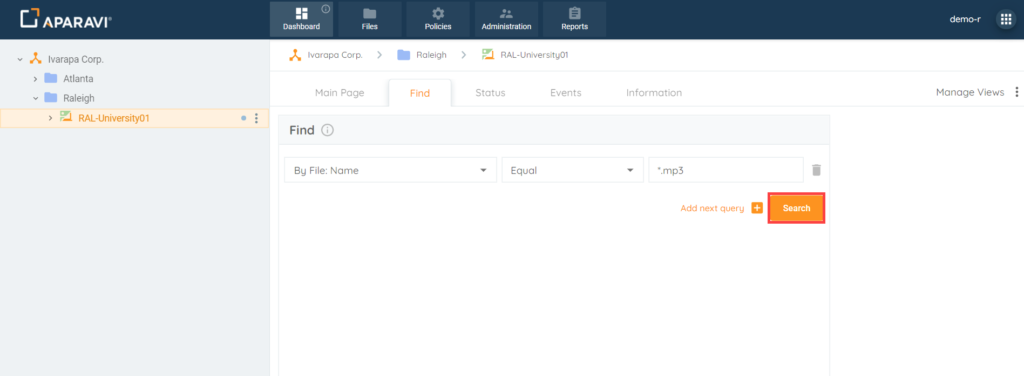
7. Once all search criteria has been properly entered into the search filter drop-down fields, click the Search button to preform the search.
8. The results of the search will display in the window, directly below the search filter fields.
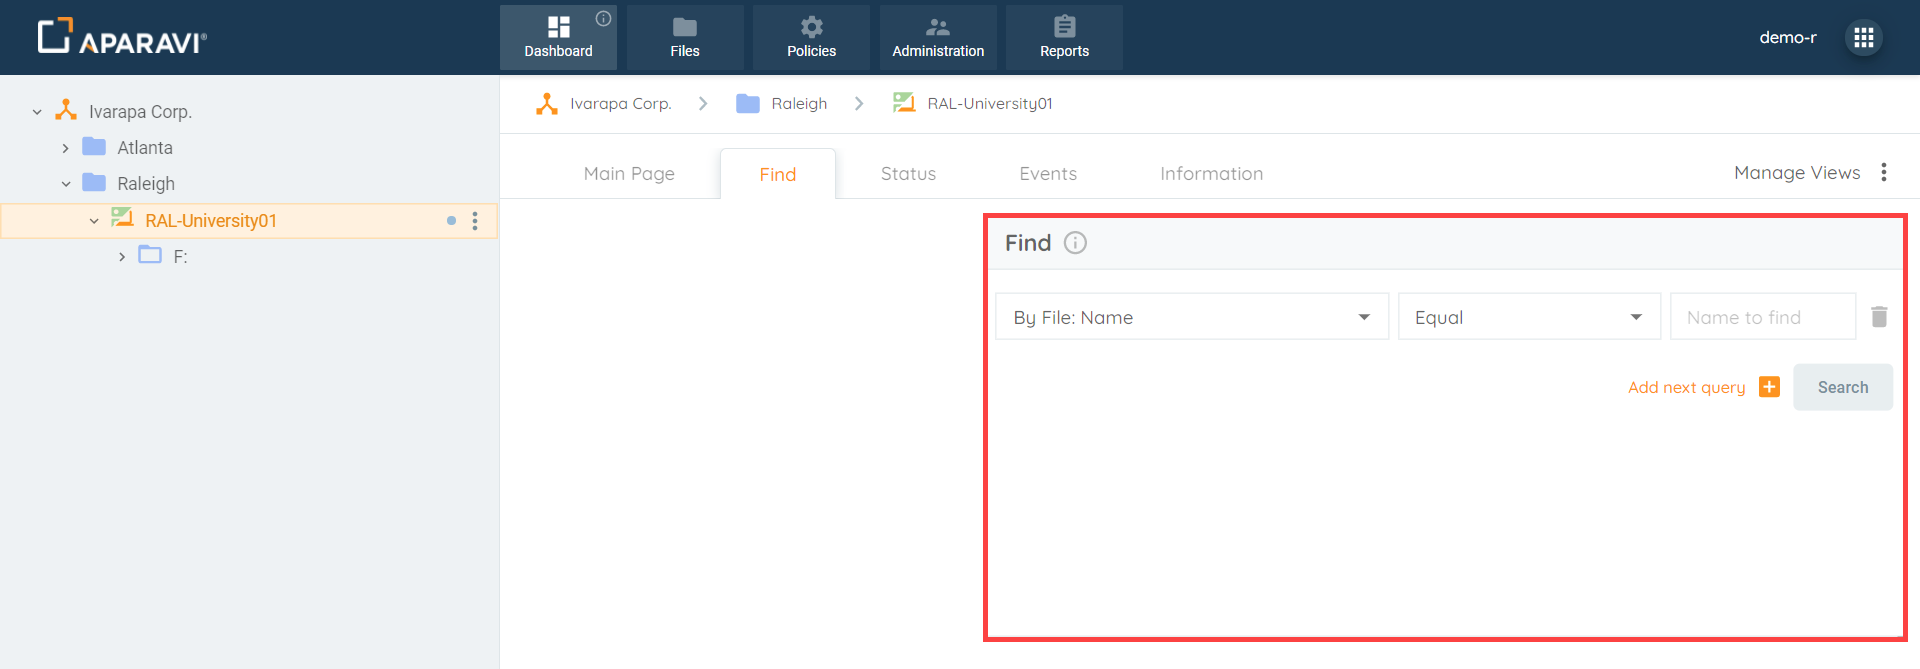
Nested Find Widget File Search
Once the first set of search criteria has been configured, another layer of search filters can be offered to drill down further for more precise searches.
1. Choose which node/folder to perform the search on, by clicking on it in the navigation tree, located on the left-hand side. Once selected, it will appear with a yellowish background color to indicate that it is selected.
Please Note: It is important to select the correct node/folder. The system will only search for files contained within that specific node/folder selected.

2. Click on the Dashboard tab in the top navigation menu. If not already located on this tab, the system will navigate to the Dashboard tab in the system.

3. Click on the Find subtab, located under the Dashboard tab. Unless the Dashboard tab has already been altered, it is typically the second subtab.

4. Click on the first search filter drop-down field and then click on one of the search options listed. Once the search filter is selected, the menu will disappear and the selection will appear inside the field.
Please Note: All filters that contain a side arrow icon, directly to the right of the filter’s name, indicates there are more options to choose from within that filter subject.
5. Click on the second search filter drop-down field and then click on one of the operators listed. Once the operator is selected, the menu will disappear and the selection will appear inside the field.
Please Note: This field is dynamic and offers different operators depending on the first search filter’s selection.

6. Click on the third field and enter the search criteria. This field will vary, depending on the selections of the first two drop-down fields. Once the information is entered or selected, it will appear inside of the field.

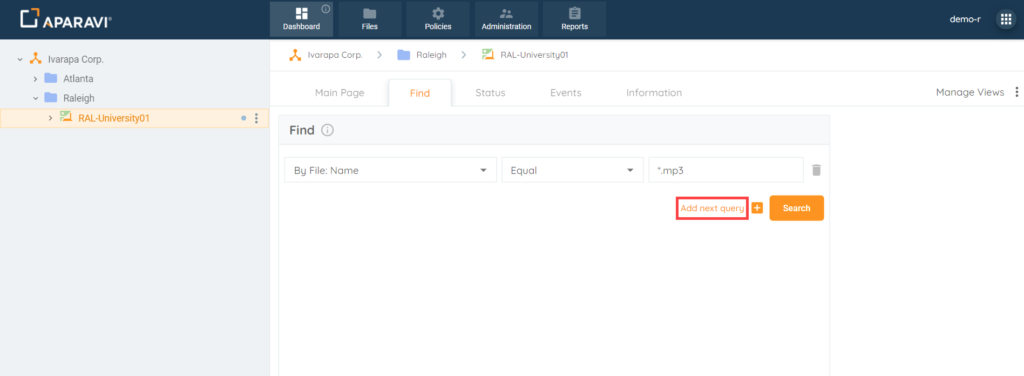
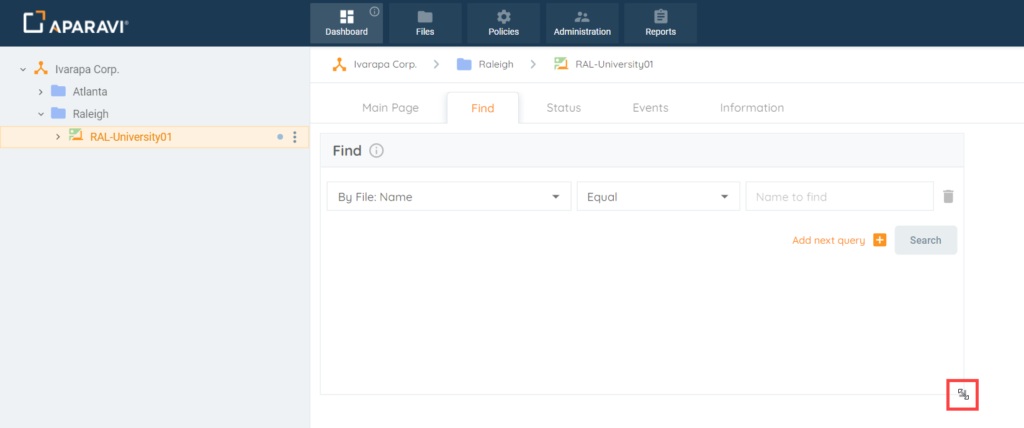
7. Click on the Add next query button, located just to the left of the Search button. Once clicked on another search field will display on the line below the last row of search fields the criteria was entered into previously.
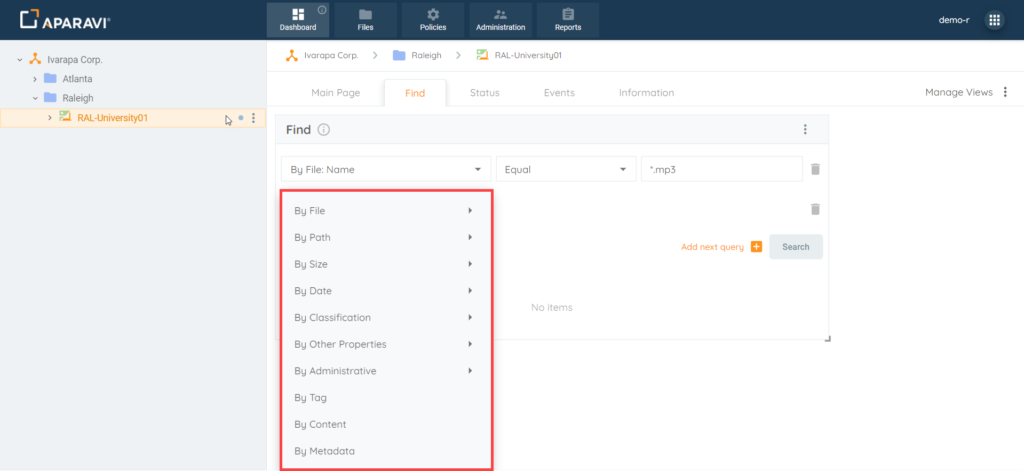
8. Click on the first search filter drop-down field and then click on one of the search options listed. Once the search filter is selected, the menu will disappear, the selection will appear inside the field, and the second and third search fields will become visible.
9. Click on the second search filter drop-down field and then click on one of the operators listed. Once the operator is selected, the menu will disappear and the selection will appear inside the field.
10. Click on the third field and enter the search criteria. This field will vary, depending on the selections of the first two drop-down fields. Once the information is entered or selected, it will appear inside of the field.
11. From this point, another layer of search filters can be applied by clicking the Add new query button and repeating the steps again, or if the search is completed, click on the Search button to view the file results.
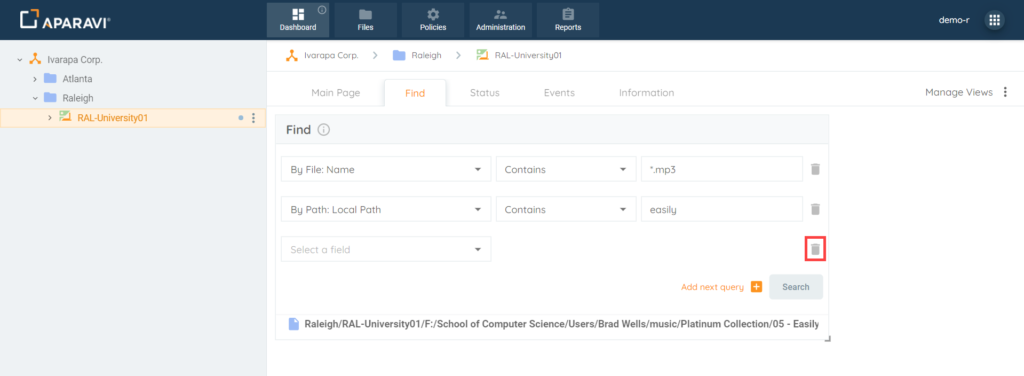
*Please Note: If at any point a row of search fields should be removed from the search, click the trash can icon located just to the right of the search field row and it will disappear automatically.
12. Once the Search button is clicked on, the files meeting the criteria will display in the window below the search filters.
Resizing & Relocating Find Widget on Find Subtab
The Find widget can be resized or relocated to another place on the Find subtab, if additional widgets are added to the subtab.
Resize
1. Click on the Dashboard Tab, located in the top navigation menu, and then click on the Find subtab.
2. Click on the Find widget and then click on the tiny arrow that appears in the very bottom right-hand side of the widget. When at the correct spot for resizing the mouse, will become a double-sided arrow to indicate it is ready for dragging.
3. If the widget should display larger on the screen, while clicking on the edge of the widget, drag the mouse away from the center of the widget until it changes into the appropriate size. Once the widget is the correct size, release the mouse and the widget will remain the new size.
4. If the widget should display smaller on the screen, while clicking on the edge of the widget, drag the mouse toward the center of the widget until it changes into the appropriate size. Once the widget is the correct size, release the mouse and the widget will remain the new size.
Relocating
1. If any additional widgets are added to the Find subtab, the Find widget can be relocated to another place on the subtab. Click on the Find widget (or any other widget) that needs to be relocated and while holding down the mouse, drag the widget to the new desired location and release the mouse.
2. Once the mouse has been released, the widget will appear in the new location of the Dashboard’s Find subtab.
Edit Find Widget Name
1. Choose which node/folder to perform the search on, by clicking on it in the navigation tree, located on the left-hand side. Once selected, it will appear with a yellowish background color to indicate that it is selected.

2. Click on the Dashboard tab in the top navigation menu. If not already located on this tab, the system will navigate to the Dashboard tab in the system.
3. Click on the Find subtab, located under the Dashboard tab. Unless the Dashboard tab has already been altered, it is typically the second subtab.
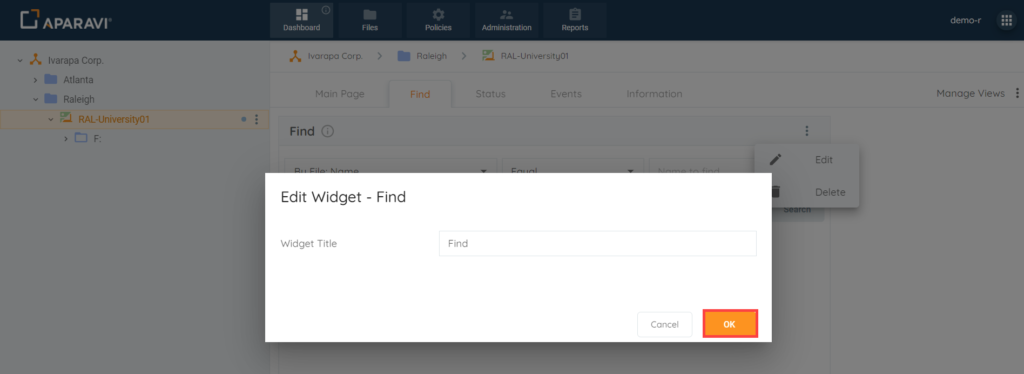
4. Hover over the Find widget on the Find subtab and click on the 3 vertical blue dots that appear in the very upper right-hand corner of the widget. Once the dots appear click on them and a drop-down menu will appear.
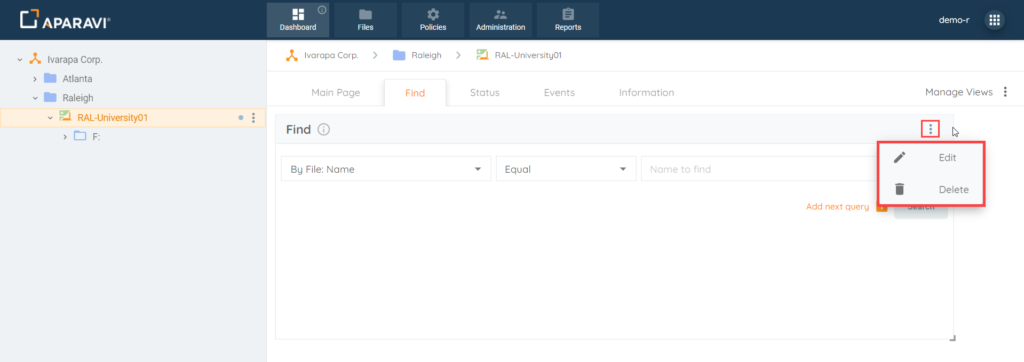
5. Click on the Edit option from the drop-down menu. Once clicked, the Edit Widget pop-up box will appear.
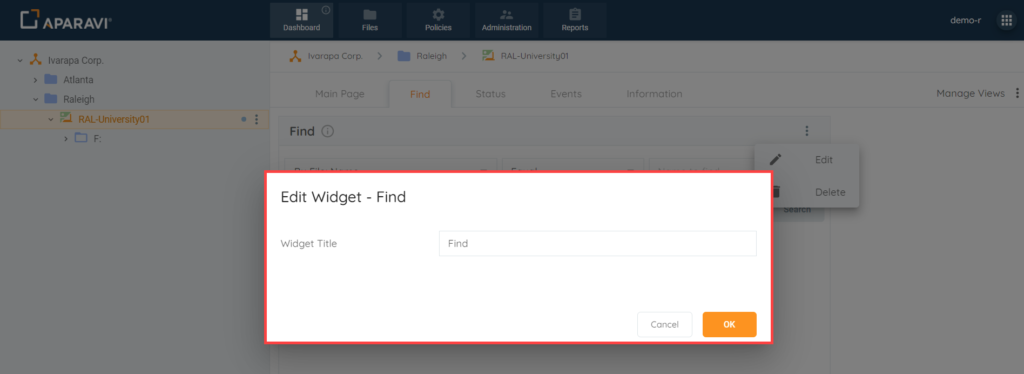
6. Enter the new name of widget into the Widget Title field and click the Ok button when completed.
Delete the Find Widget from the Find subtab
By default when a new node is installed, the Dashboard will offer the Find subtab and automatically preload the Find widget. At any point the Find widget can be deleted from the Find subtab by completing the steps below:
1. Choose which node/folder to perform the search on, by clicking on it in the navigation tree, located on the left-hand side. Once selected, it will appear with a yellowish background color to indicate that it is selected.
2. Click on the Dashboard tab in the top navigation menu. If not already located on this tab, the system will navigate to the Dashboard tab in the system.
3. Click on the Find subtab, located under the Dashboard tab. Unless the Dashboard tab has already been altered, it is typically the second subtab.
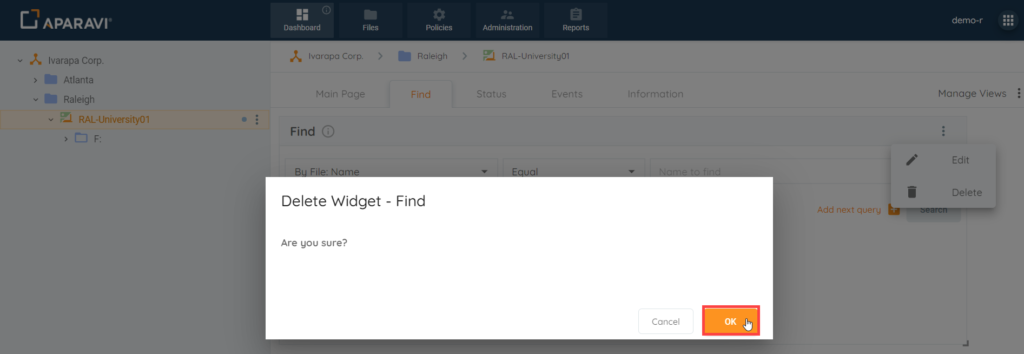
4. Hover over the Find widget on the Find subtab and click on the 3 vertical blue dots that appear in the very upper right-hand corner of the widget. Once the dots appear click on them and a drop-down menu will appear.
5. Click on the Delete option from the drop-down menu. Once clicked, the Delete Widget pop-up box will appear.
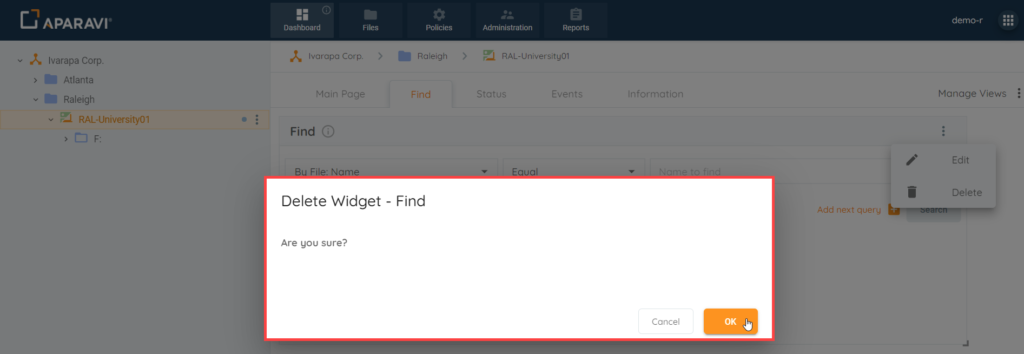
6. Click on the Ok button, located at the bottom right-hand side of the Delete Widget confirmation pop-up box. Once clicked, the Find widget will delete from the find subtab automatically.
Rename Find Subtab
The Find subtab can be renamed to reflect something more meaningful if desired.
1. Click on the Dashboard Tab, located in the top navigation menu, and then click on the Find subtab.
2. Click on the Manage Views button, located in the upper right-hand side. Once clicked on, a menu will expand with options to select from.

3. Click on the Rename Tab option from the menu that expands. Once clicked on, the Rename Tab pop-up box will appear.
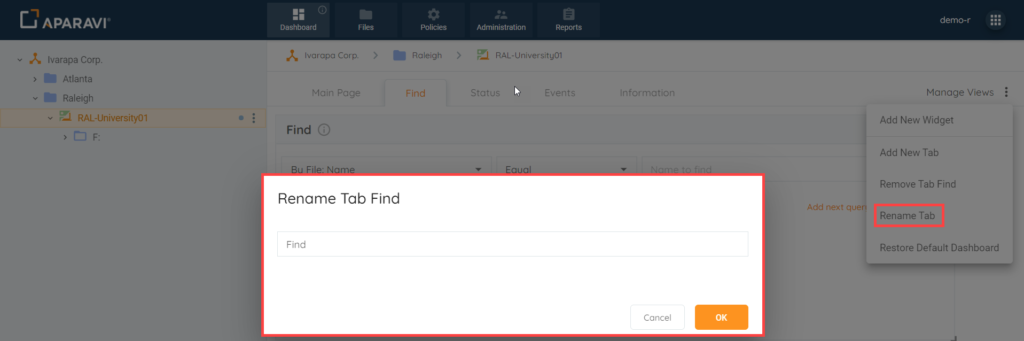
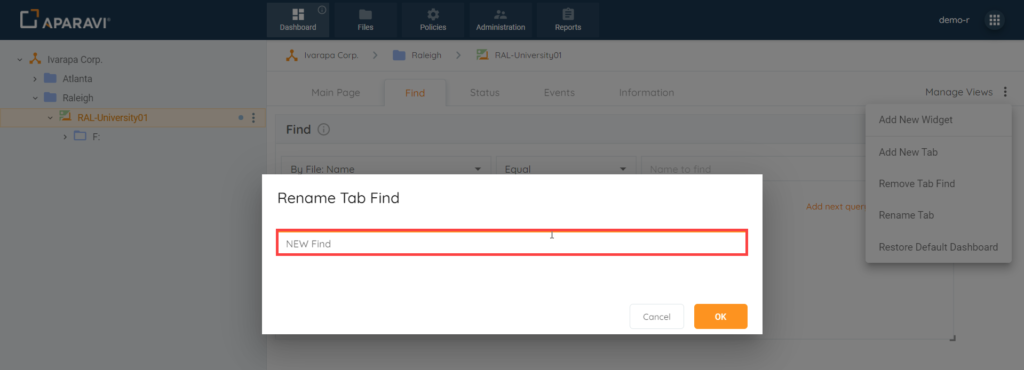
4. Type the new name of the tab into the text box, located inside of the Rename Tab pop-up box.
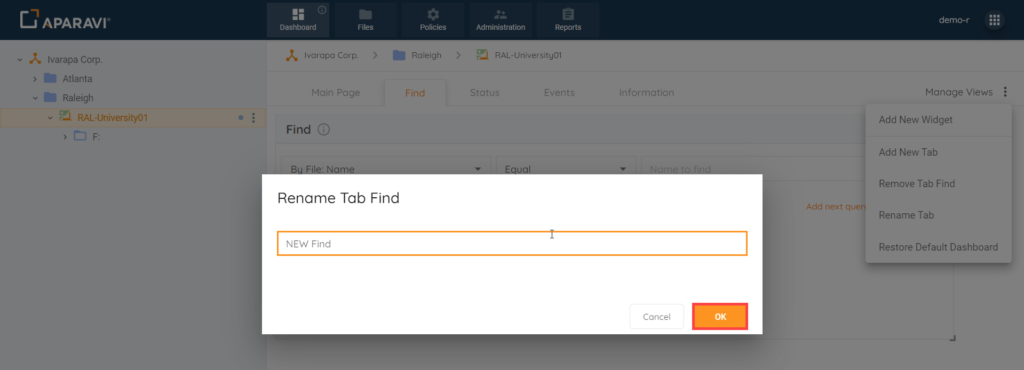
5. Once completed, click on the Ok button, located at the bottom right-hand side of the the Rename Tab pop-up box.
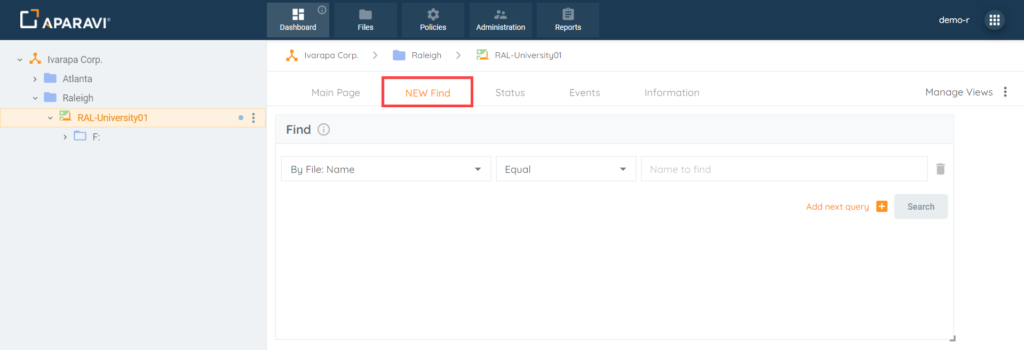
6. Once clicked on, the Find subtab will reflect the updated name automatically.
Remove Find Subtab
The Find subtab can be removed from the Dashboard Tab completely.
1. Click on the Dashboard Tab, located in the top navigation menu, and then click on the Find subtab.
2. Click on the Manage Views button, located in the upper right-hand side. Once clicked on, a menu will expand with options to select from.
3. Click on the Remove Tab option from the menu that expands. Once clicked on, the Remove Tab pop-up box will appear.
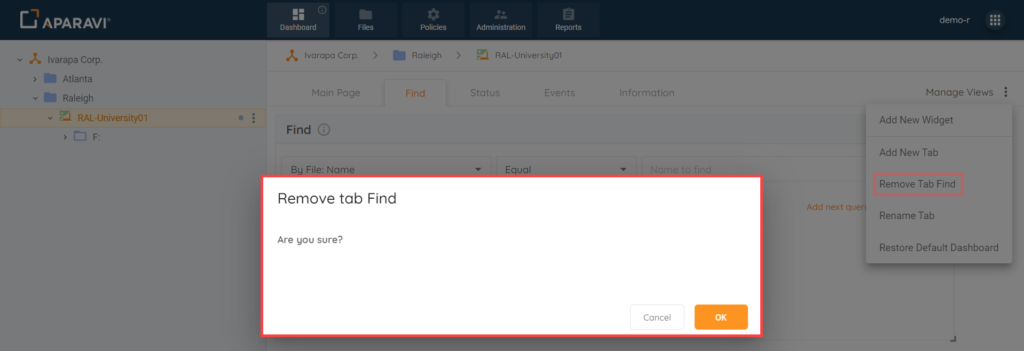
4. Click the Ok button, located in the bottom right-hand side of the the Remove Tab pop-up box.
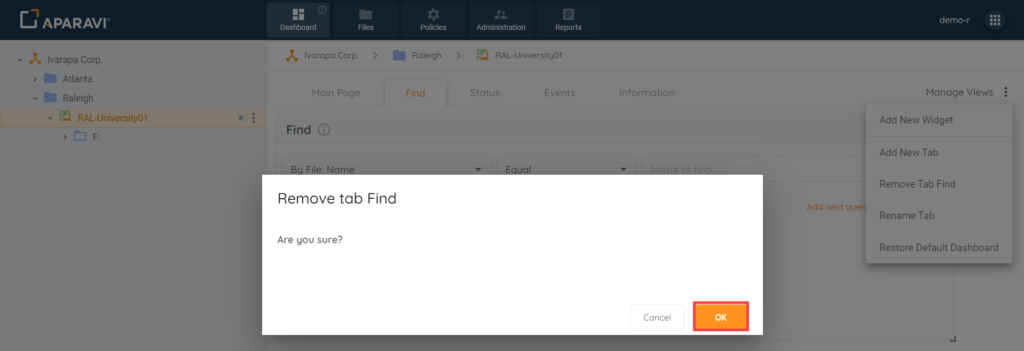
5. Once clicked on, the Find subtab will disappear from the Dashboard tab.
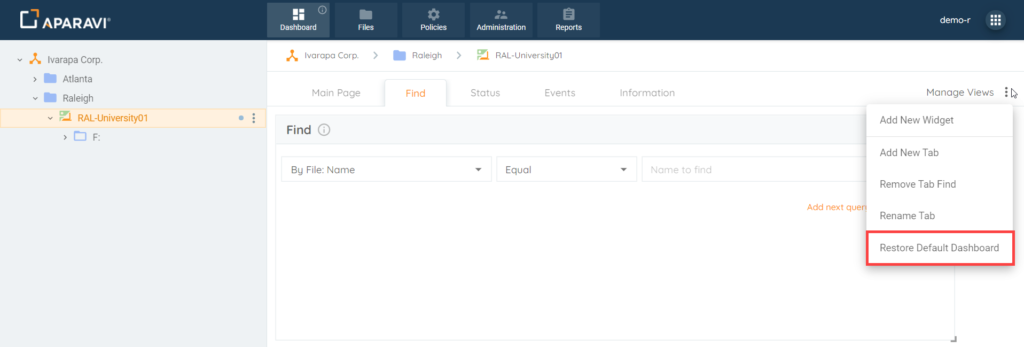
Restore Default Dashboard
If the Dashboard has been altered or deleted, it can restored to it’s original state upon installation of the node. When this option is selected, it will also restore the Find subtab to it’s original state as well.
1. Click on the Dashboard Tab, located in the top navigation menu.
2. Click on the Manage Views button, located in the upper right-hand side. Once clicked on, a menu will expand with options to select from.
3. Click on the Restore Default Dashboard option from the menu that appears.
4. The Restore default dashboard pop-up box will appear to confirm the restoration of the Dashboard.
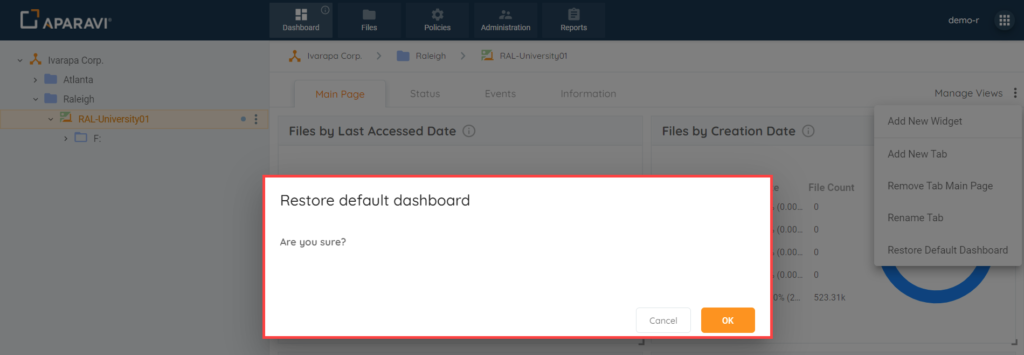
5. Click the Ok button, located in the bottom right-hand side of the the Restore default dashboard pop-up box.
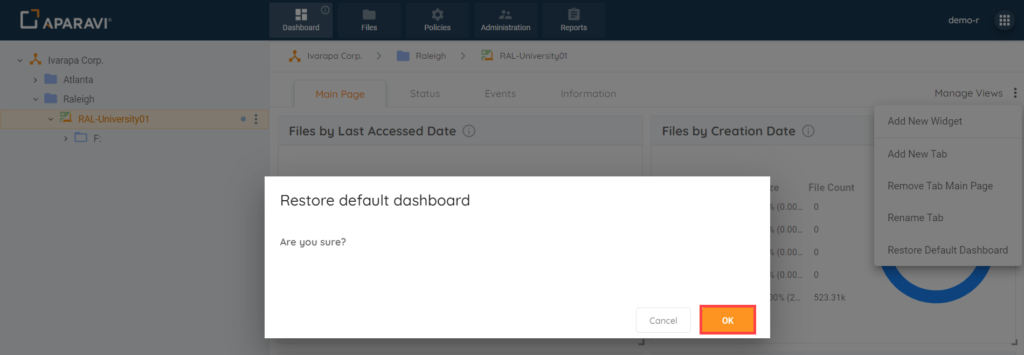
6. Once clicked on, the Find subtab will appear in its original form when the node was originally added.