How Can We Help?
Search for answers or browse our knowledge base.
Administration Users
Purpose
When the Aparavi system is installed, by default the system generates an Administrative account. This account is given all permissions that the system has to offer and also has the ability to add and remove other Aparavi user’s from the system. Administrative users are able to set up custom permissions for each user on the system and can precisely allow access to only nodes that the Administrative account allows.
Overview
- Adding a User
- Editing a User
- Deleting a User
Adding a User
The original administrative user account or any other accounts that have been created that have been given administrative privileges, are able to add new users to the Aparavi system.
1. Choose the Organization, by clicking on it in the navigation tree, located on the left-hand side. Once selected, it will appear with a yellowish background color to indicate that it is selected.
Please Note: It is important that the Organization Node is selected and the user has Administrative privileges or the Users option will not be available.

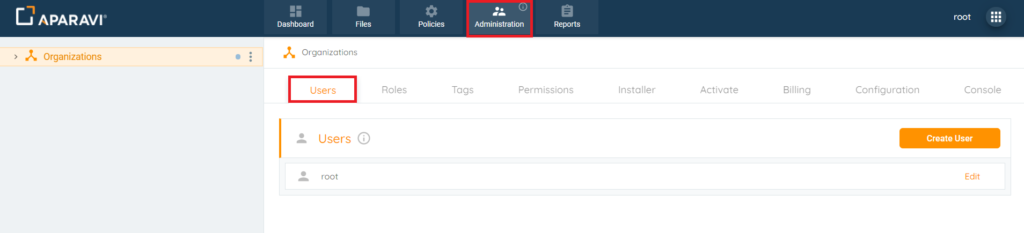
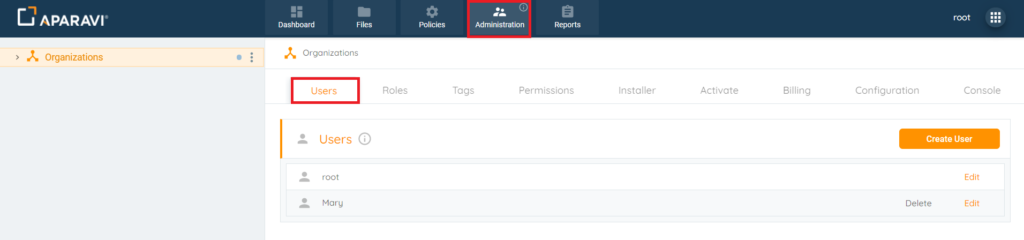
2. Click on the Administrative Tab, located in the top navigation menu and then click on the Users subtab.
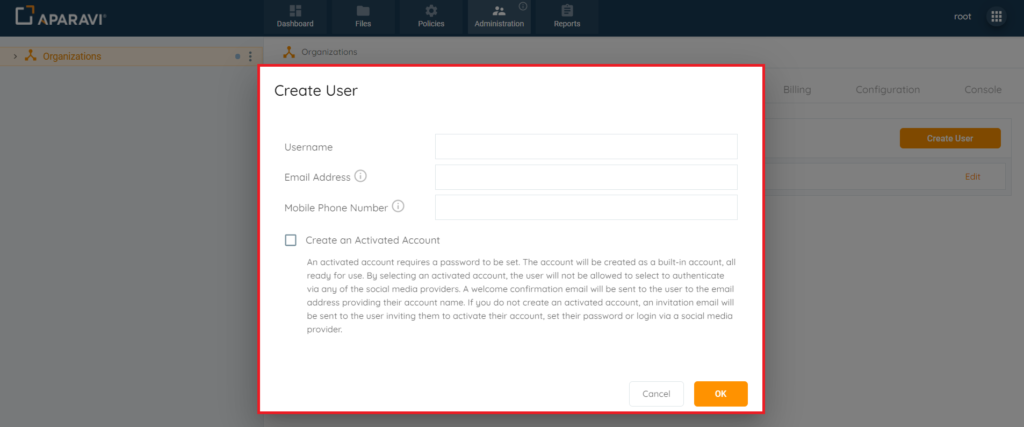
3. Click on the Create User button, located in the upper right-hand corner. Once clicked on, the Create User pop-up box will appear.
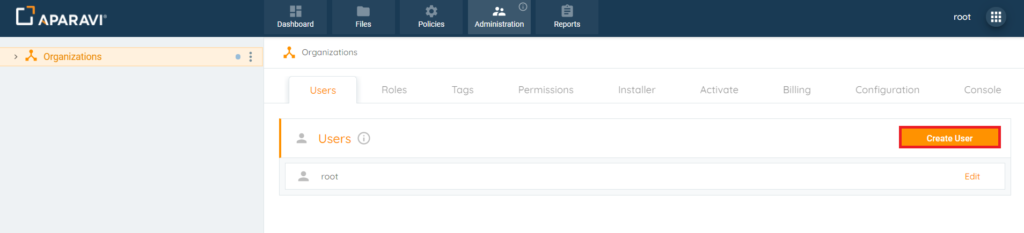
4. Once the Create User pop-up box appears, the system provides several options for setting up a new user account.
Username: Required Field that new user will input when logging into the system
Email Address: Optional only if phone number is provided*
Mobile Phone Number: Optional only if email address is provided*
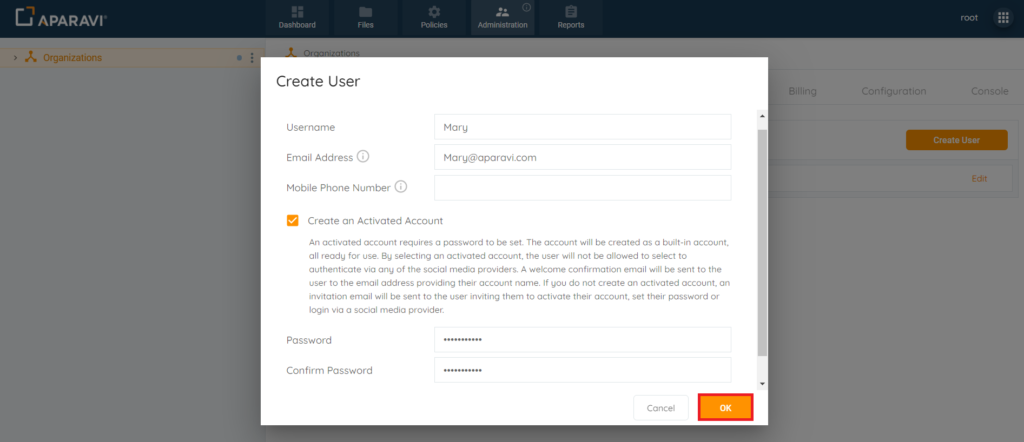
Create an Activate Account (Checkbox): An activated account requires a password to be set. The account will be created ready to use, when the password is given to the new user. By selecting an activated account, the user will not be allowed to select to authenticate via any of the social media providers. A welcome confirmation email will be sent to the user to the email address providing their account name. If you do not create an activated account, an invitation email will be sent to the user inviting them to activate their account, set their password or login via a social media provider.
*If the Create an Active Account checkbox is left unchecked, when the account is created, the newly created user will need to set up their password via invitation from the system. The invitation to set up their password will be sent to their email address or mobile phone number provided, depending on which field the information was entered into.
5. Once all selections have been made, click on the Ok button, located in the bottom right-hand side of the Create User pop-up box to create the account.
6. Once the Ok button has been clicked, the Create User pop-up box will close and the newly added user will appear under the Users subtab. Also, an alert will display in the bottom left-hand corner of the screen, to indicate that the user has been successfully created.
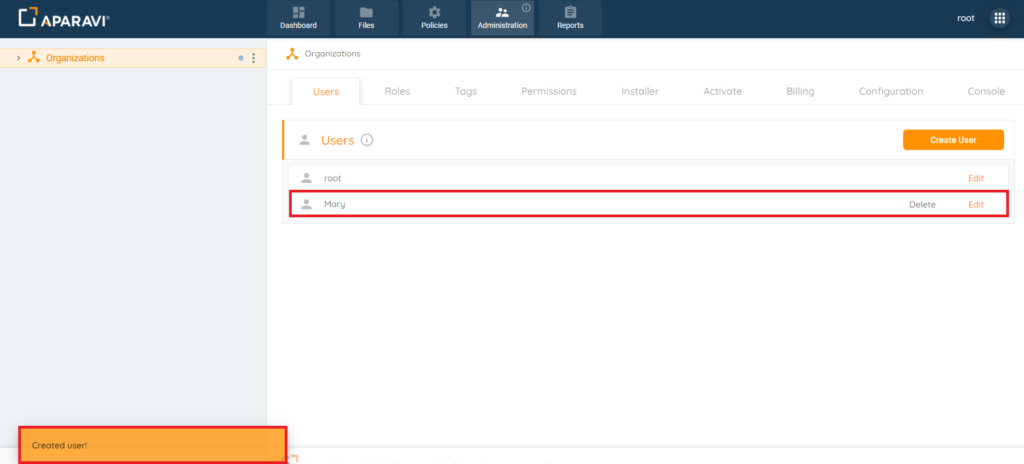
Please Note: all new users will automatically be assigned the role of “Everyone.” This role will allow access to all functions except for the Administration tab or any features within it. If a change is needed, the role can be updated.
Editing a User
Once a user account has been created, it can also be edited to reflect new options such as adding new permissions to the user, changing the password and many more features.
1. Choose the Organization, by clicking on it in the navigation tree, located on the left-hand side. Once selected, it will appear with a yellowish background color to indicate that it is selected.
Please Note: It is important that the Organization Node is selected and the user has Administrative privileges or the Users option will not be available.

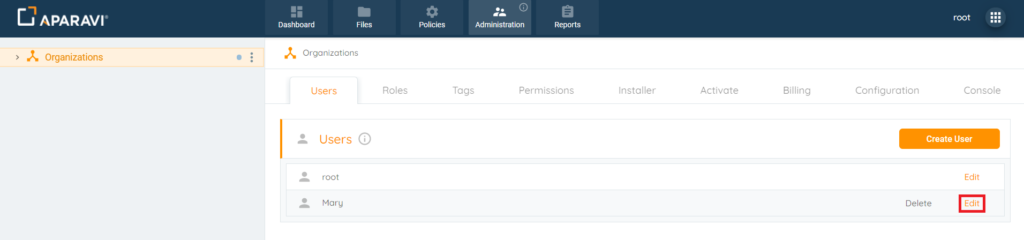
2. Click on the Administrative Tab, located in the top navigation menu and then click on the Users subtab.

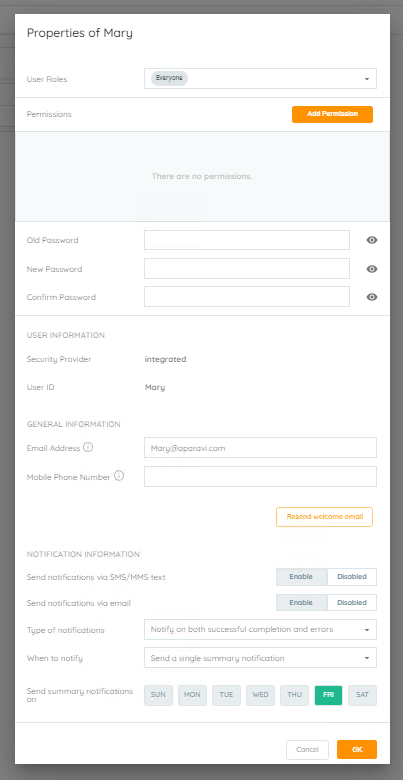
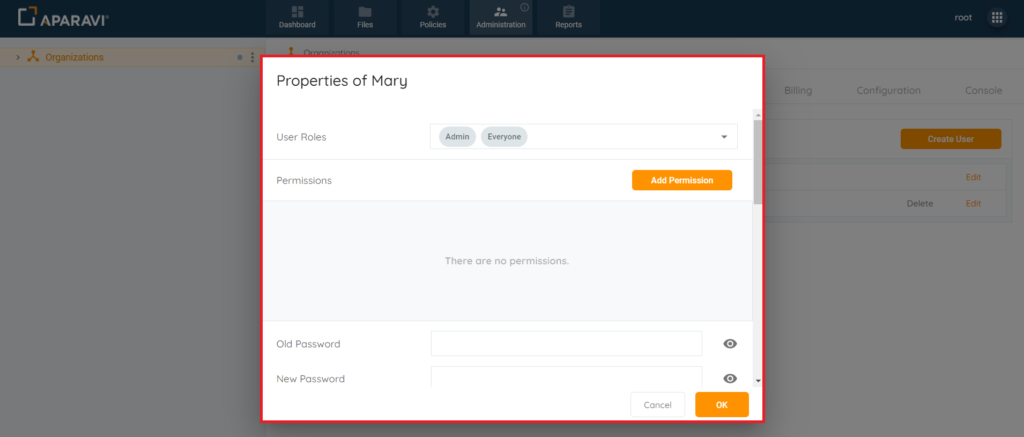
3. Click on the Edit button, located to the right-hand side of the User’s name. Once clicked on, the Properties of [Name of User] pop-up box will appear.
4. Make the changes inside of the Properties of [Name of User] pop-up box and then click on the Ok but to save the changes.
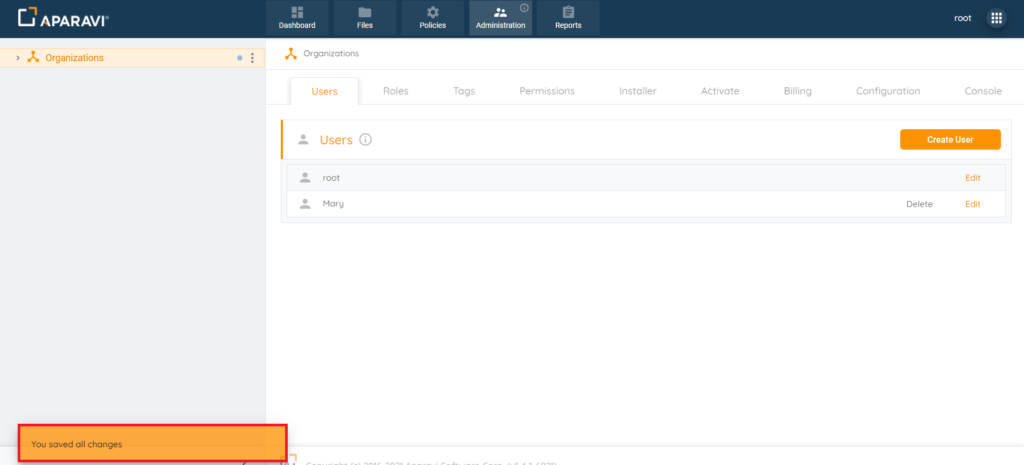
5. Once the Ok button has been clicked, the Properties of [Name of User] pop-up box will close and the new changes will take effect for the account. Also, an alert will appear in the bottom left-hand corner to indicate that the changes have been applied.
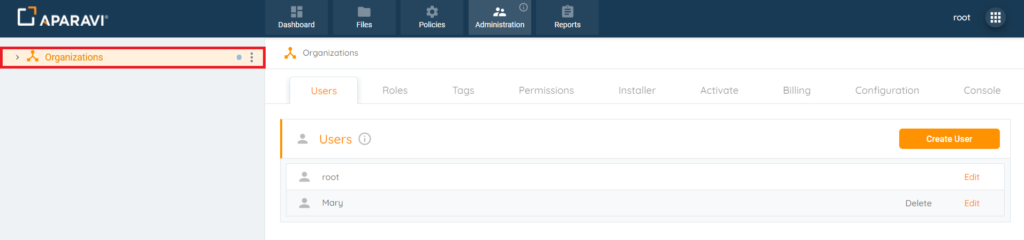
6. Click on the Edit button, located just to the right-hand side of the User’s name to view the updated changes.
Deleting a User
Once a user account has been created, it can also be deleted. Once a user account has been deleted, the user will no longer be able to access the Aparavi system.
1. Choose the Organization, by clicking on it in the navigation tree, located on the left-hand side. Once selected, it will appear with a yellowish background color to indicate that it is selected.
Please Note: It is important that the Organization Node is selected and the user has Administrative privileges or the Users option will not be available.
2. Click on the Administrative Tab, located in the top navigation menu and then click on the Users subtab.
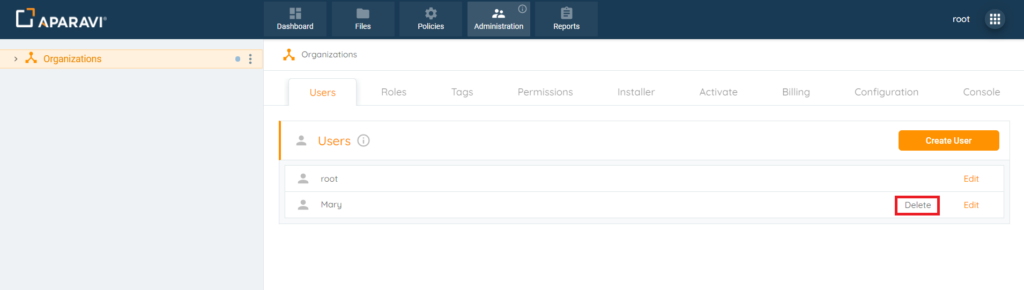
3. Click on the Delete button, located to the right-hand side of the User’s name. Once clicked on, the Delete User pop-up box will appear.
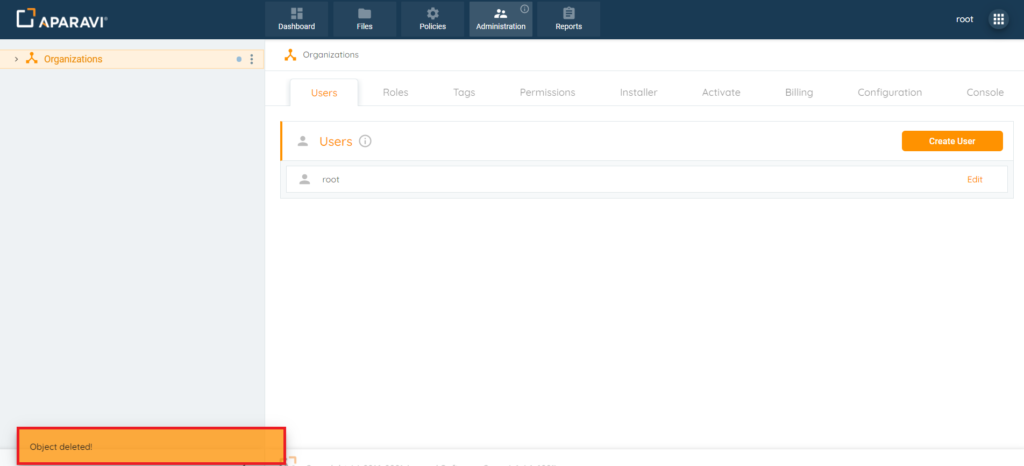
4. Inside of the Delete pop-up box, click on the Delete button, located in the bottom right-hand side.
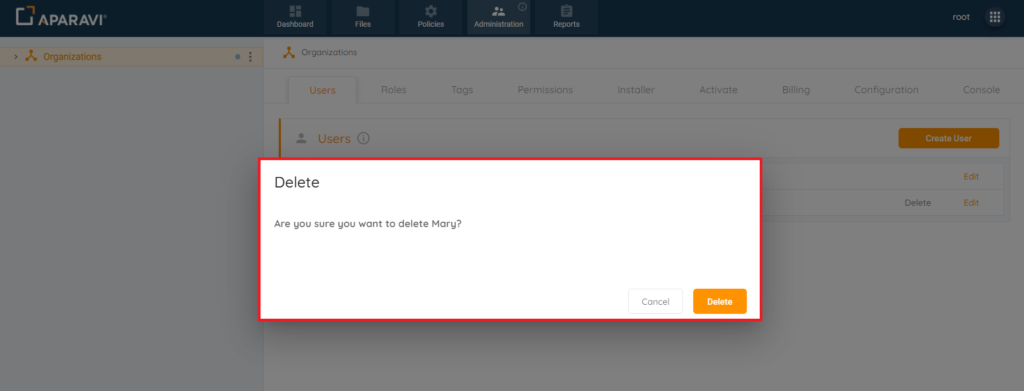
5. Once clicked on, the Delete pop-up box will disappear, and the user will disappear from the Users subtab.