How Can We Help?
Search for answers or browse our knowledge base.
Collector Install
Purpose
Collectors serve as the collection point for all your data. Deploying a standalone Collector will also require deploying at least one Aggregator prior to collector installation. The Aparavi platform requires at least one of each component or a hybrid Aggregator-Collector to collect data from your infrastructure. All data collected from your sources will remain on the Aggregator and is not transferred to the Aparavi platform itself.
Usage
Install requirements
- Supported OS – see Supported Platforms for the currently available options
- CPU – 4 cores minimum, 8 cores recommended for more parallel tasks
- RAM – 32GB if quick scanning only, 64GB recommended if indexing and classifying
- Disk – 150GB minimum free space
Please Note: Virtual memory must be enabled on the host where the Aggregator-Collector Hybrid is running. To make the engine more stable in terms of memory usage, turn on memory paging on the system where the engine runs. If the engine runs out of free memory in the system, it will begin using disk space as memory storage.
Install process
- Once the Windows or Linux server that will be used as the Collector has been prepared, open the Aparavi portal within the designated server to begin the deployment process.
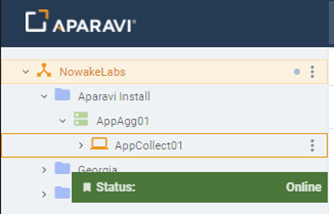
- Using the tree on the left panel, navigate to the Aggregator that you want to to use for the Collector to connect.
- Click on that level object to bring up the menu, scroll down to and click + Add Object. The sub-menu should appear with multiple: Add Aggregator Group, Add Collector and Add Worker.

- Select Add Collector. The Add Collector modal will appear. At this point you can fill in the required information.
- Collector Name – the name for the collector within the Aparavi portal
- Platform – Windows or Linux
- Connect To – hostname or IP of the Aggregator used for the Collector to connect
- App Program Folder – location for the install (Windows only)
- App Data Folder – location for the user data
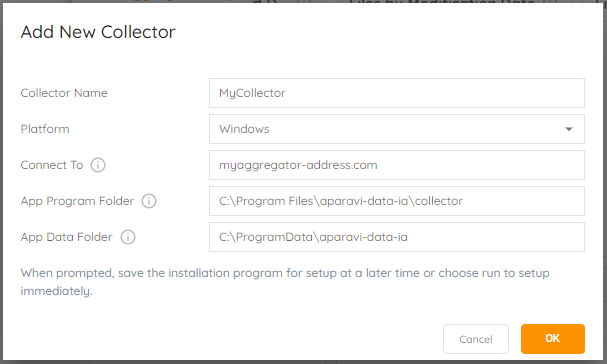
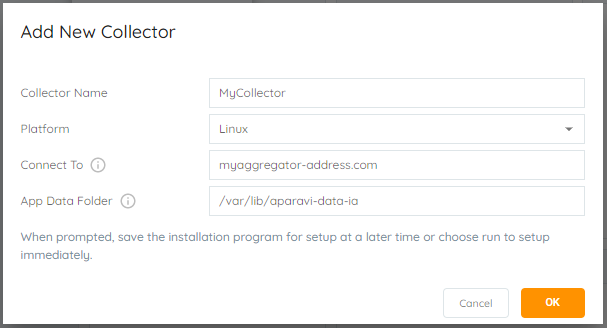
- Select the OK button once all required information has been entered. This will initiate the Collector installer download locally.

Windows installs
- If the installer was not downloaded on the server designated as the Collector, the installation file will need to be copied to the designated Collector server. Launch the installer to proceed with the Collector installation. The installer will extract, and the installation is completely automated.
Linux installs
- When download completes, select the option to save the downloaded file, which will place the file in the current user’s Download directory. Open a terminal and set the default location to the Download directory, in most cases using this command:
cd ~/Downloads
- The downloaded filename will include the Aggregator as named with the version number and a .run file extension. The file must be set executable in order to launch the installation. Using an example filename, here is the command to set the file executable:
chmod a+x install-AppAggLinux-2.0.0-6376.run
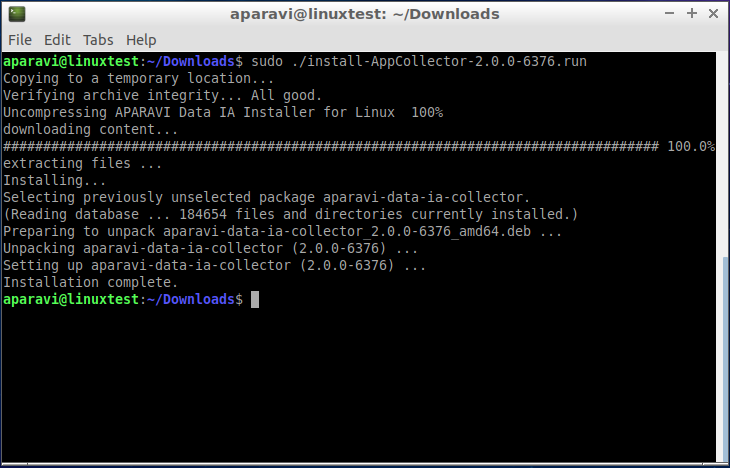
- The installation can now be started and must be run either while logged in a root or by using the sudo command. Here is an example of the latter case:
sudo ./install-AppAggLinux-2.0.0-6376.run
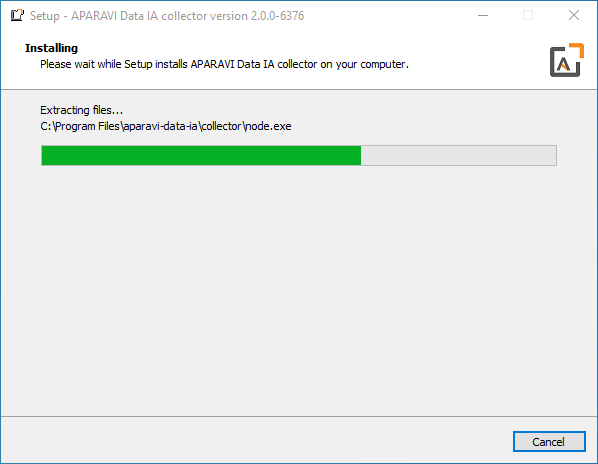
- The installation will run, showing progress during the process until complete, with no further user action needed, as shown:
Install complete
- Once the installation is complete, the Aparavi Data IA Collector service will automatically start. Within the portal interface, the new deployed collector will automatically come online and is now ready for service.