How Can We Help?
Search for answers or browse our knowledge base.
Dashboard Information Subtab
Purpose
Located on the last subtab under the Dashboard tab, the Information subtab will provide system specifications on the node selected, as well as the local host information that the files are scanning from.
*Please note: Ensure that the proper node is selected since different nodes may have different dashboards entirely.
Overview
- System Information Widget
- Add, Edit & Delete Widgets to Information Subtab
- Resizing & Relocating Information Widget on Information Subtab
- Edit System Information Widget Name
- Delete System Information Widget from the Information subtab
- Rename Information Subtab
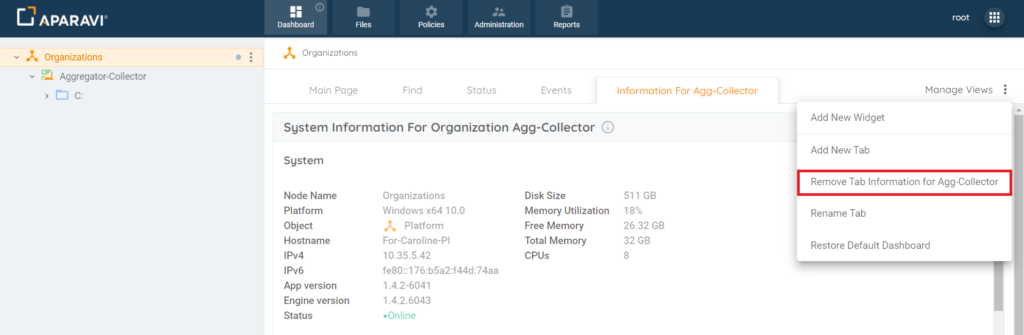
- Remove Information Subtab
- Restore Default Dashboard
System Information Widget
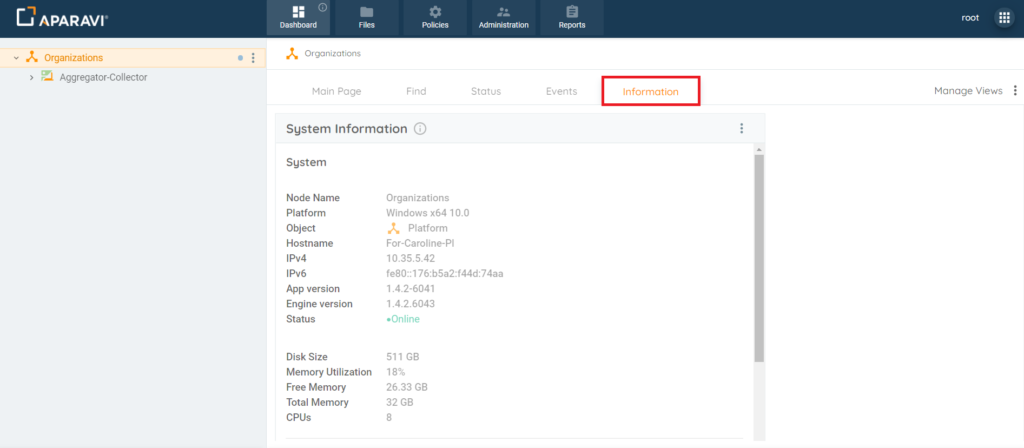
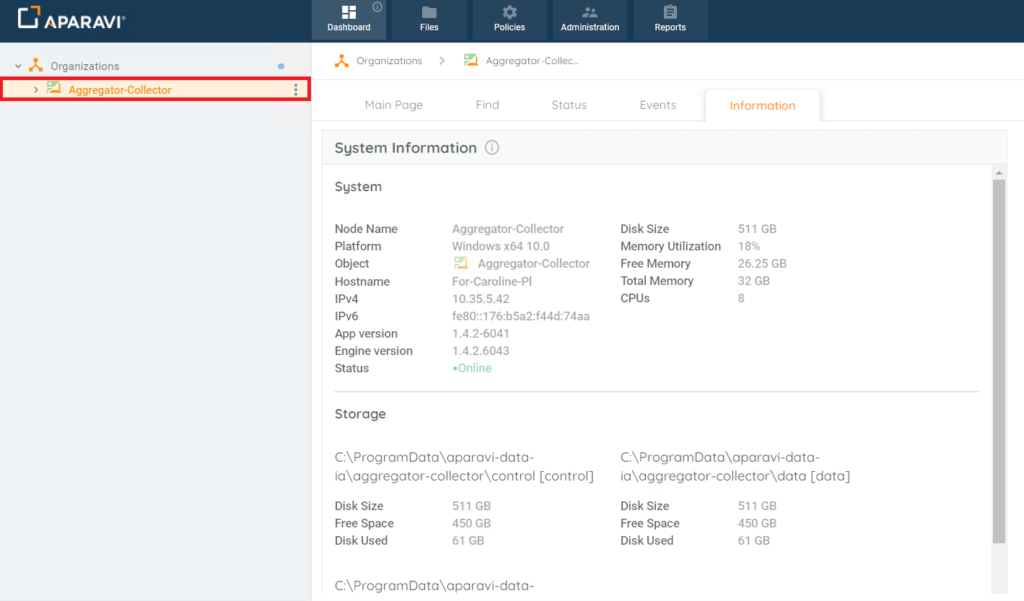
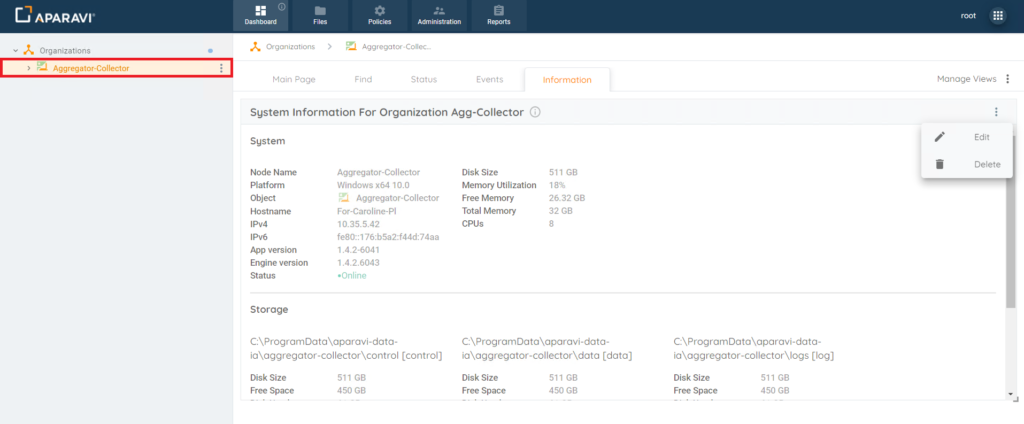
1. Choose which node to view the system information about by clicking on the node in the navigation tree, located on the left-hand side of the screen. Once the node is selected, it will highlight in a yellowish background to indicate that it is selected.
Please Note: It is important to select the correct node. The system will only display the system information for that specific node selected.

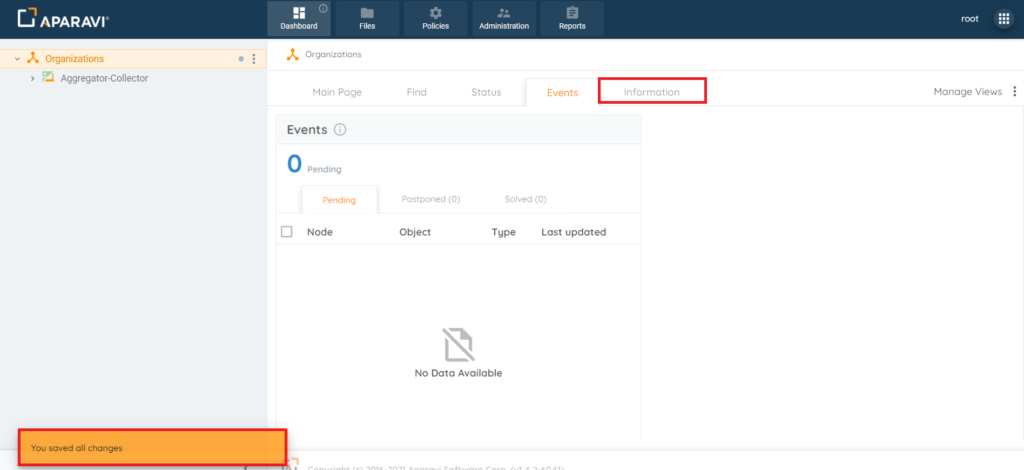
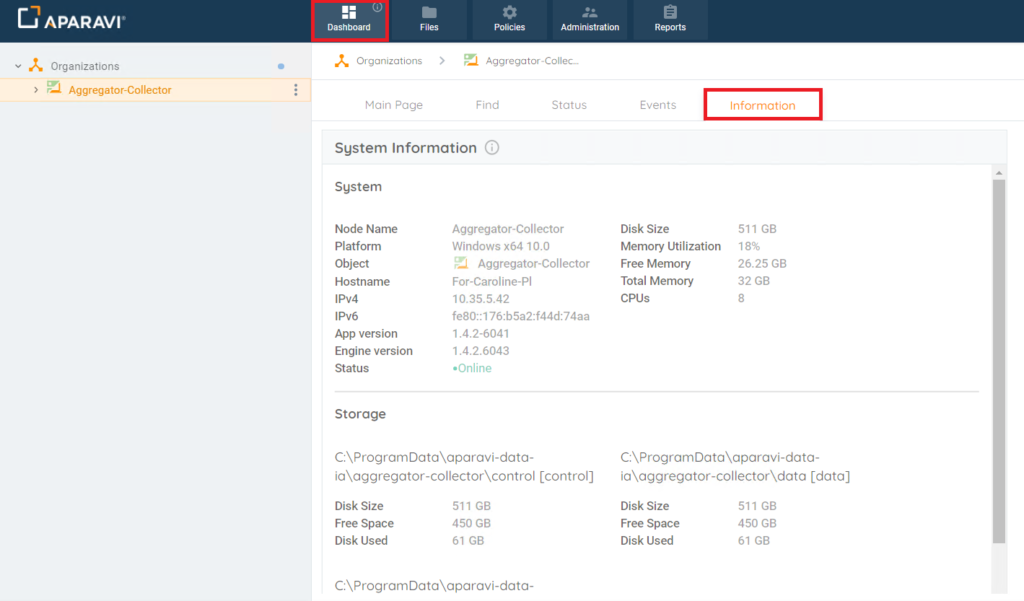
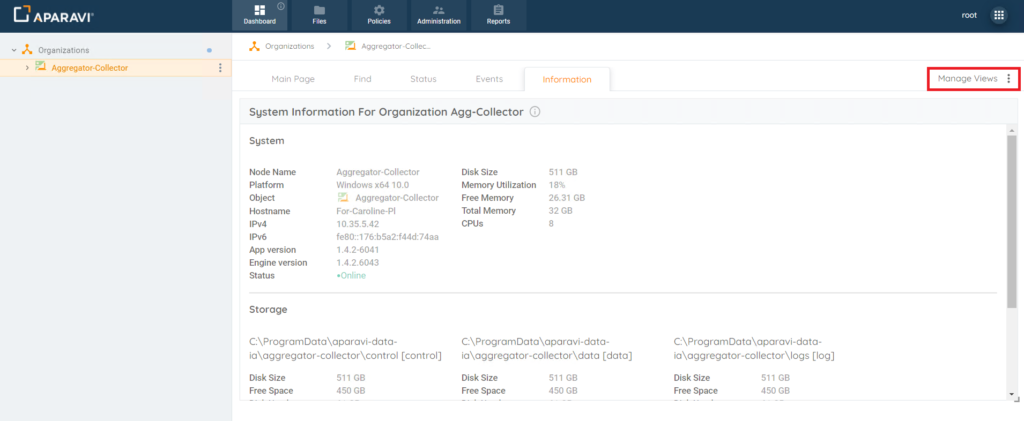
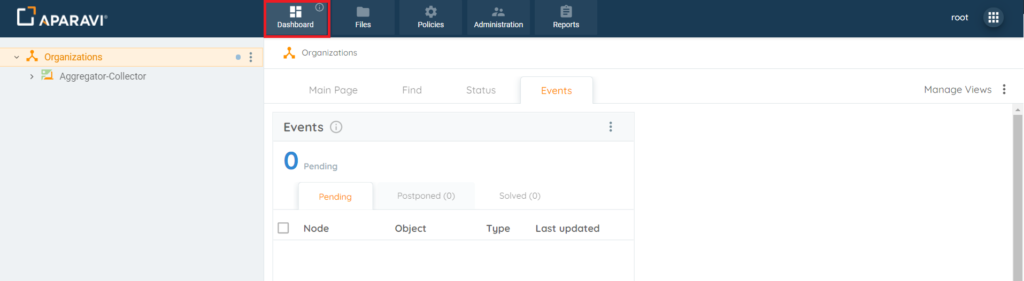
2. Click on the Dashboard Tab, located in the top navigation menu, and then click on the Information subtab.

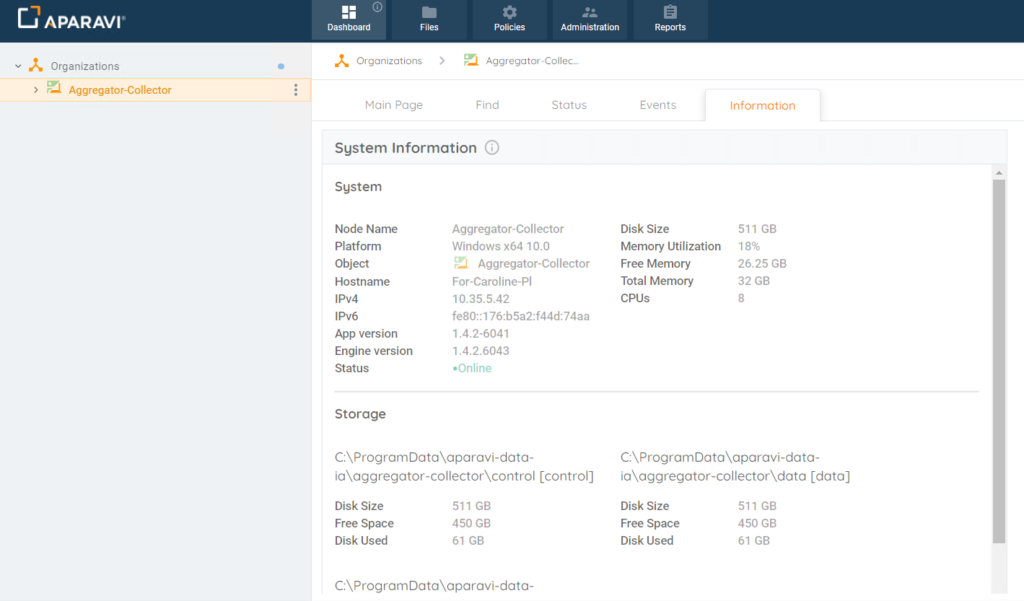
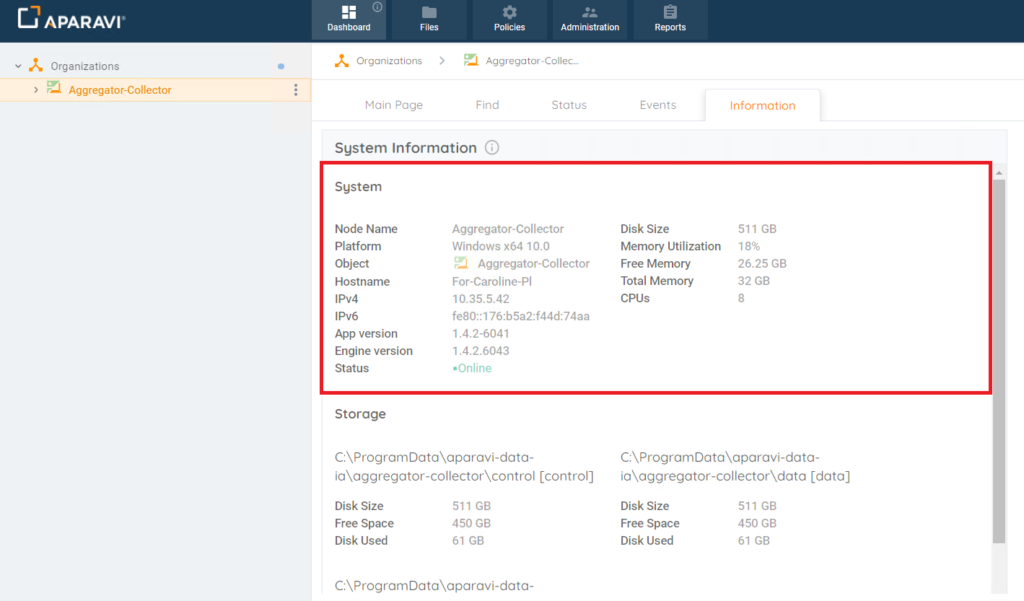
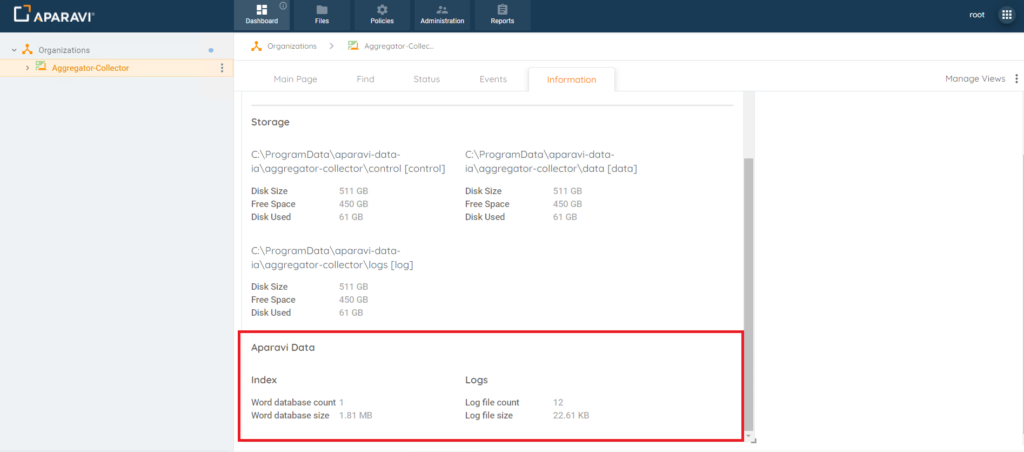
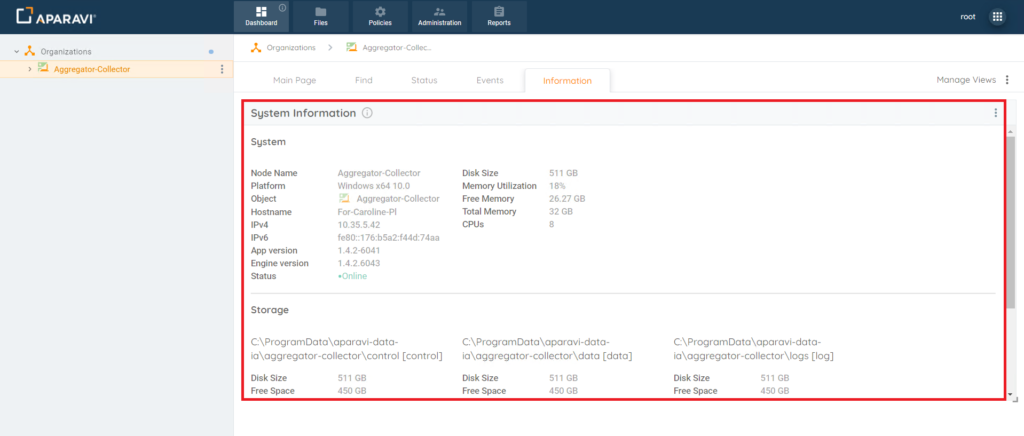
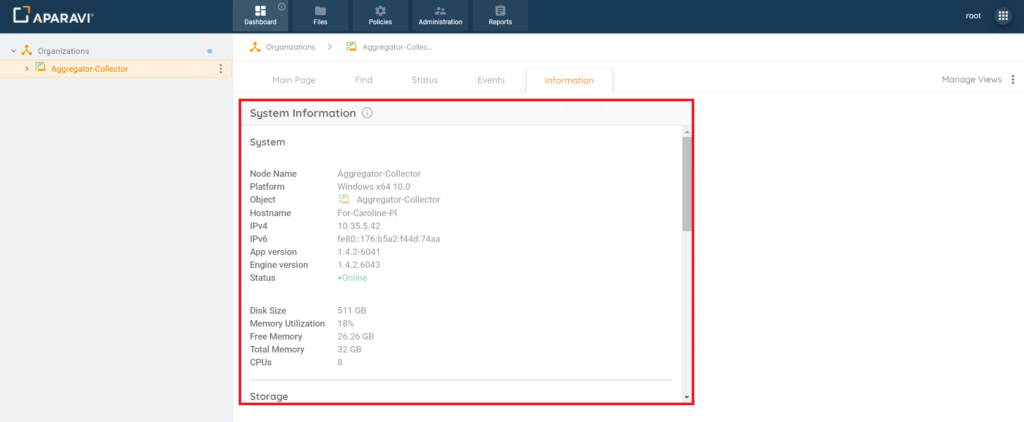
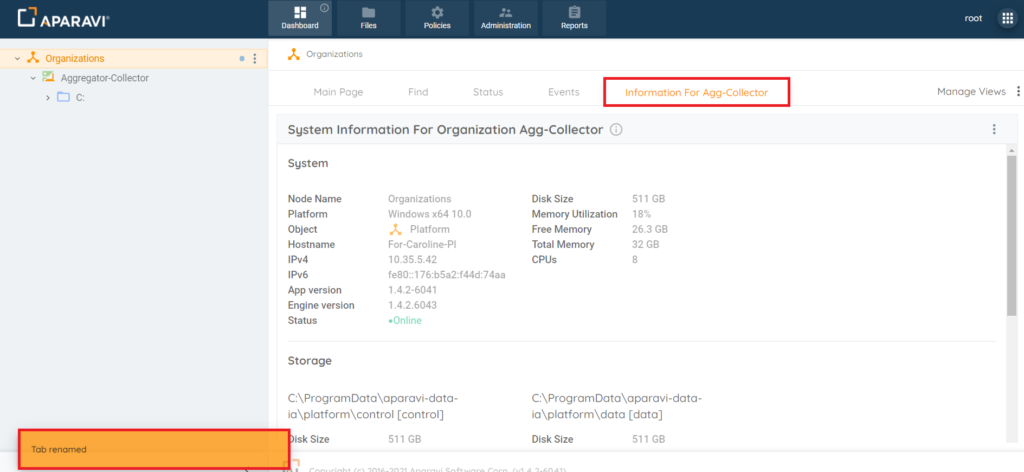
3. Once clicked on, the System Information widget will display showing the specifications broken up into 3 different sections:
- System
- Storage
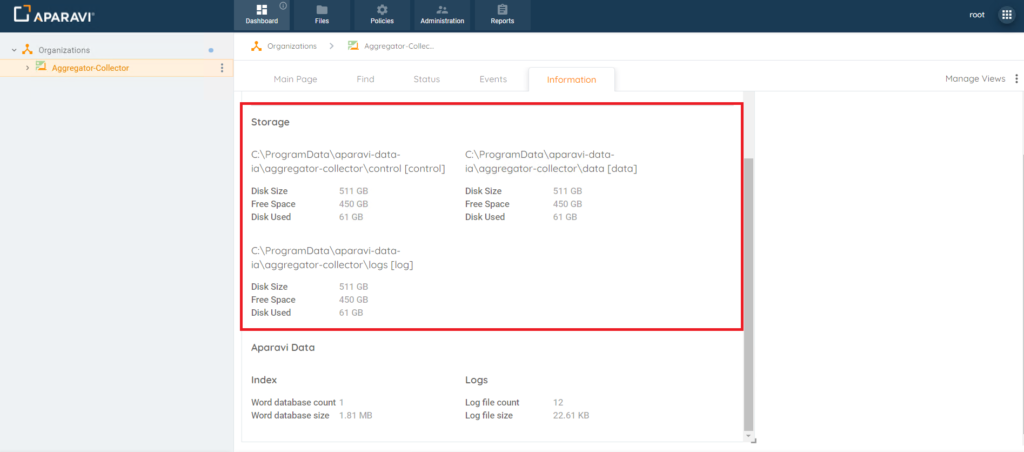
- Aparavi Data
Resizing & Relocating Information Widget on Information Subtab
Resize
1. Click on the Dashboard Tab, located in the top navigation menu, and then click on the Information subtab.

2. Click on the System Information widget and then click on the tiny arrow that appears in the very bottom right-hand side of the widget. When at the correct spot for resizing the mouse will become a double-sided arrow to indicate it is ready for dragging.
3. If the System Information widget should display larger on the screen, while clicking on the edge of the widget, drag the mouse away from the center of the widget until it changes into the appropriate size. Once the widget is the correct size, release the mouse and the widget will remain the new size.
4. If the System Information widget should display smaller on the screen, while clicking on the edge of the widget, drag the mouse toward the center of the widget until it changes into the appropriate size. Once the widget is the correct size, release the mouse and the widget will remain the new size.
Relocating
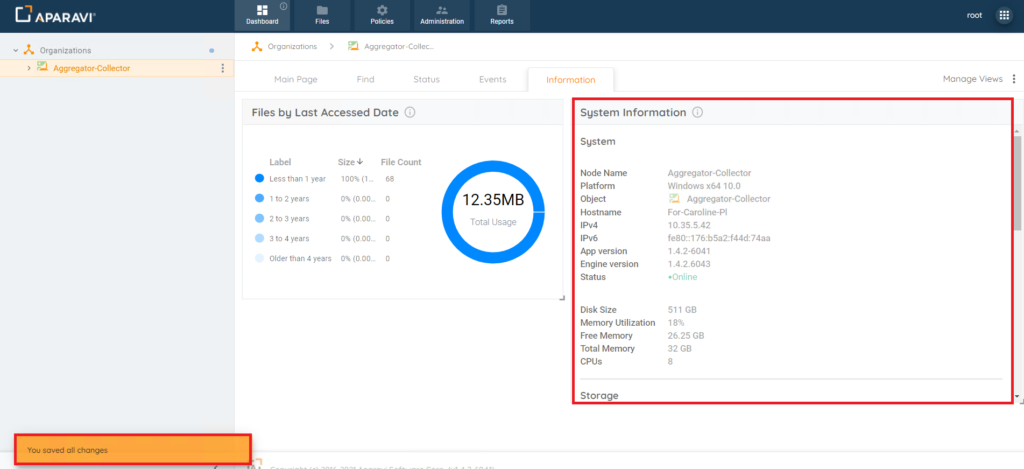
1. Hover over the System Information widget header title bar until the cursor turns into a hand icon. Once the hand icon is displaying, click the widget and while holding down the mouse, drag the System Information widget to the new desired location and release the mouse.
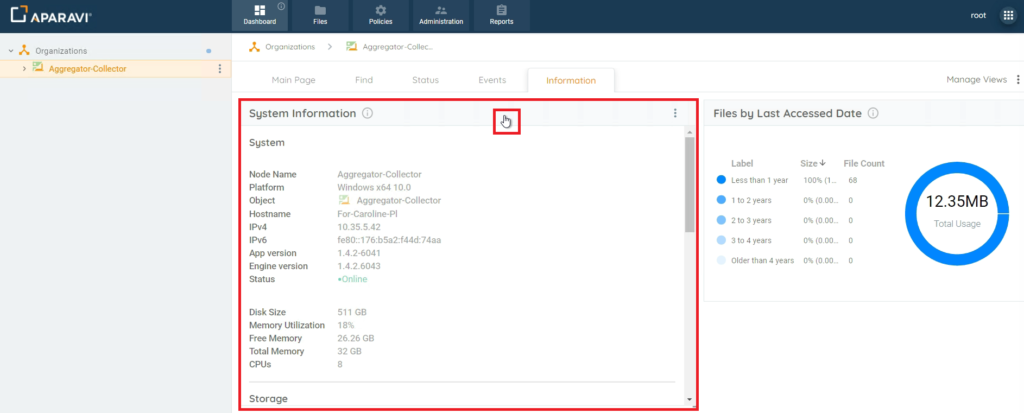
2. Once the mouse has been released, the widget will appear in the new location of the Dashboard’s Information subtab. Also, the system will flash an alert message in the bottom left-hand side of the screen to indicate that the changes have been changed.
Edit System Information Widget Name
1. Choose which node to view the system information about by clicking on the node in the navigation tree, located on the left-hand side of the screen. Once the node is selected, it will highlight in a yellowish background to indicate that it is selected.
Please Note: It is important to select the correct node. The system will only display the system information for that specific node selected.
2. Click on the Dashboard tab in the top navigation menu. If not already located on this tab, the system will navigate to the Dashboard tab in the system. Once located on the Dashboard tab, click on the Information subtab.

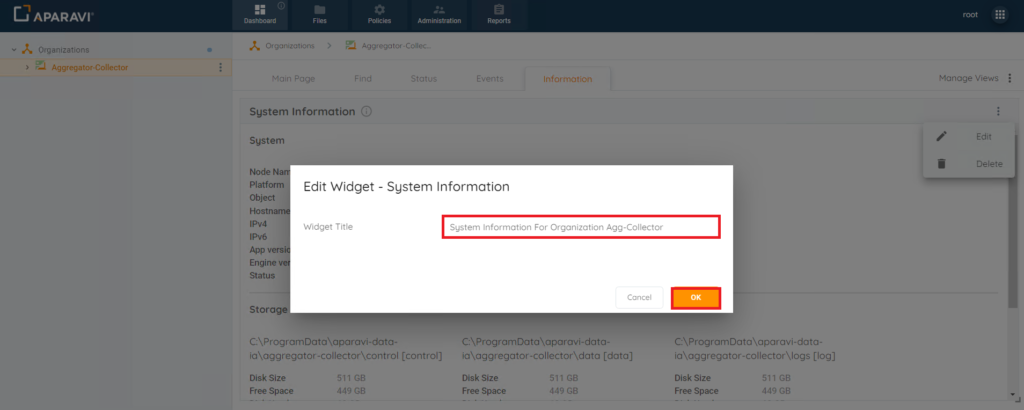
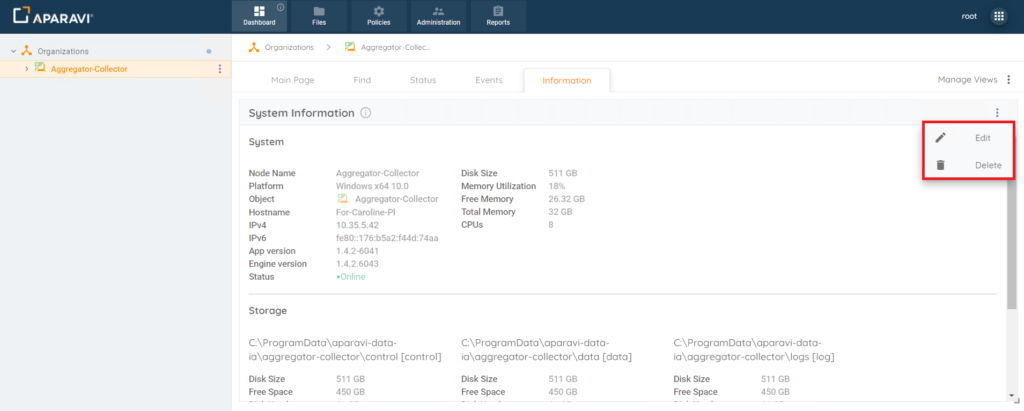
3. Hover over the System Information widget on the Information subtab and click on the 3 vertical blue dots that appear in the very upper right-hand corner of the widget. Once the dots appear, click on them and a drop-down menu will appear.
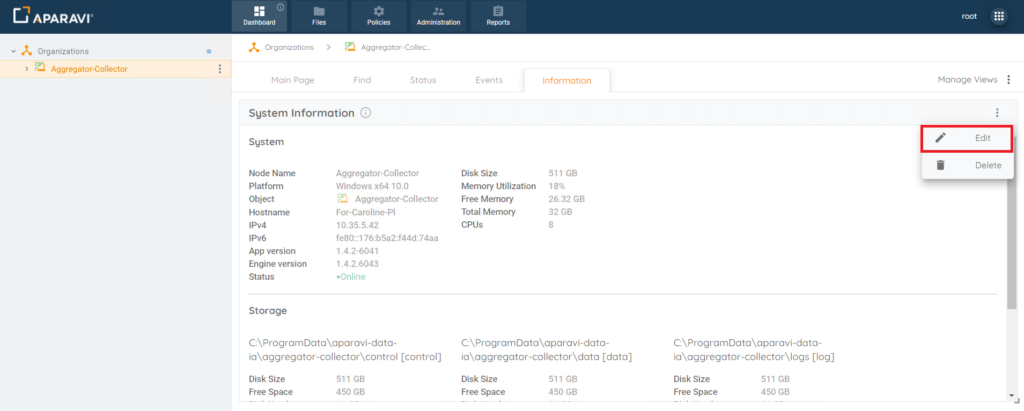
4. Click on the Edit option from the drop-down menu. Once clicked, the Edit Widget pop-up box will appear.

5. Enter the new name of widget into the Widget Title field and click the Ok button when completed.
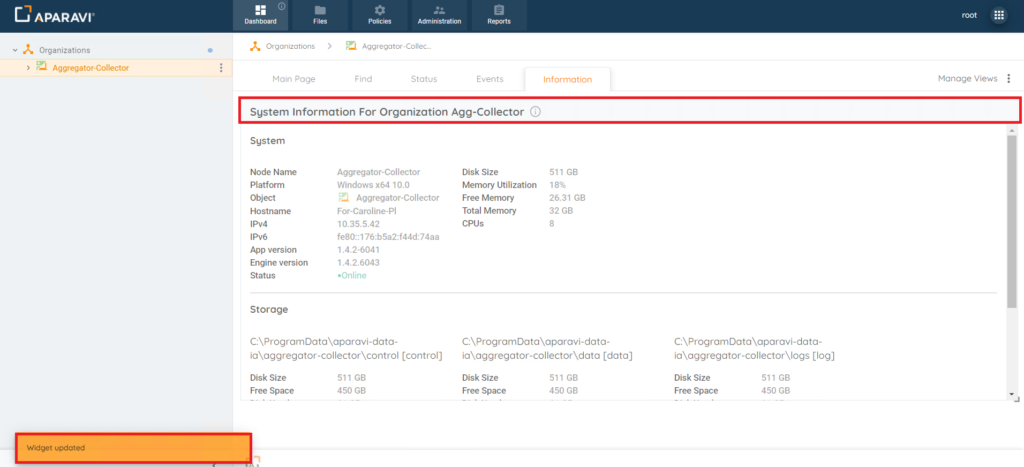
6. Once the Ok button has been clicked, the Edit Widget – [Name of Widget] pop-up box will close and the System Information widget’s name will update automatically.
Delete System Information Widget from the Information subtab
1. Choose which node to view the system information about by clicking on the node in the navigation tree, located on the left-hand side of the screen. Once the node is selected, it will highlight in a yellowish background to indicate that it is selected.
Please Note: It is important to select the correct node. The system will only display the system information for that specific node selected.
2. Click on the Dashboard tab in the top navigation menu. If not already located on this tab, the system will navigate to the Dashboard tab in the system. Once located on the Dashboard tab, click on the Information subtab.
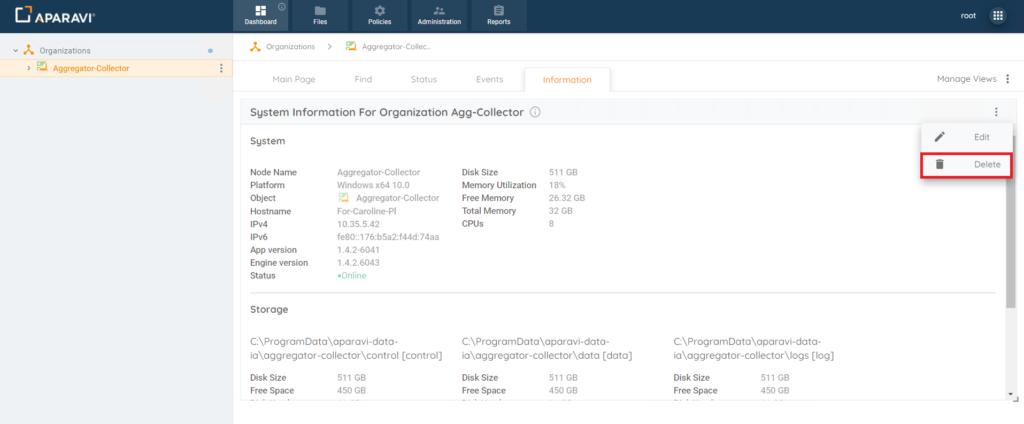
3. Hover over the System Information widget on the Information subtab and click on the 3 vertical blue dots that appear in the very upper right-hand corner of the widget. Once the dots appear, click on them and a drop-down menu will appear.
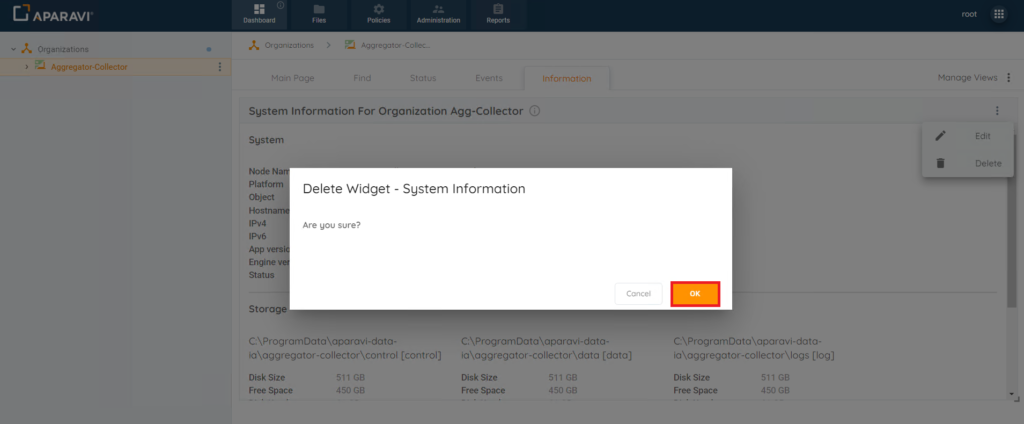
4. Click on the Delete option from the drop-down menu. Once clicked, the Delete Widget pop-up box will appear.
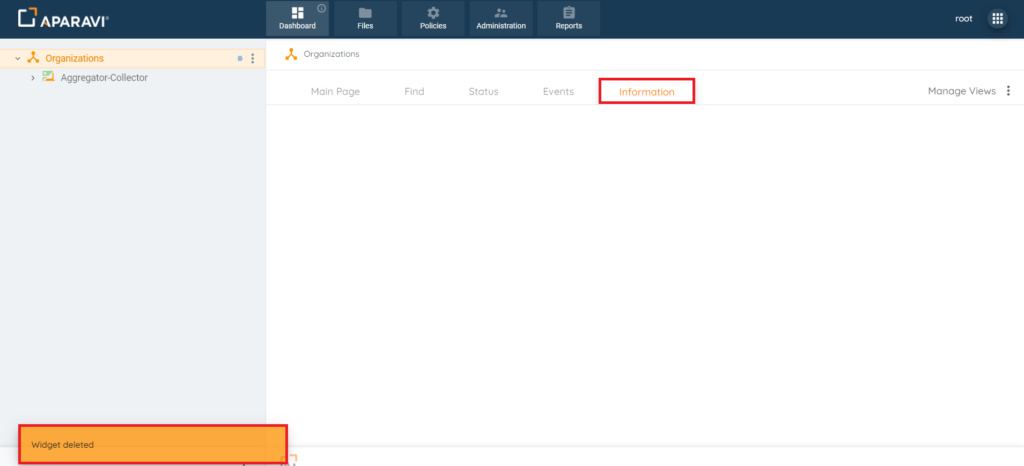
5. Click on the Ok button, located at the bottom right-hand side of the Delete Widget confirmation pop-up box. Once clicked, the System Information widget will delete from the Information subtab automatically.
Rename Information Subtab
The Information subtab can be renamed to reflect something more meaningful if desired.
1. Click on the Dashboard Tab, located in the top navigation menu, and then click on the Information subtab.

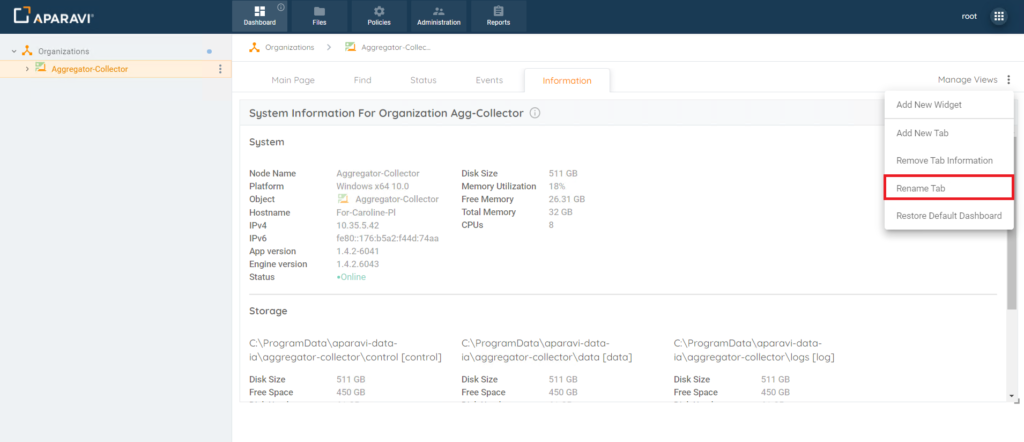
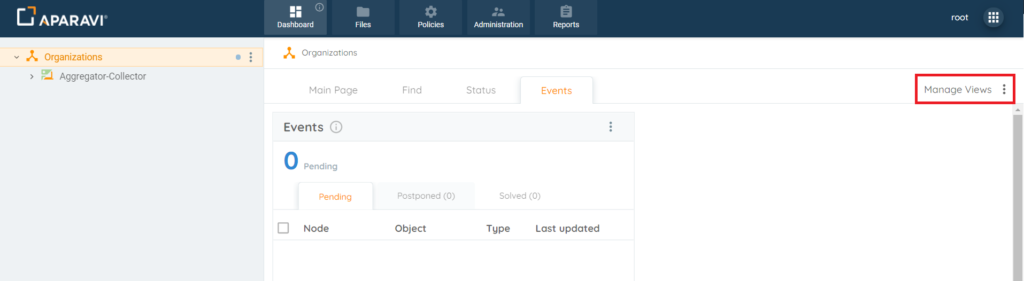
2. Click on the Manage Views button, located in the upper right-hand side. Once clicked on, a menu will expand with options to select from.
3. Click on the Rename Tab option from the menu that expands. Once clicked on, the Rename Tab pop-up box will appear.
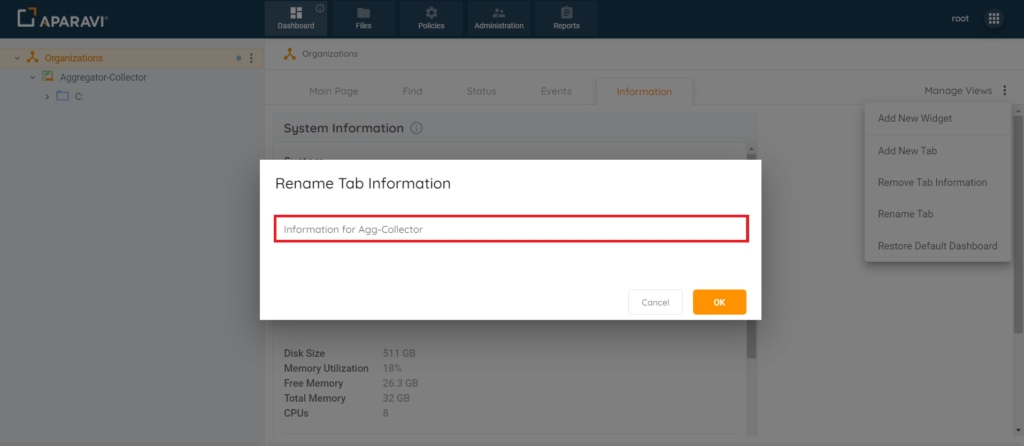
4. Type the new name of the tab into the text box, located inside of the Rename Tab pop-up box.
5. Once completed, click on the Ok button, located at the bottom right-hand side of the the Rename Tab pop-up box.
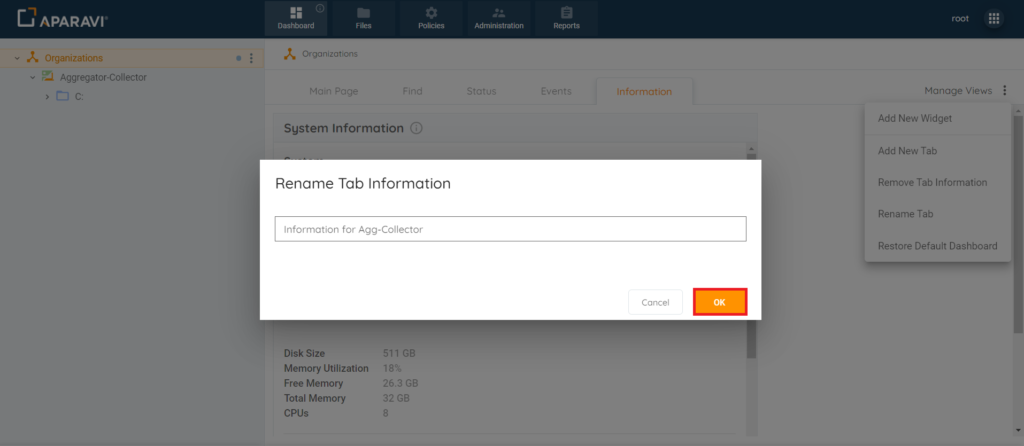
6. Once clicked on, the Information subtab will reflect the updated name automatically.
Remove Information Subtab
The Information subtab can be removed from the Dashboard Tab completely.
1. Click on the Dashboard Tab, located in the top navigation menu, and then click on the Information subtab.

2. Click on the Manage Views button, located in the upper right-hand side. Once clicked on, a menu will expand with options to select from.

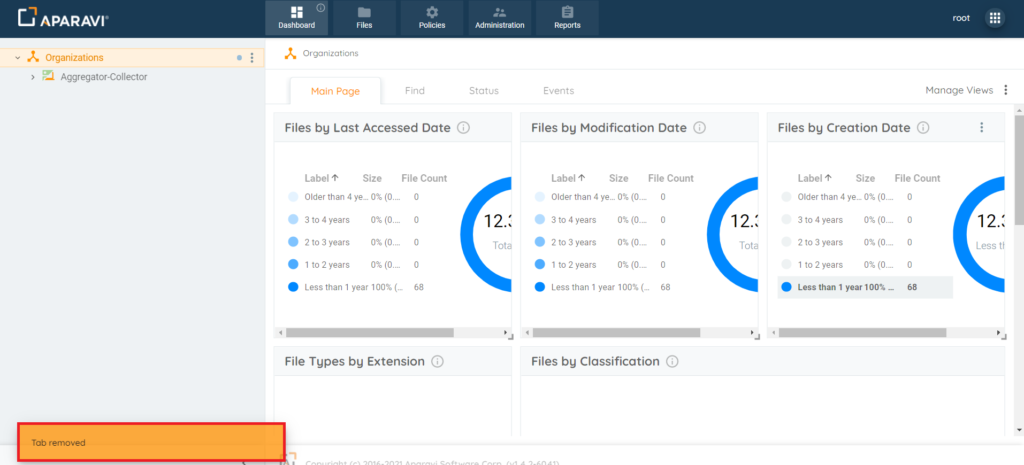
3. Click on the Remove Tab option from the menu that appears.
4. The Remove Information subtab pop-up box will appear to confirm the removal of the Information subtab.
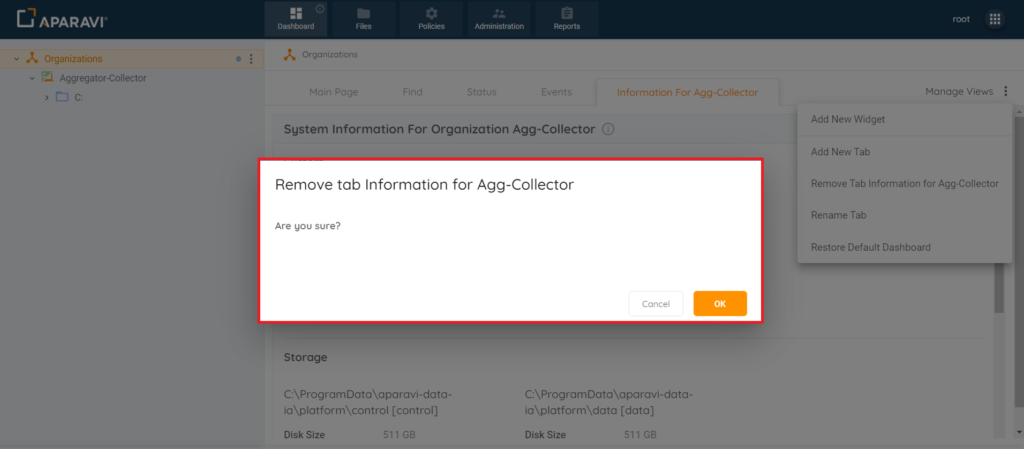
5. Click the Ok button, located in the bottom right-hand side of the the Remove Tab pop-up box.
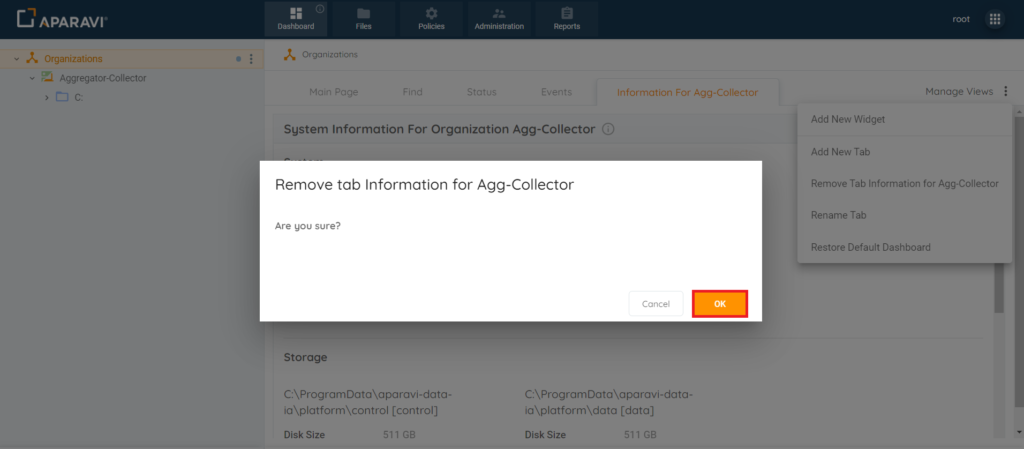
6. Once clicked on, the Information subtab will disappear from the Dashboard tab.
Restore Default Dashboard
If the Dashboard has been altered or deleted, it can restored to it’s original state upon installation of the node. When this option is selected, it will also restore the Information subtab to it’s original state as well.
1. Click on the Dashboard Tab, located in the top navigation menu.
2. Click on the Manage Views button, located in the upper right-hand side. Once clicked on, a menu will expand with options to select from.
3. Click on the Restore Default Dashboard option from the menu that appears.
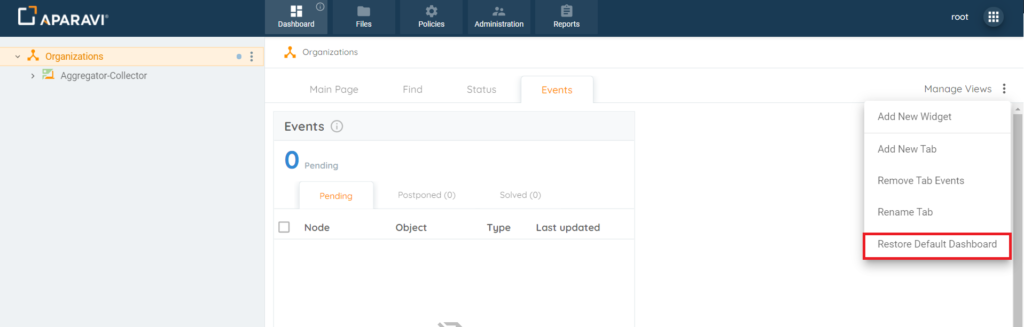
4. The Restore default dashboard pop-up box will appear to confirm the restoration of the Dashboard.
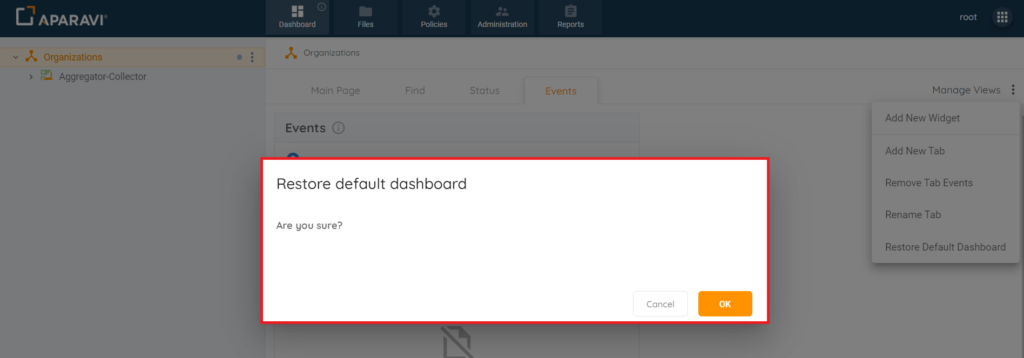
5. Click the Ok button, located in the bottom right-hand side of the the Restore default dashboard pop-up box.
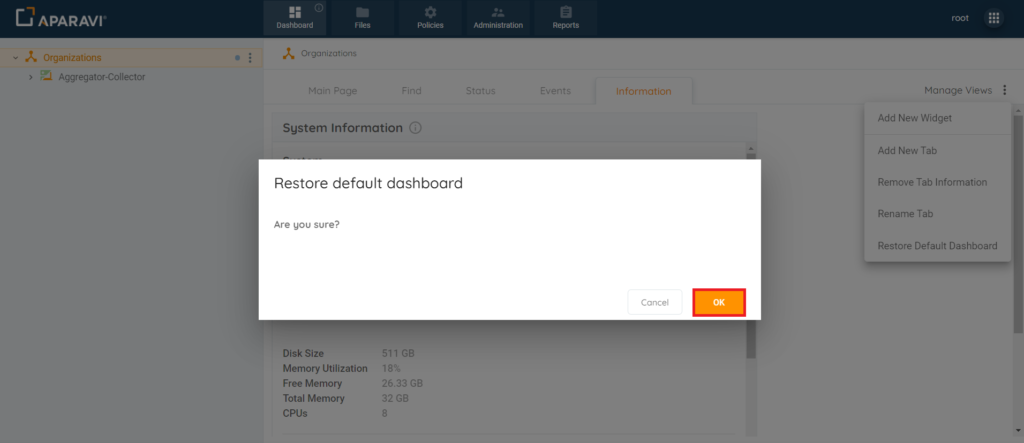
6. Once clicked on, the Information subtab will appear in its original form when the node was originally added.